Review | Ferrania P30

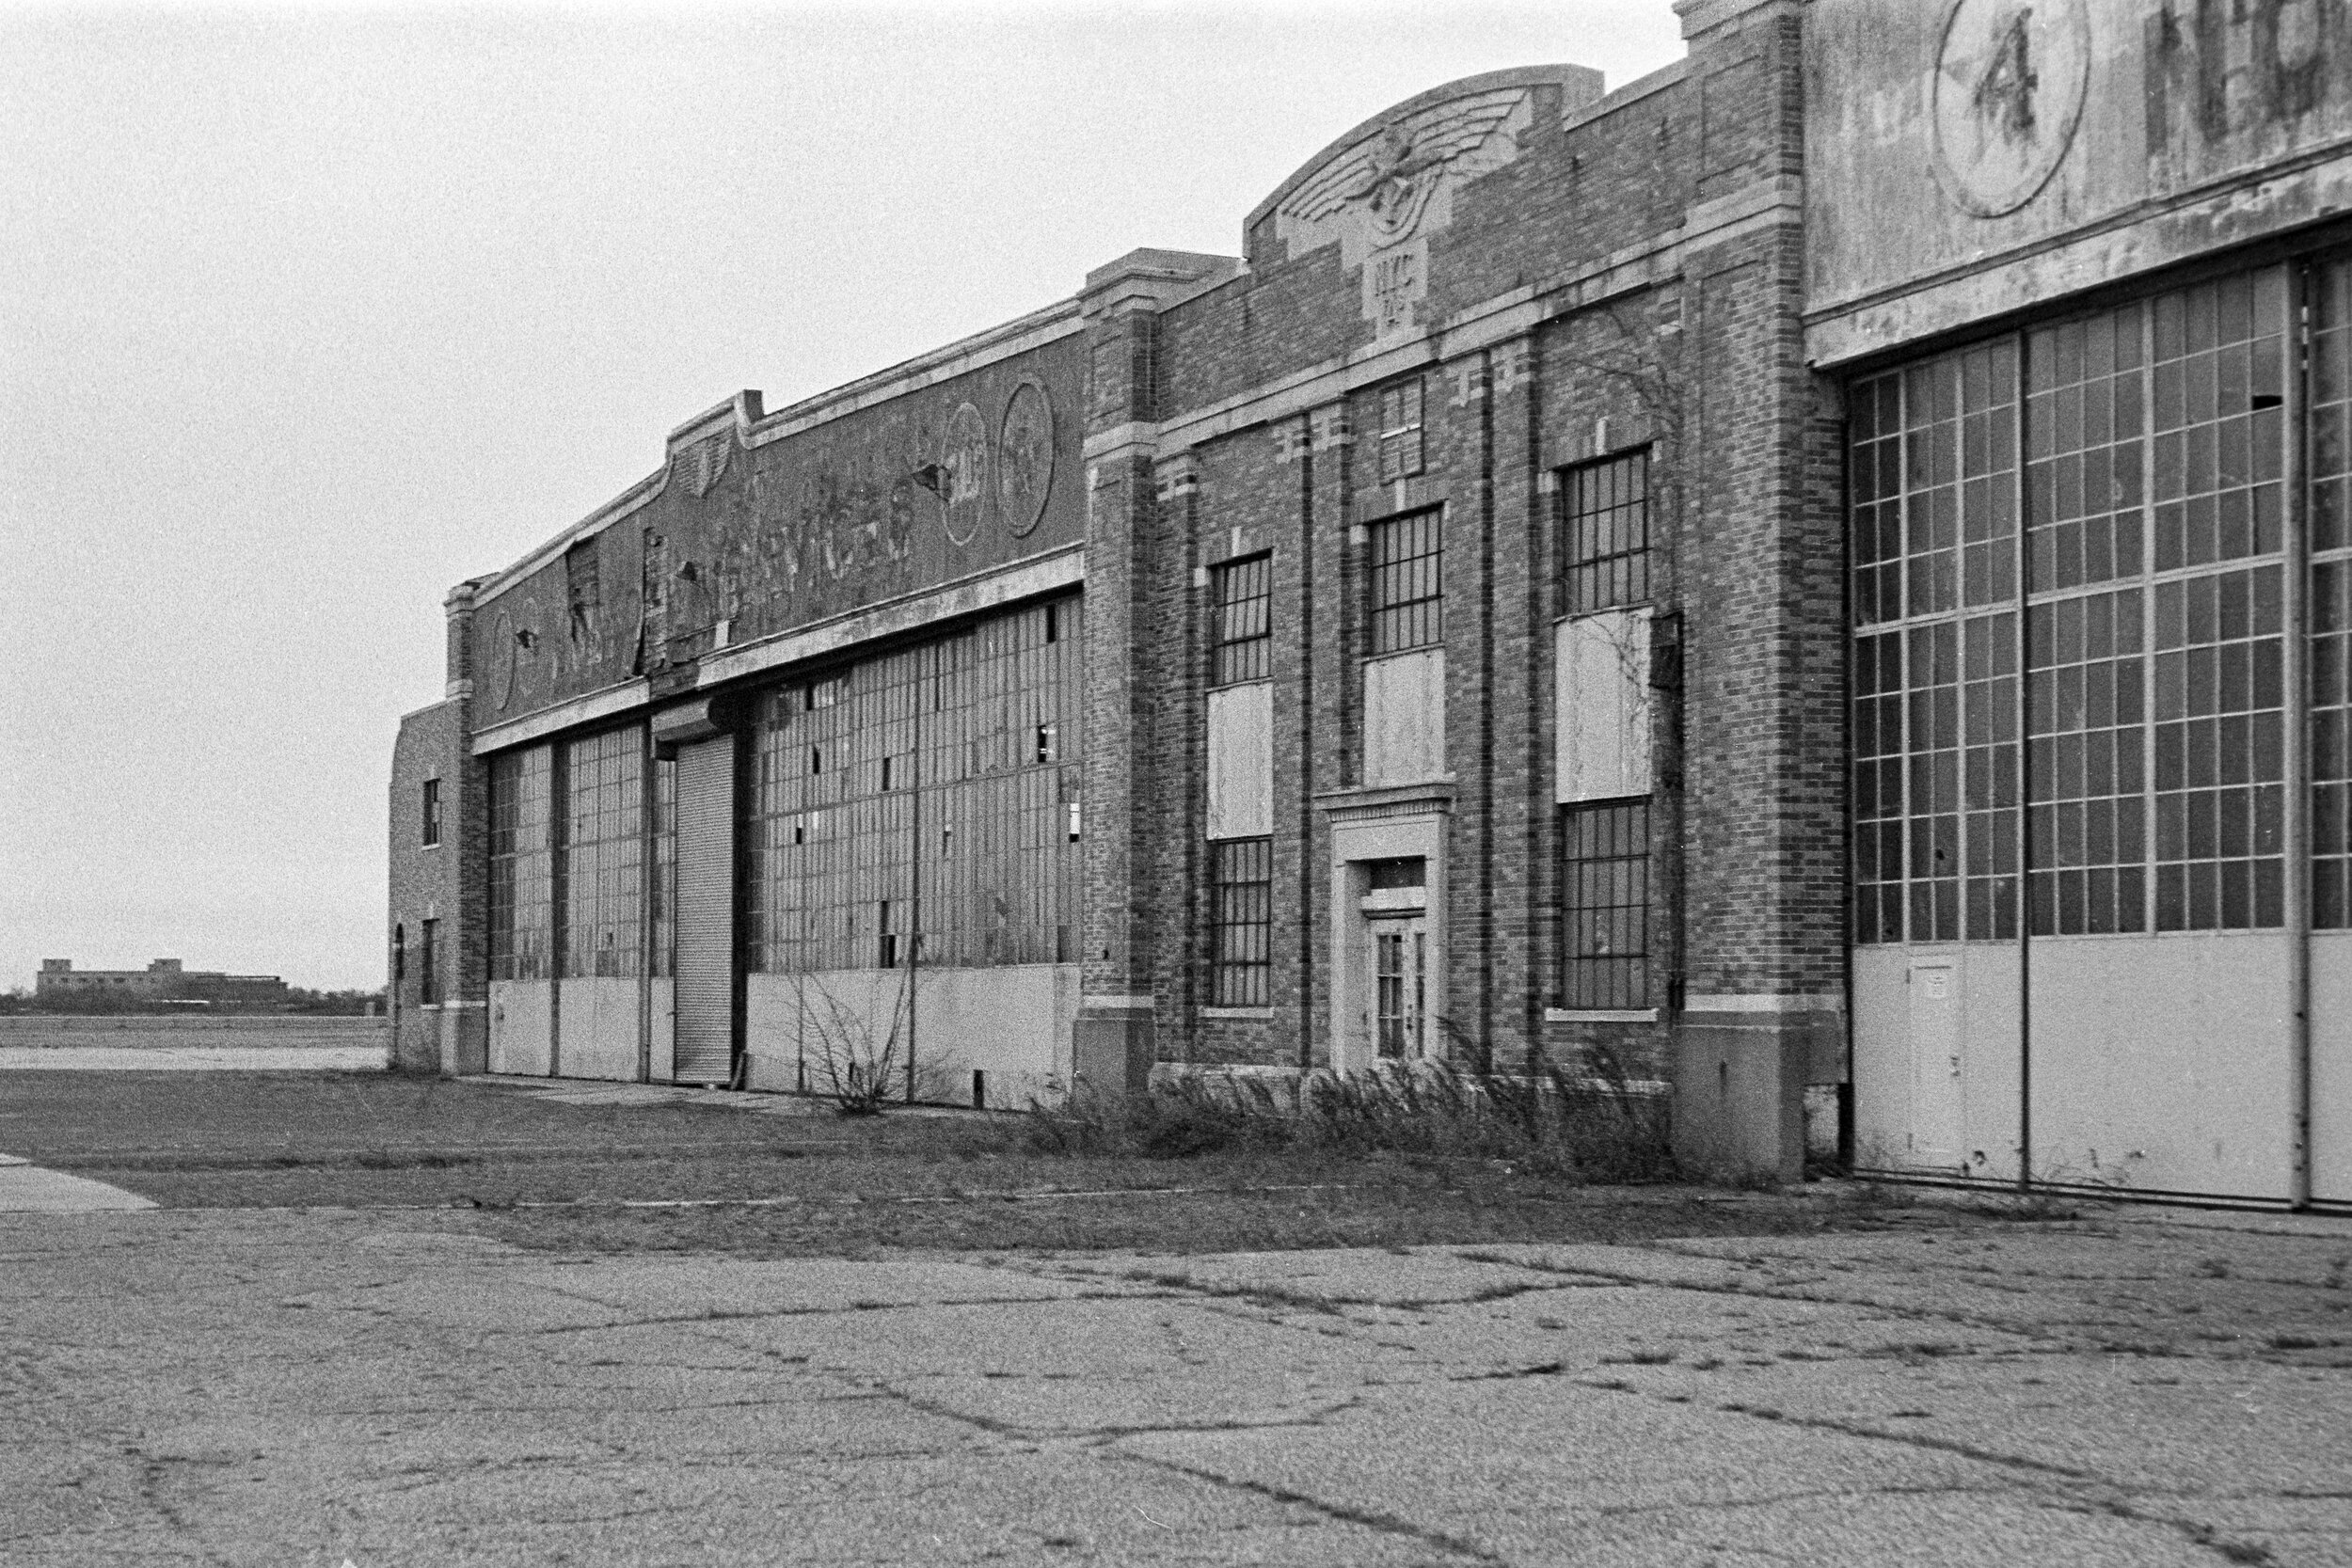
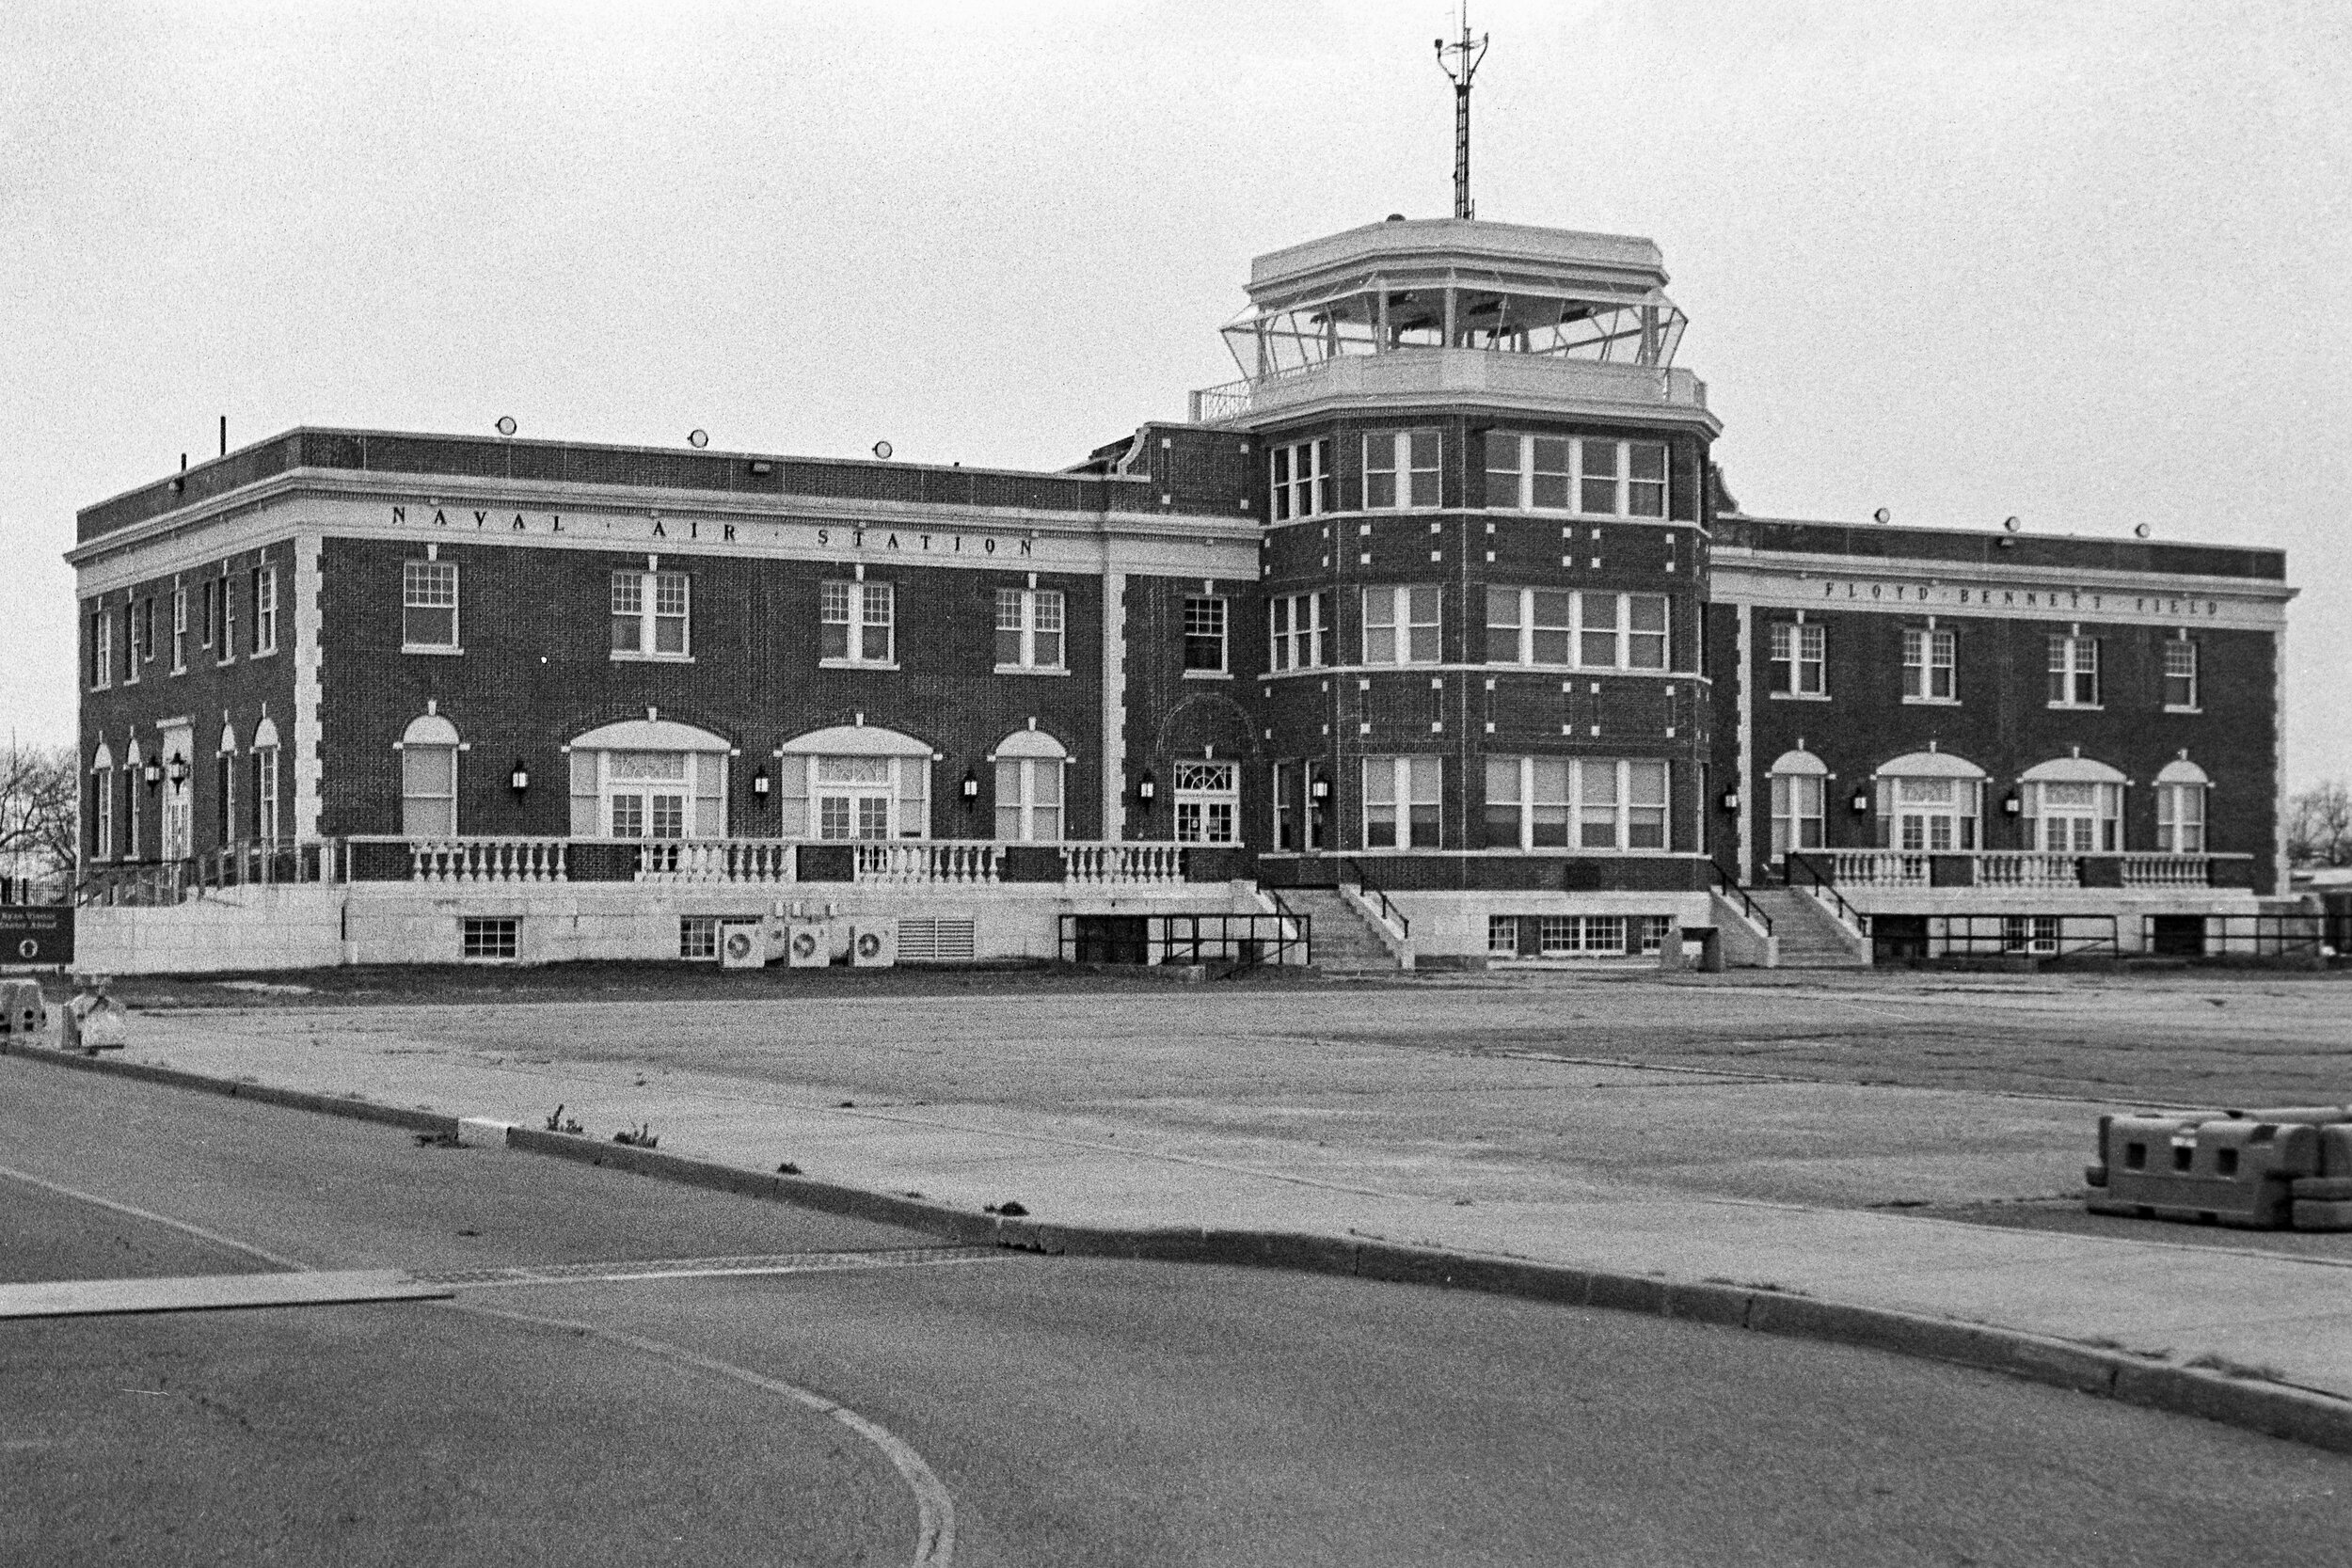
I’m a little late to the game with this review because I’ve been shooting Ferrania P30 since it was first available, and I figured it was about time I put my thoughts on paper for anybody else wondering whether it’s worth their time and money to try this film. It’s always exciting to see new (or revived) emulsions enter the market. P30 was resurrected by the team at FILM Ferrania in Italy, who launched a Kickstarter campaign to buy the rights to Ferrania’s emulsions after the company ceased operation in 2009. As of 2021, P30 is only available in 35mm with plans to produce 120 at some point in the future. Bringing back a defunct emulsion is no easy task, and there have been many delays over the years (much to the chagrin of Kickstarter backers). I purchased two rolls in late 2017, giving one to a friend and shooting the other one myself. The Bethlehem Steel series here on my website was actually shot on P30 in early 2019.

GRC_19883-Edit.jpg

Introduction & Shooting

So, what do I think of Ferrania P30? It certainly won’t replace FP4 Plus or Across 100 in my arsenal, but P30 does have a place in my film fridge. It’s a film suited to very specific situations and subjects, and I wouldn’t suggest shooting it on anything but a clear, sunny day. You need to be very careful with this film and contrasty scenes – the emulsion does not leave much information in the shadows and it’s very easy to underexpose a scene. I tend to apply +.3 or +.7 exposure compensation on my F100 when the subject is primarily in the shadows. Trust your instincts and you’ll end up with a roll of rich, if contrasty, negatives.

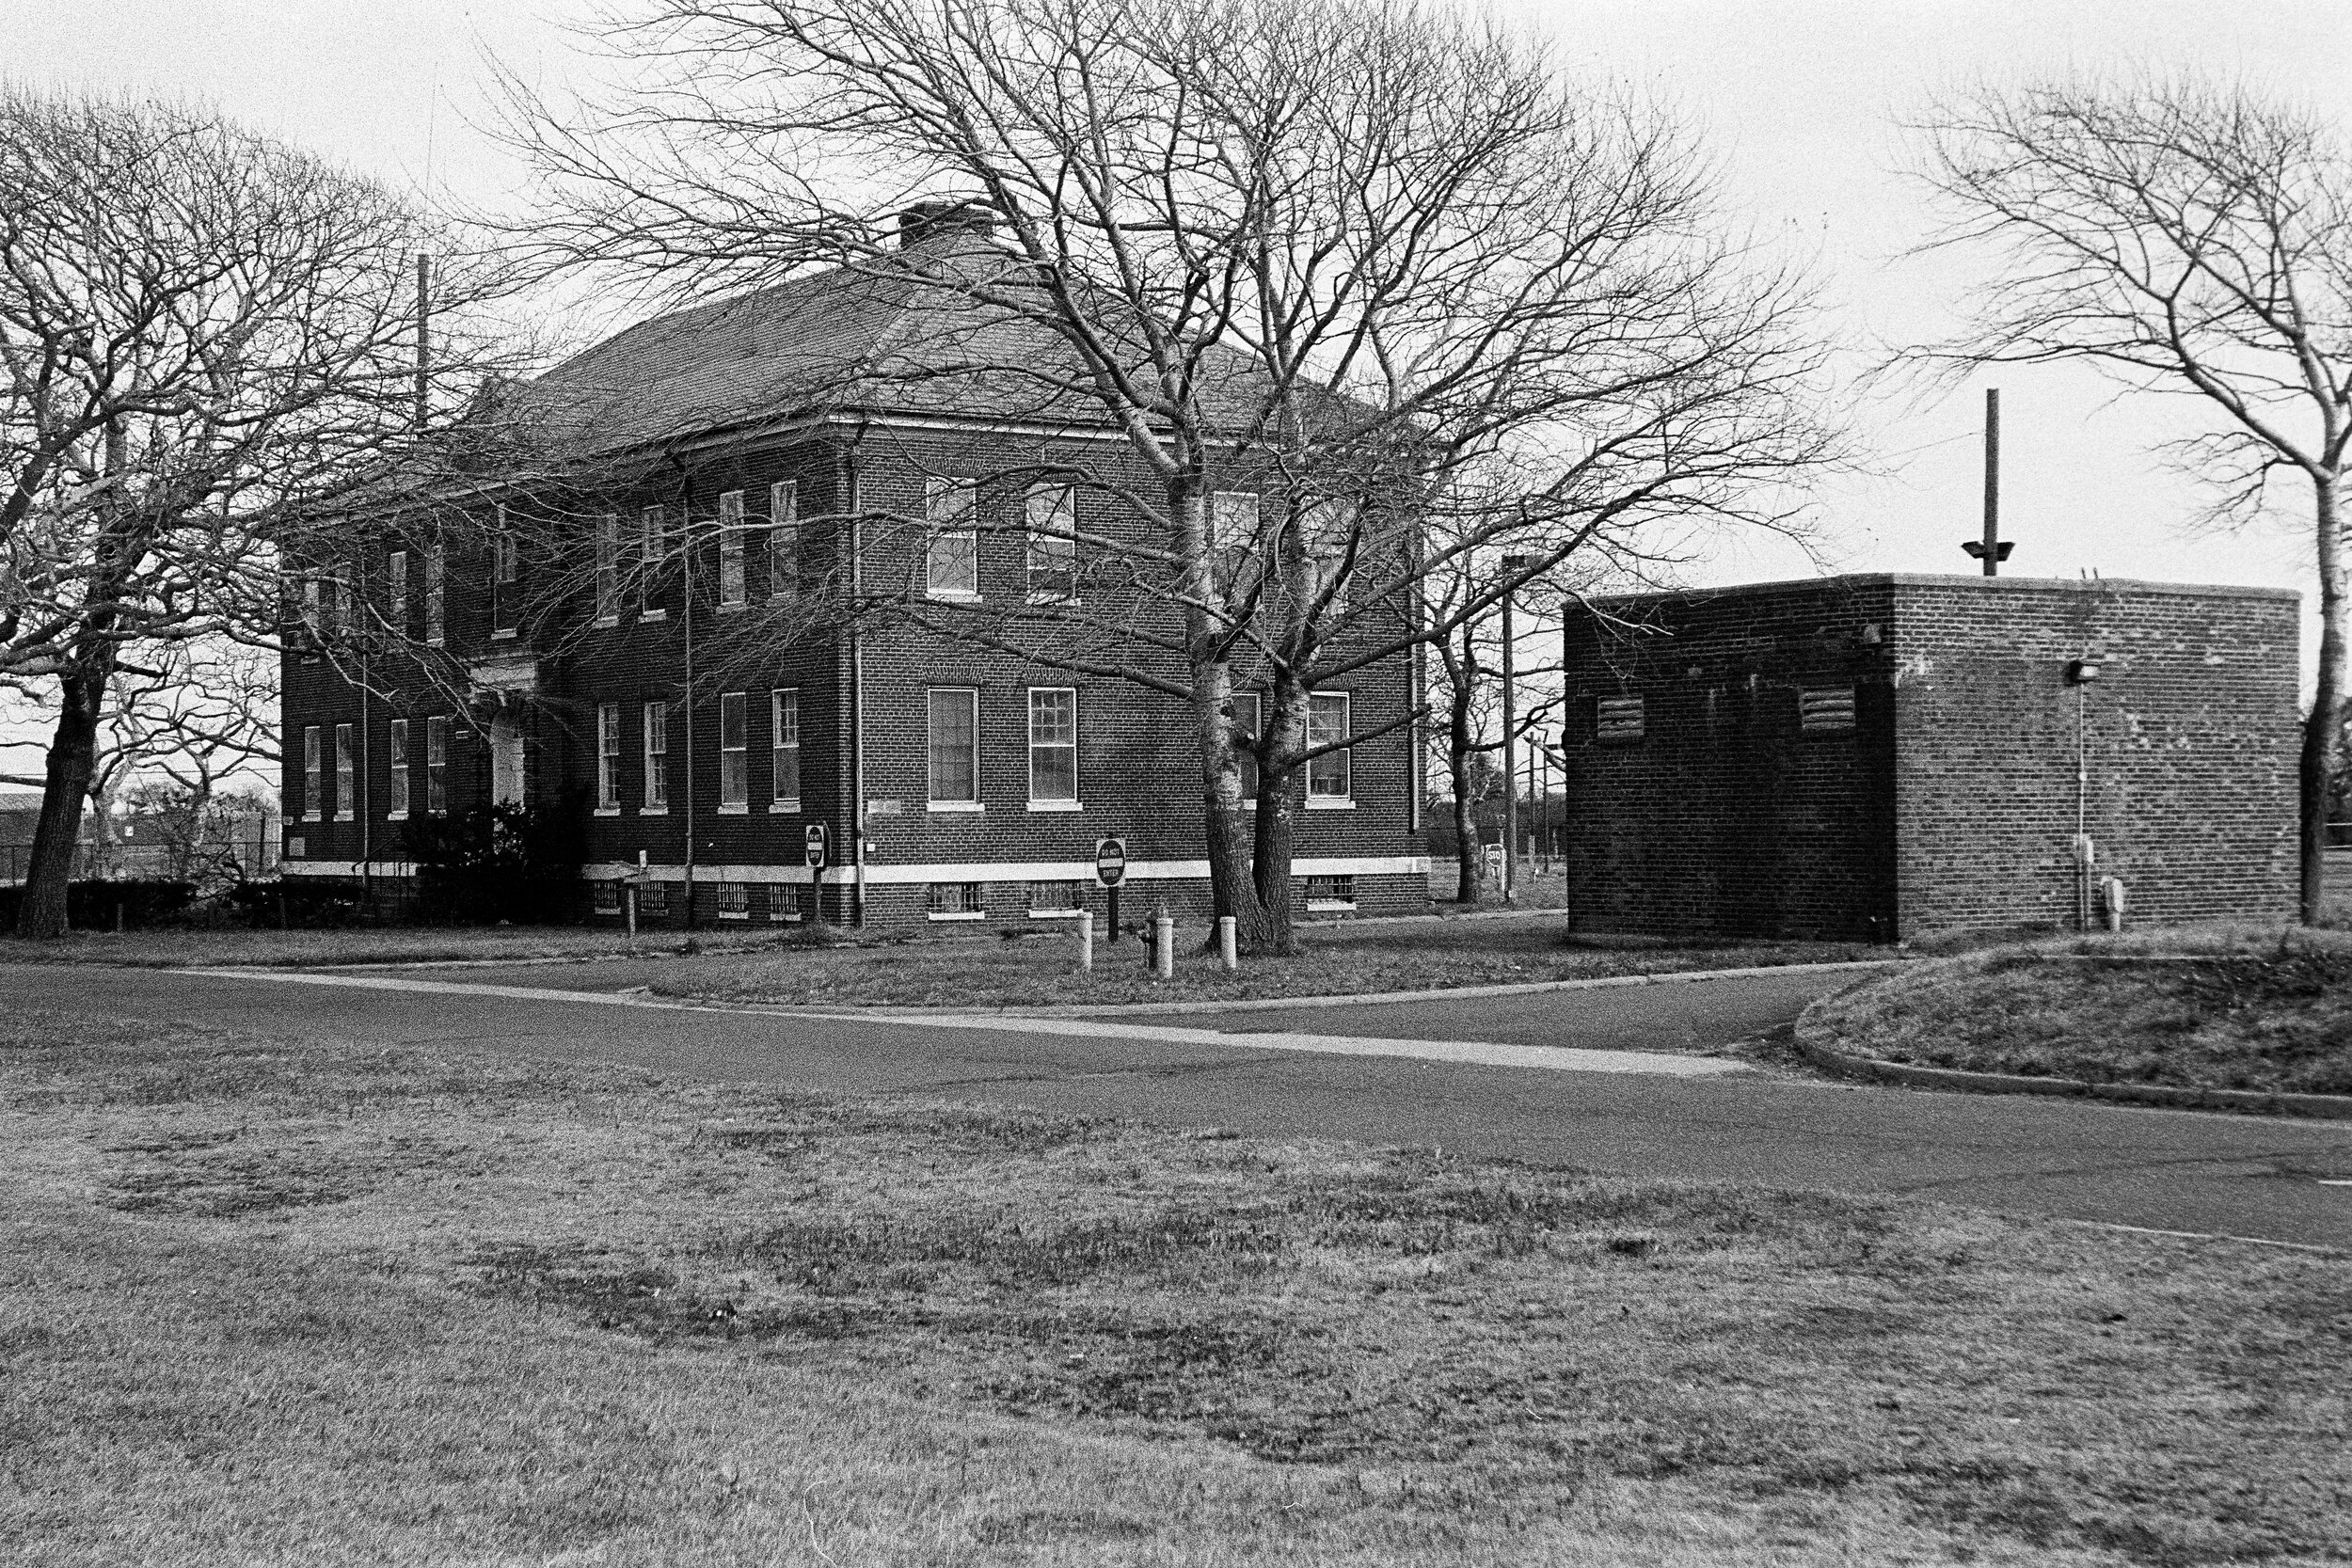
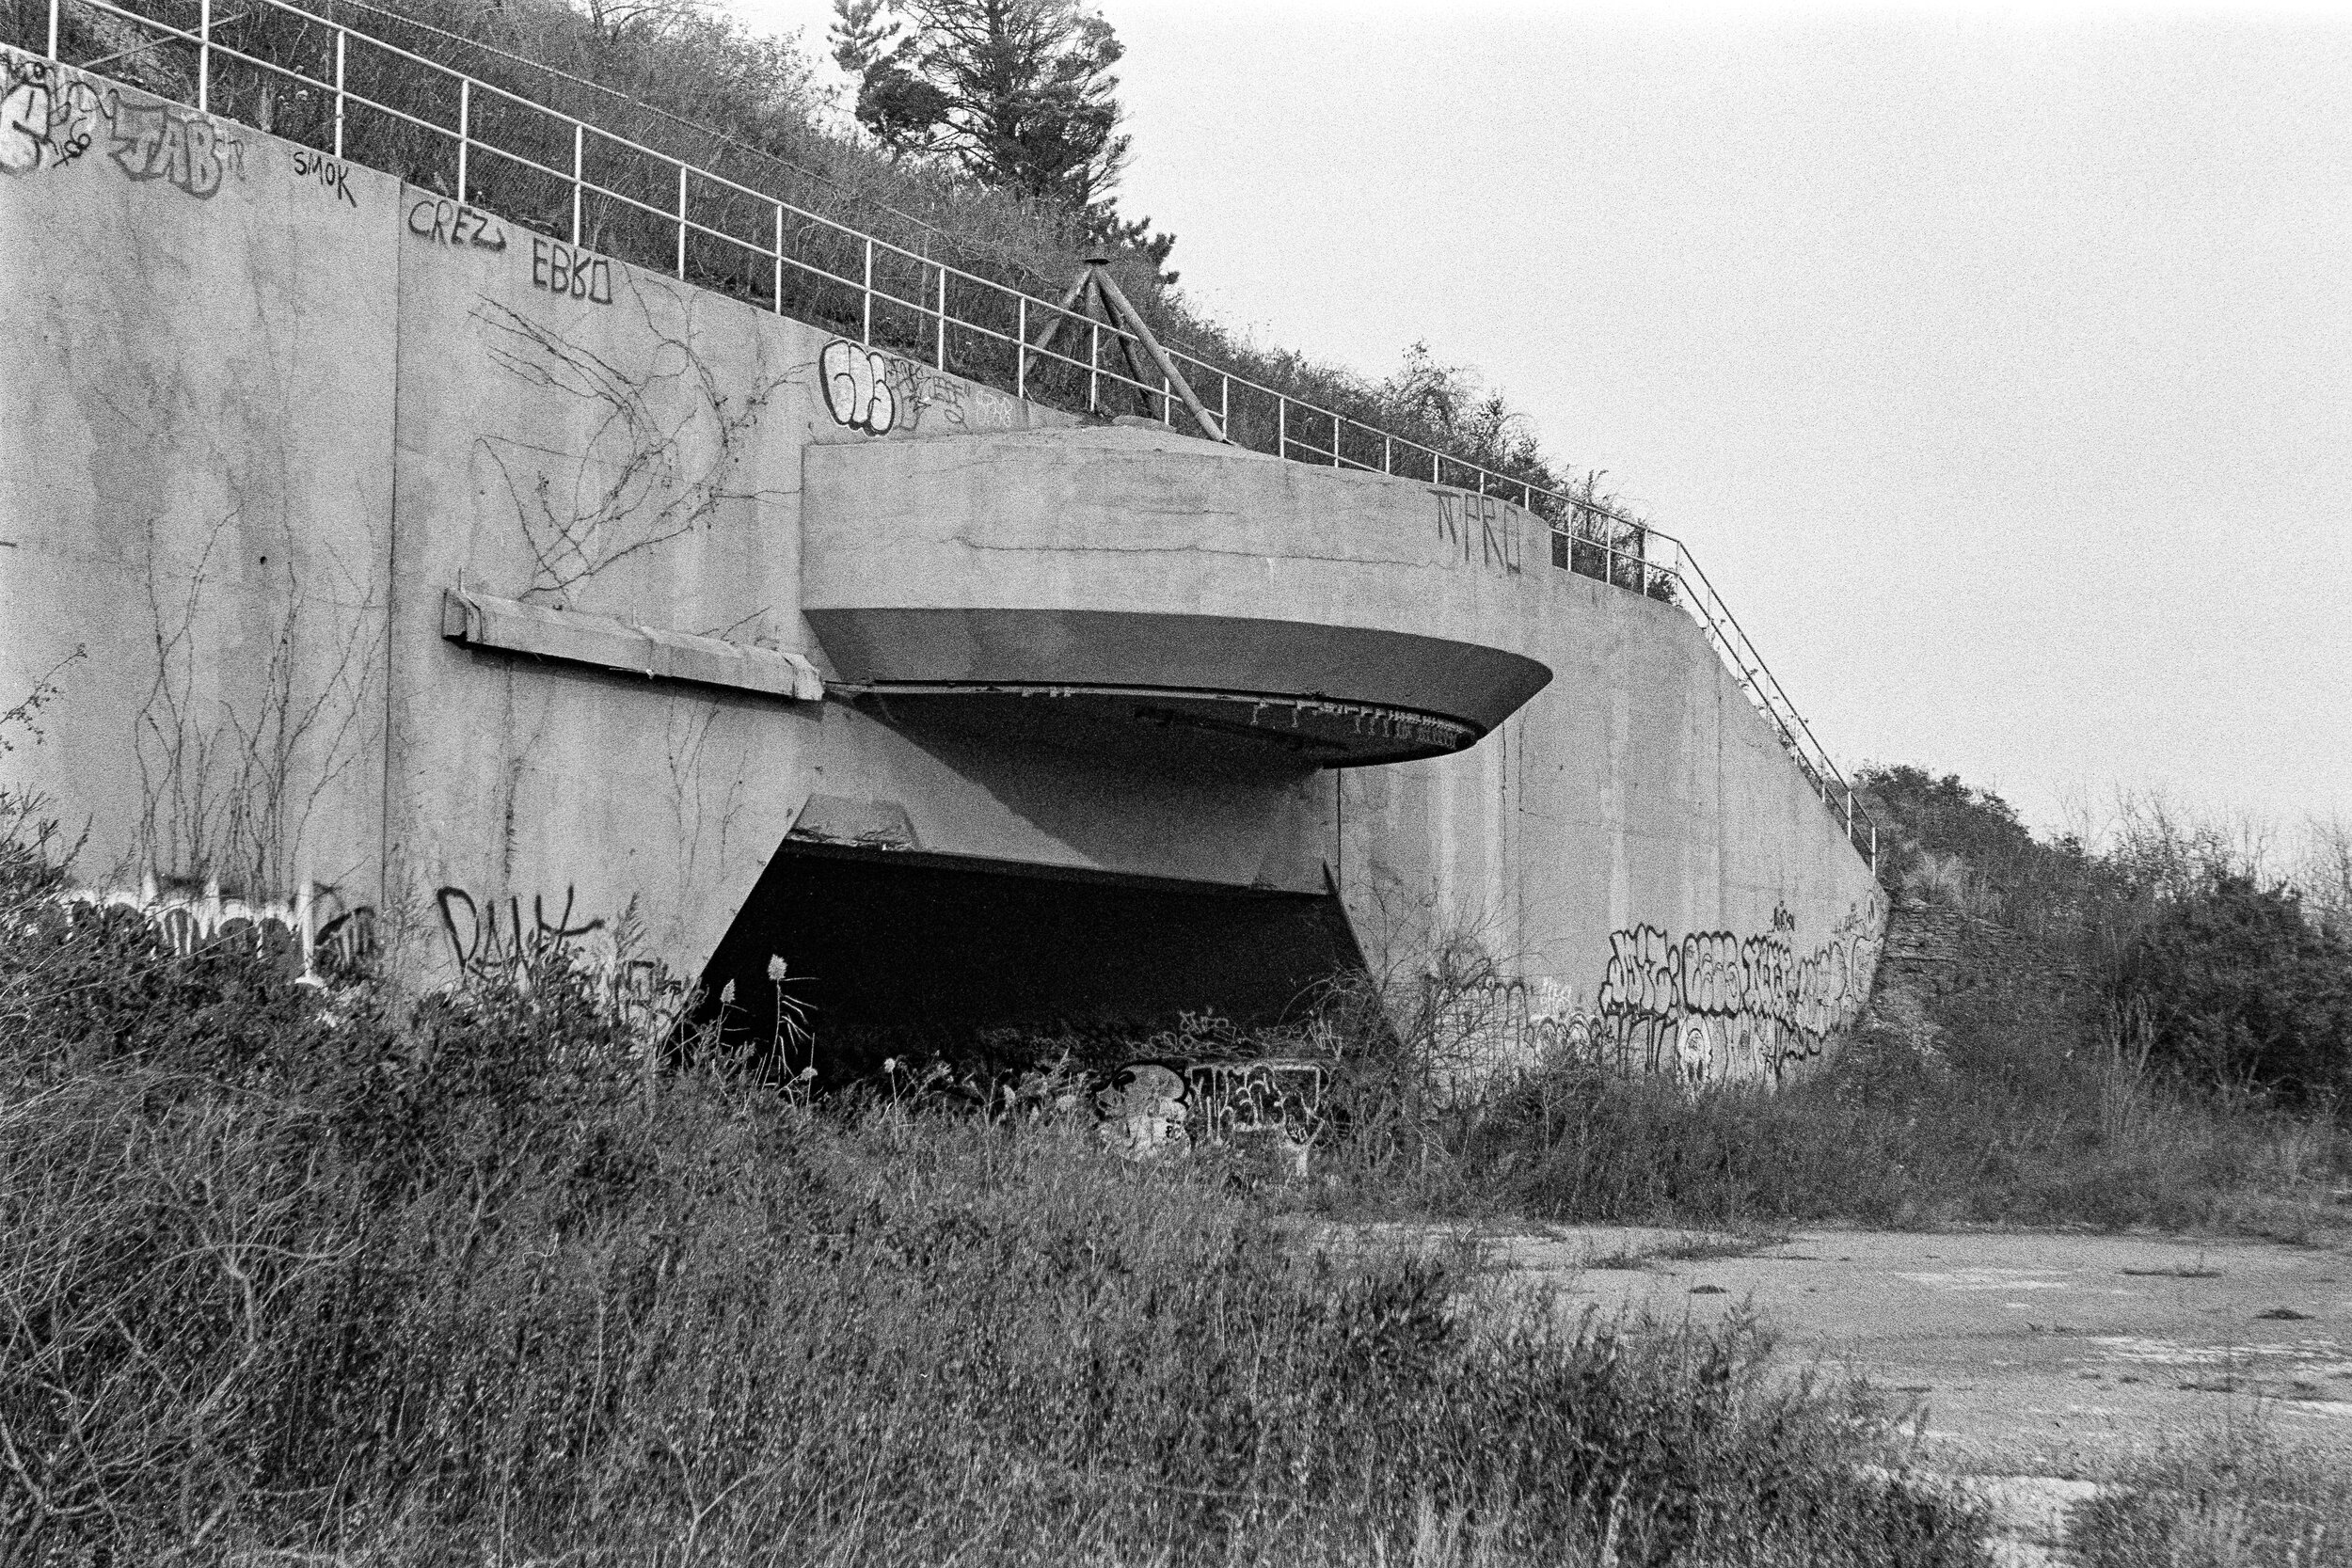
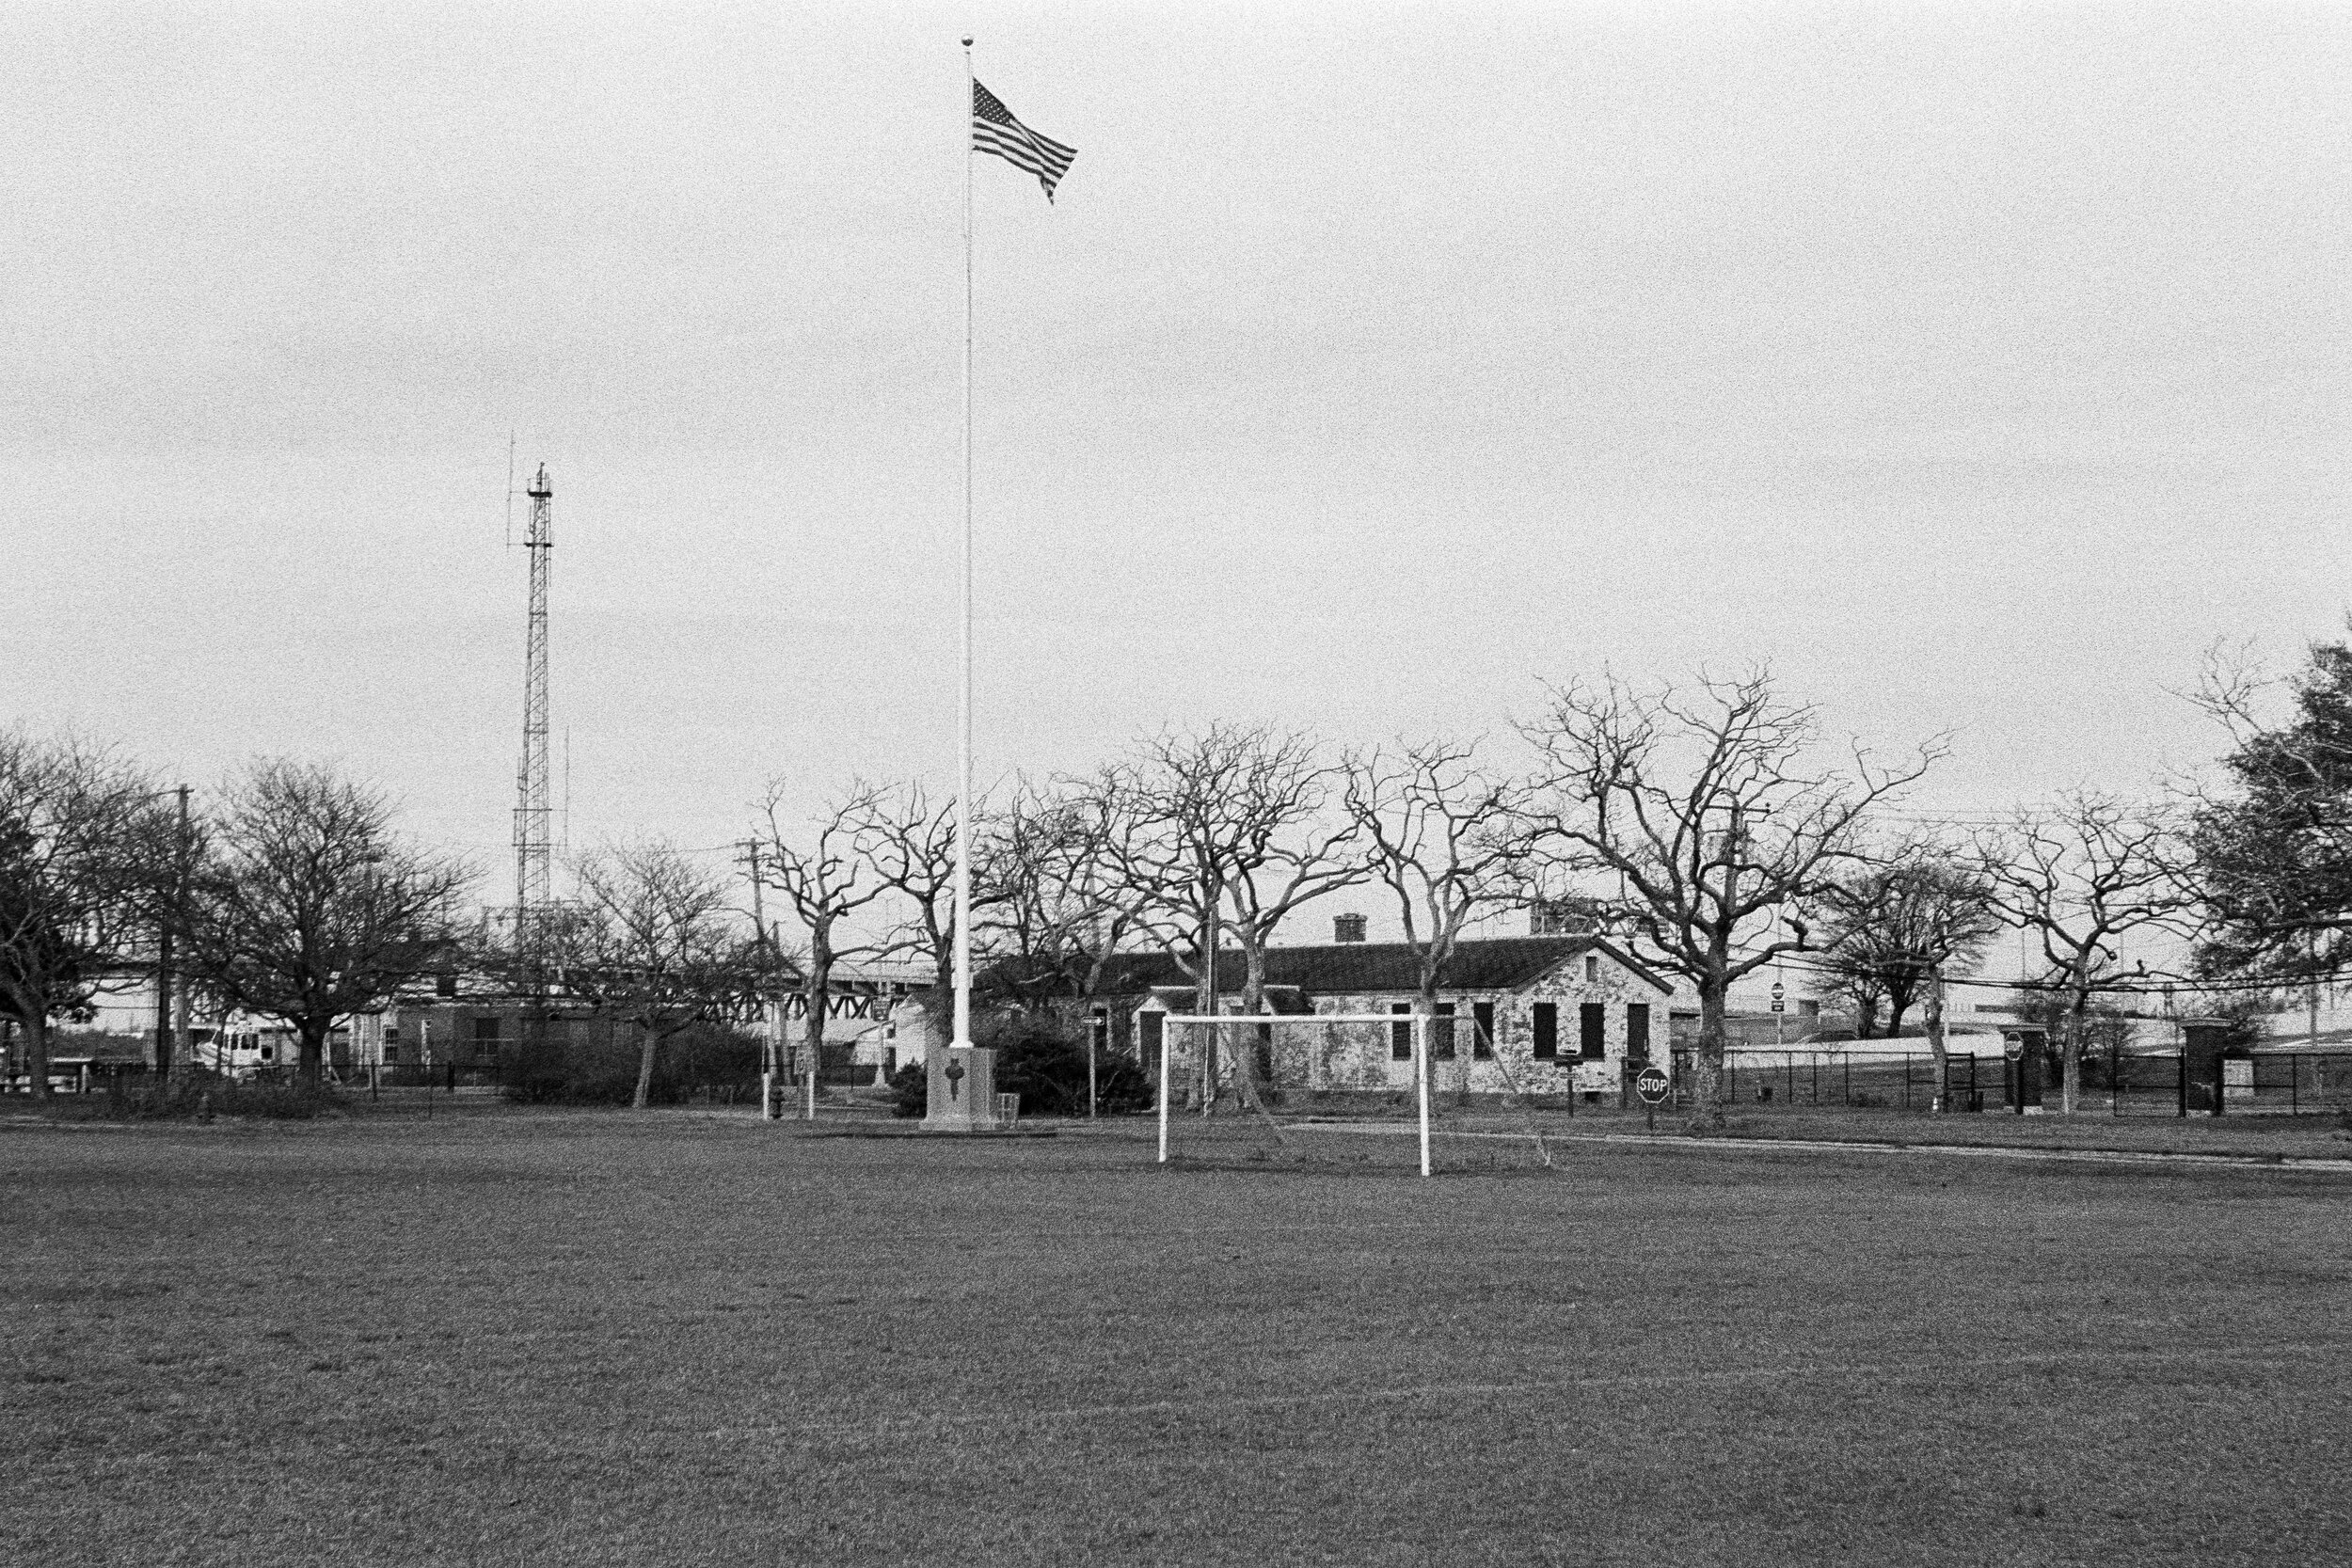
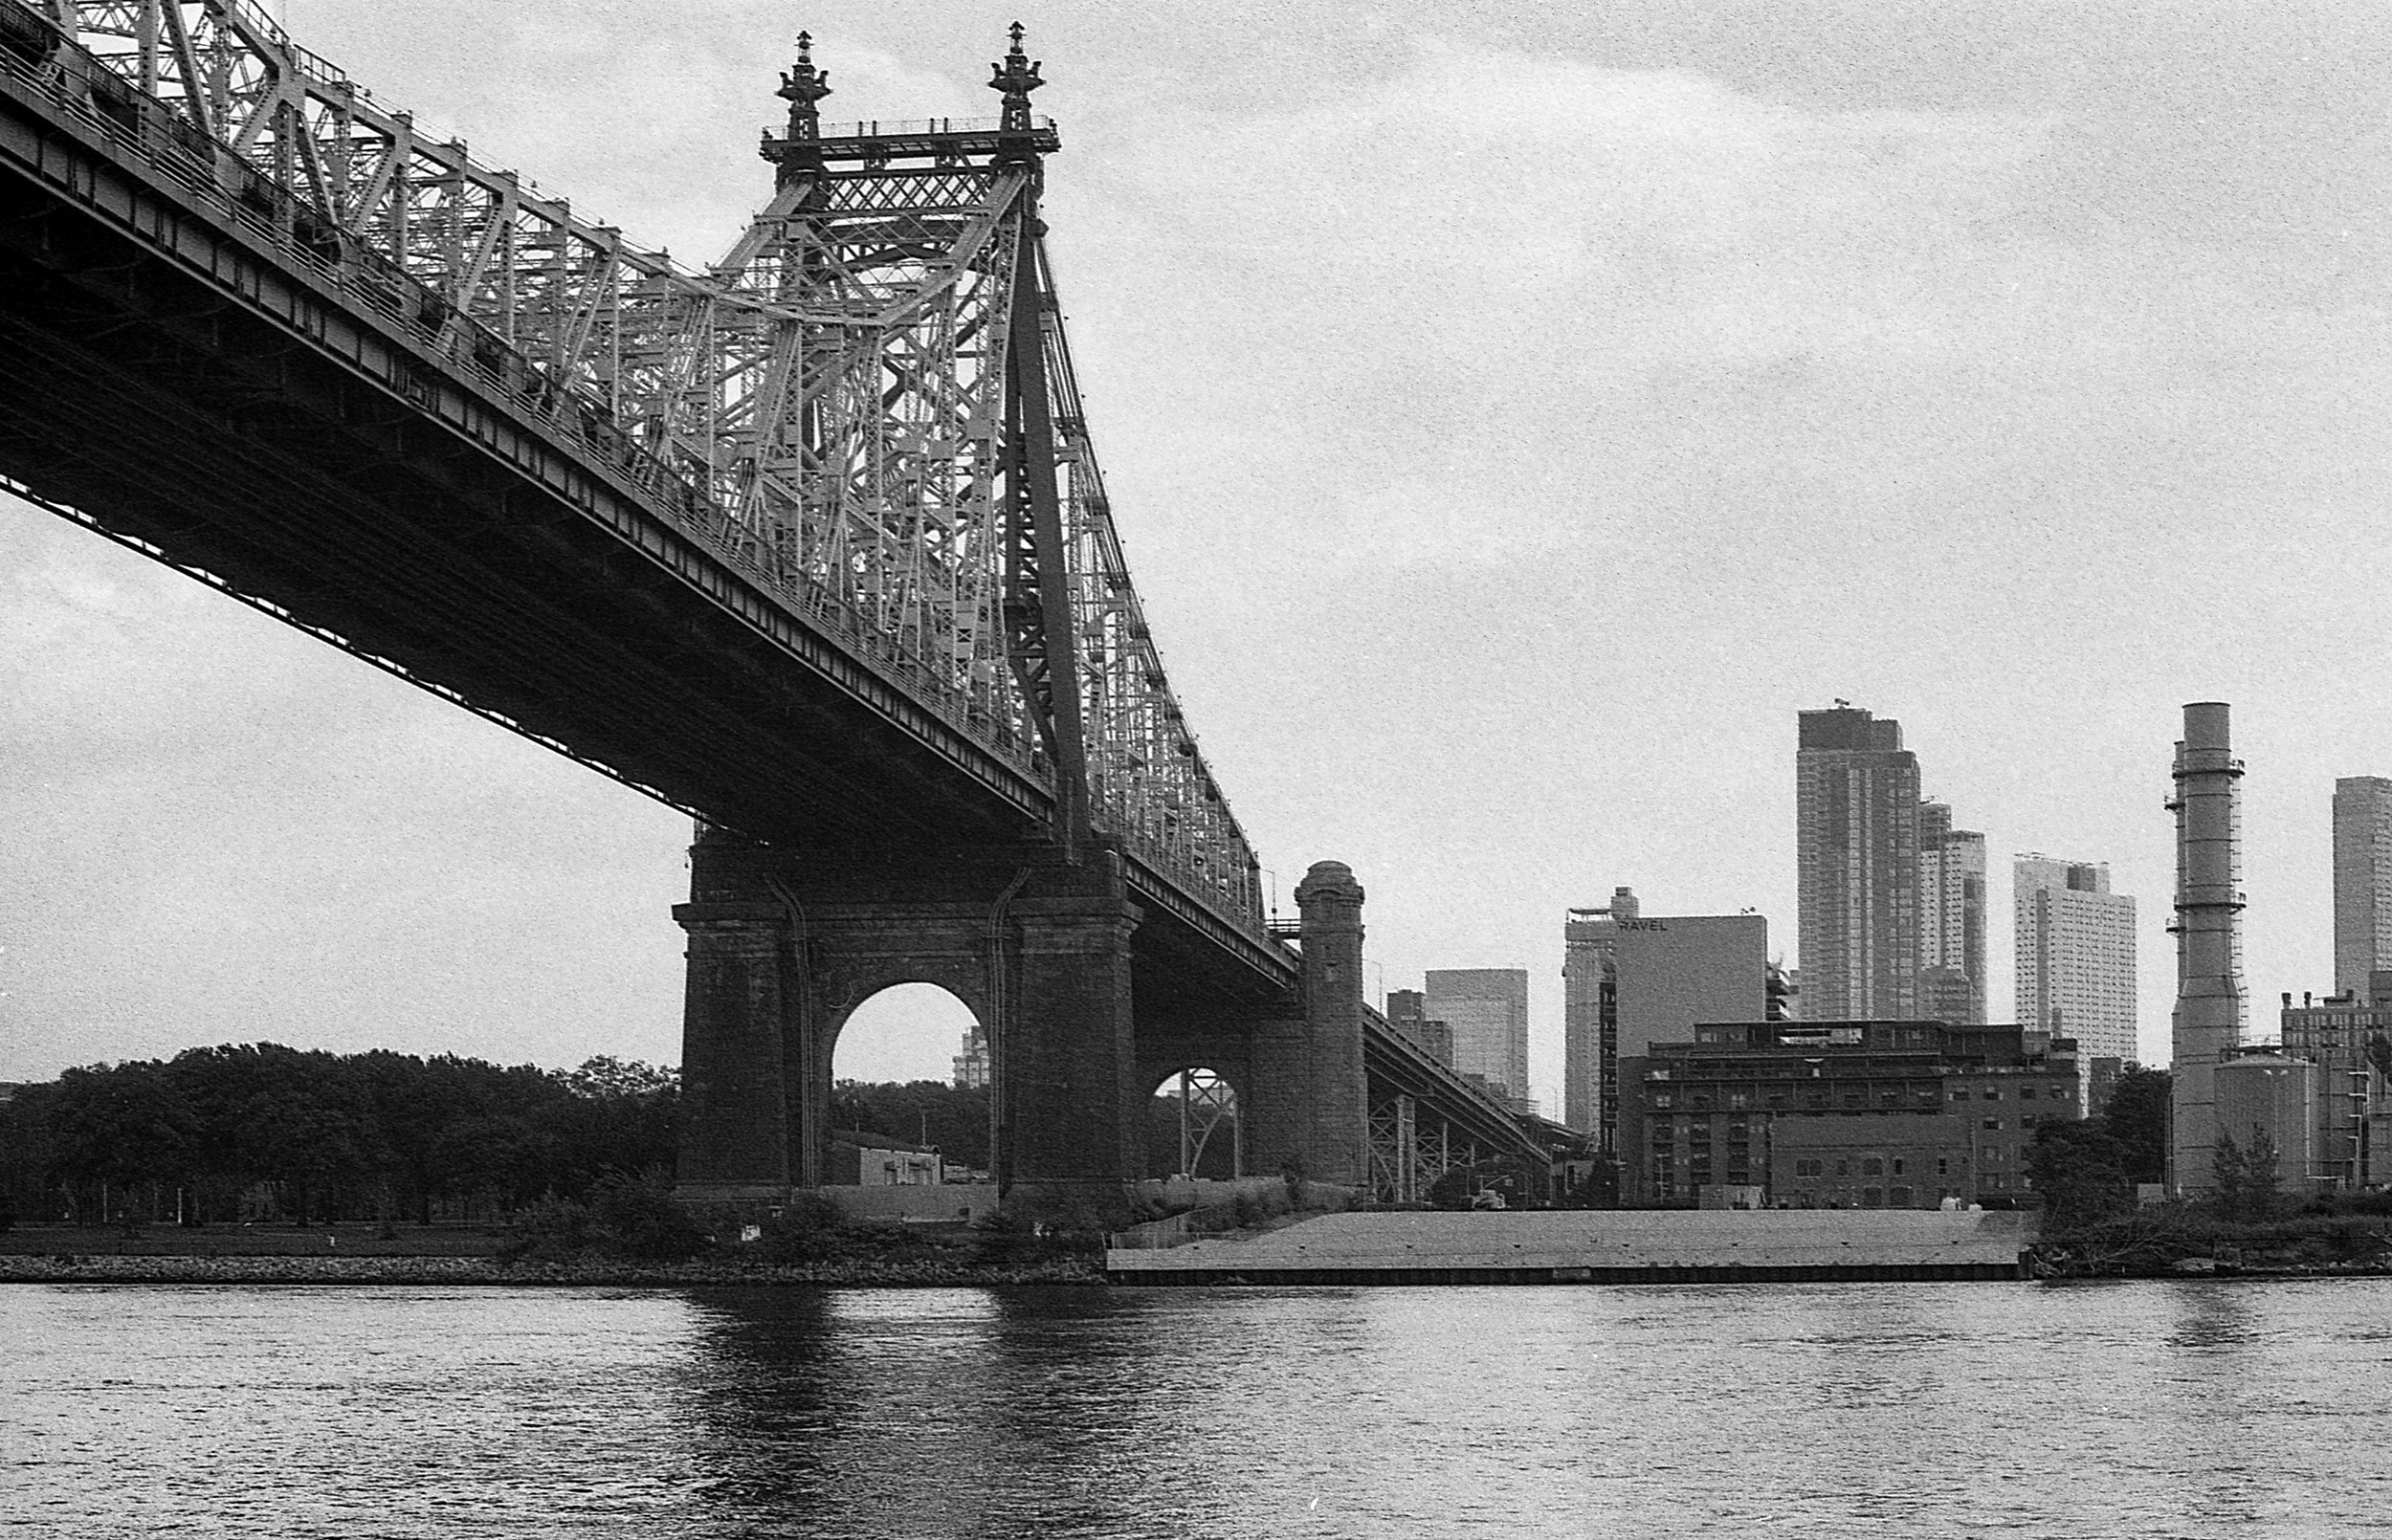
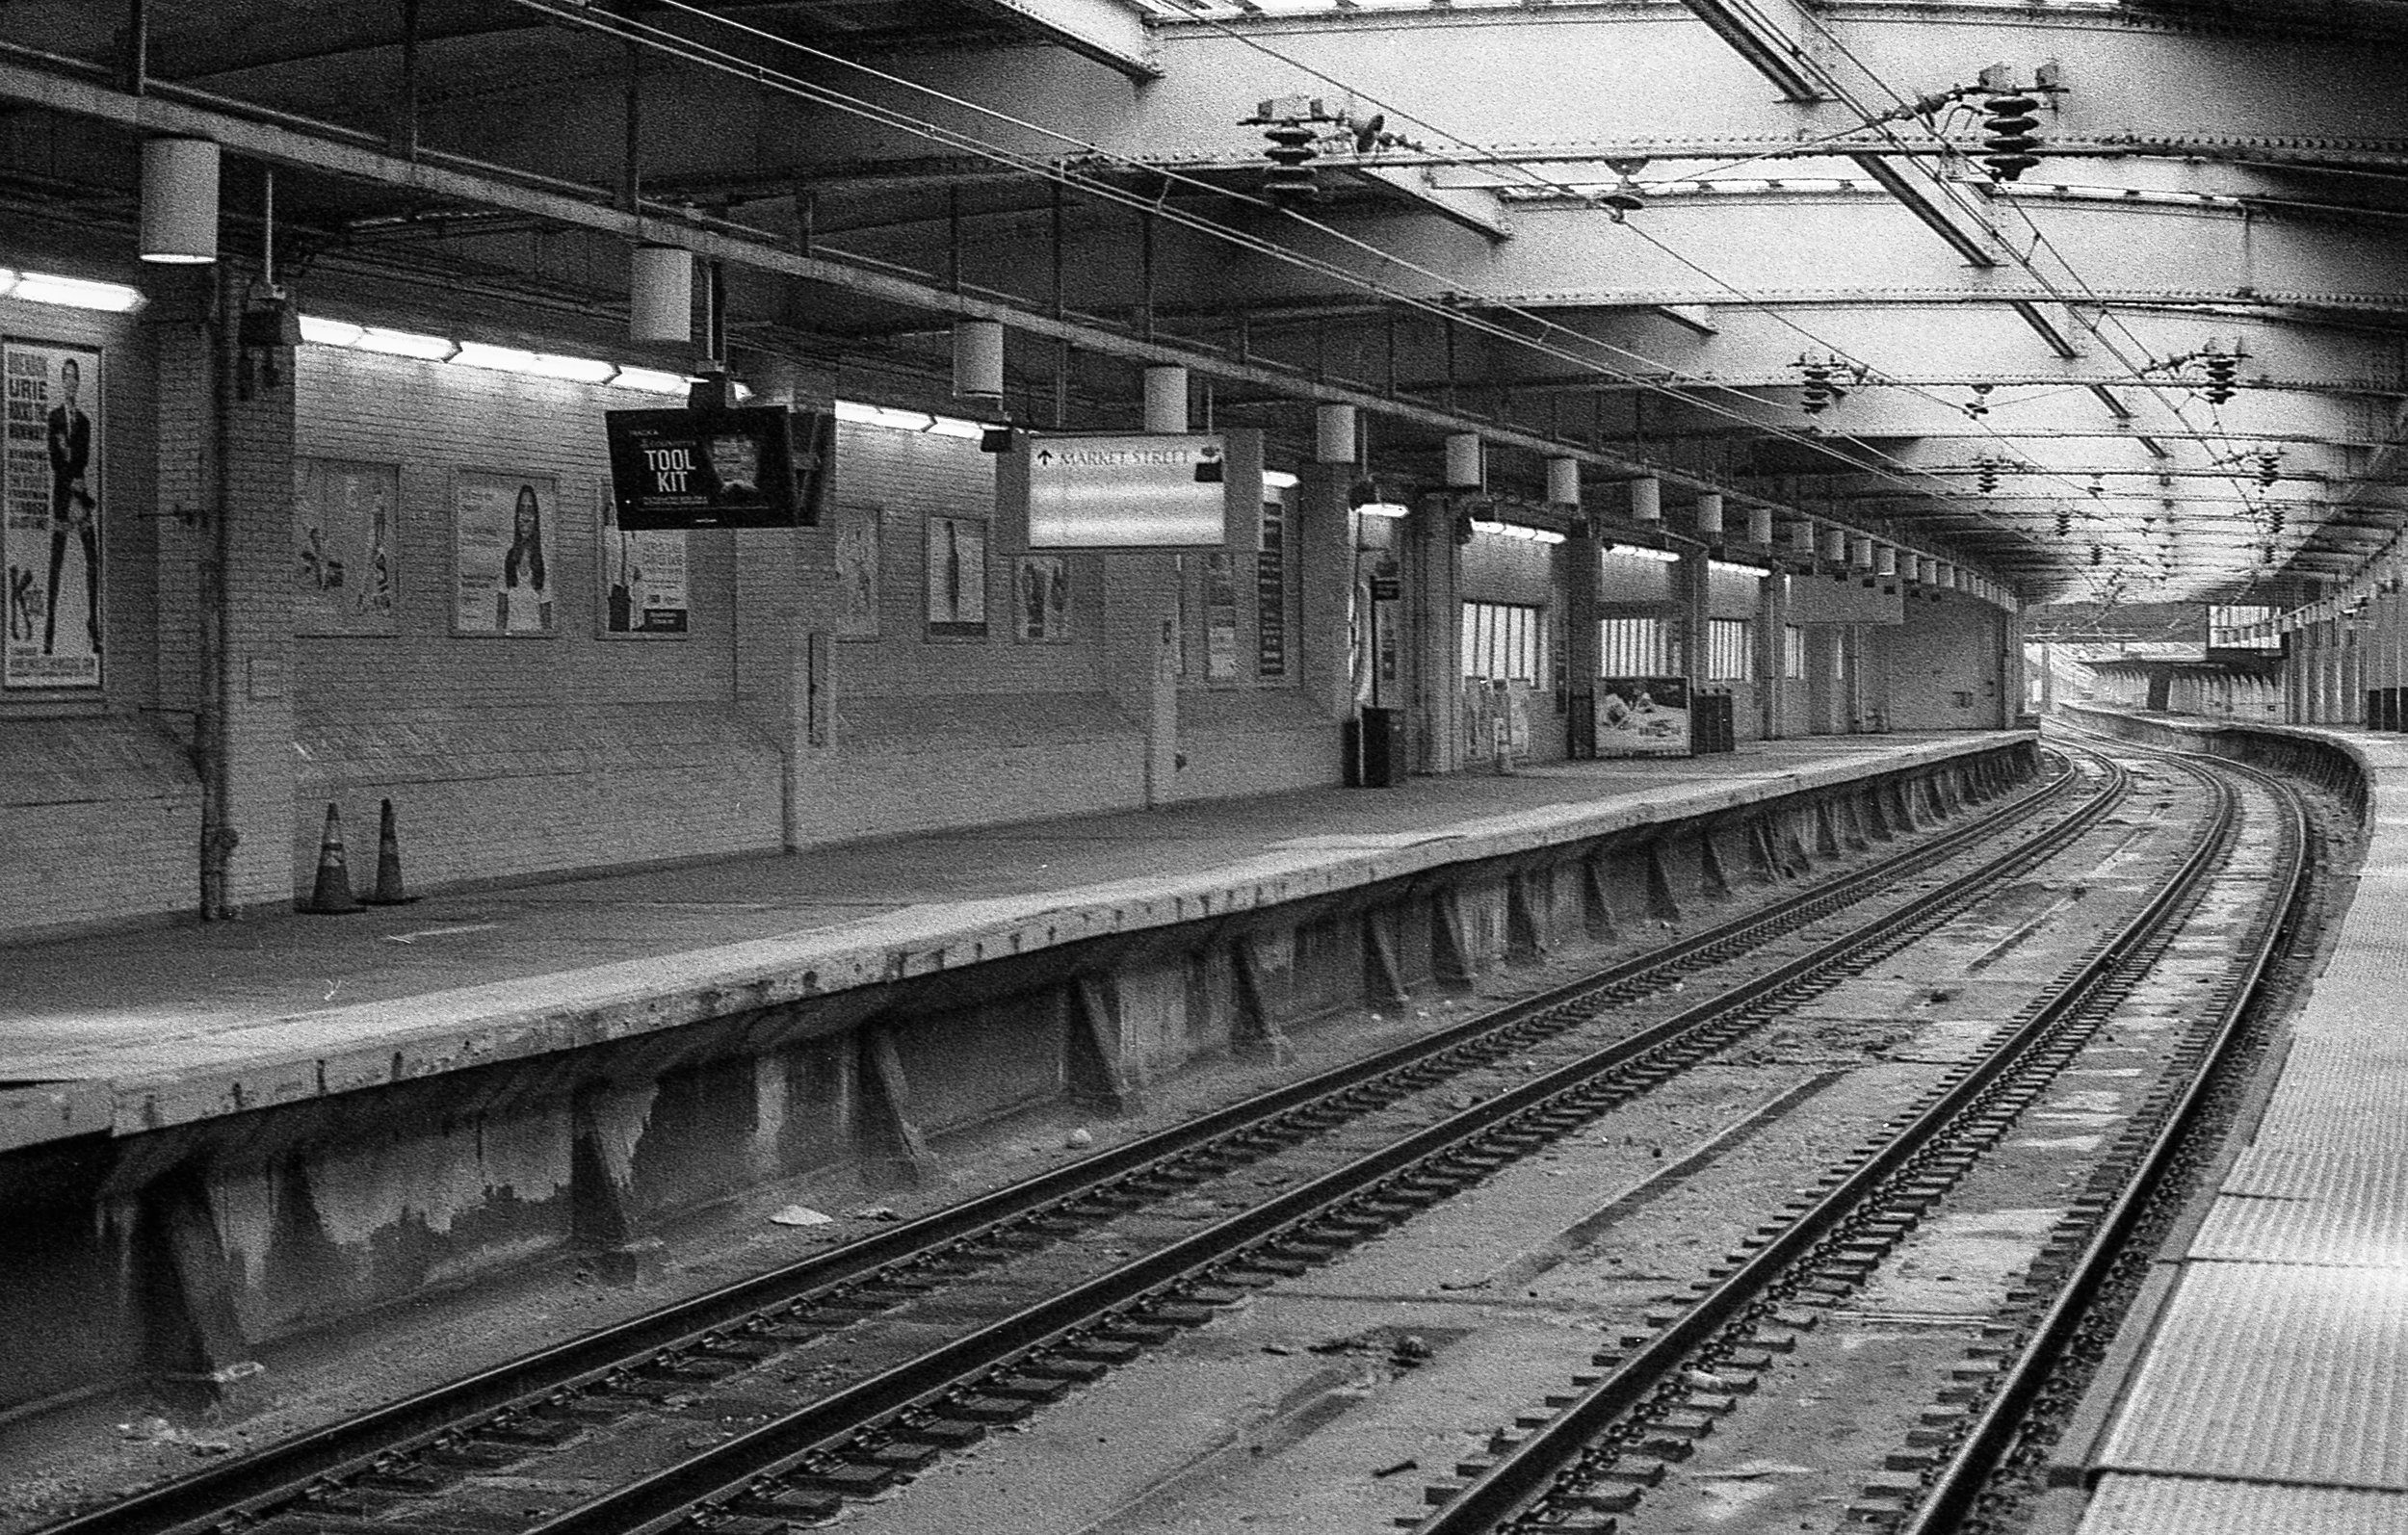
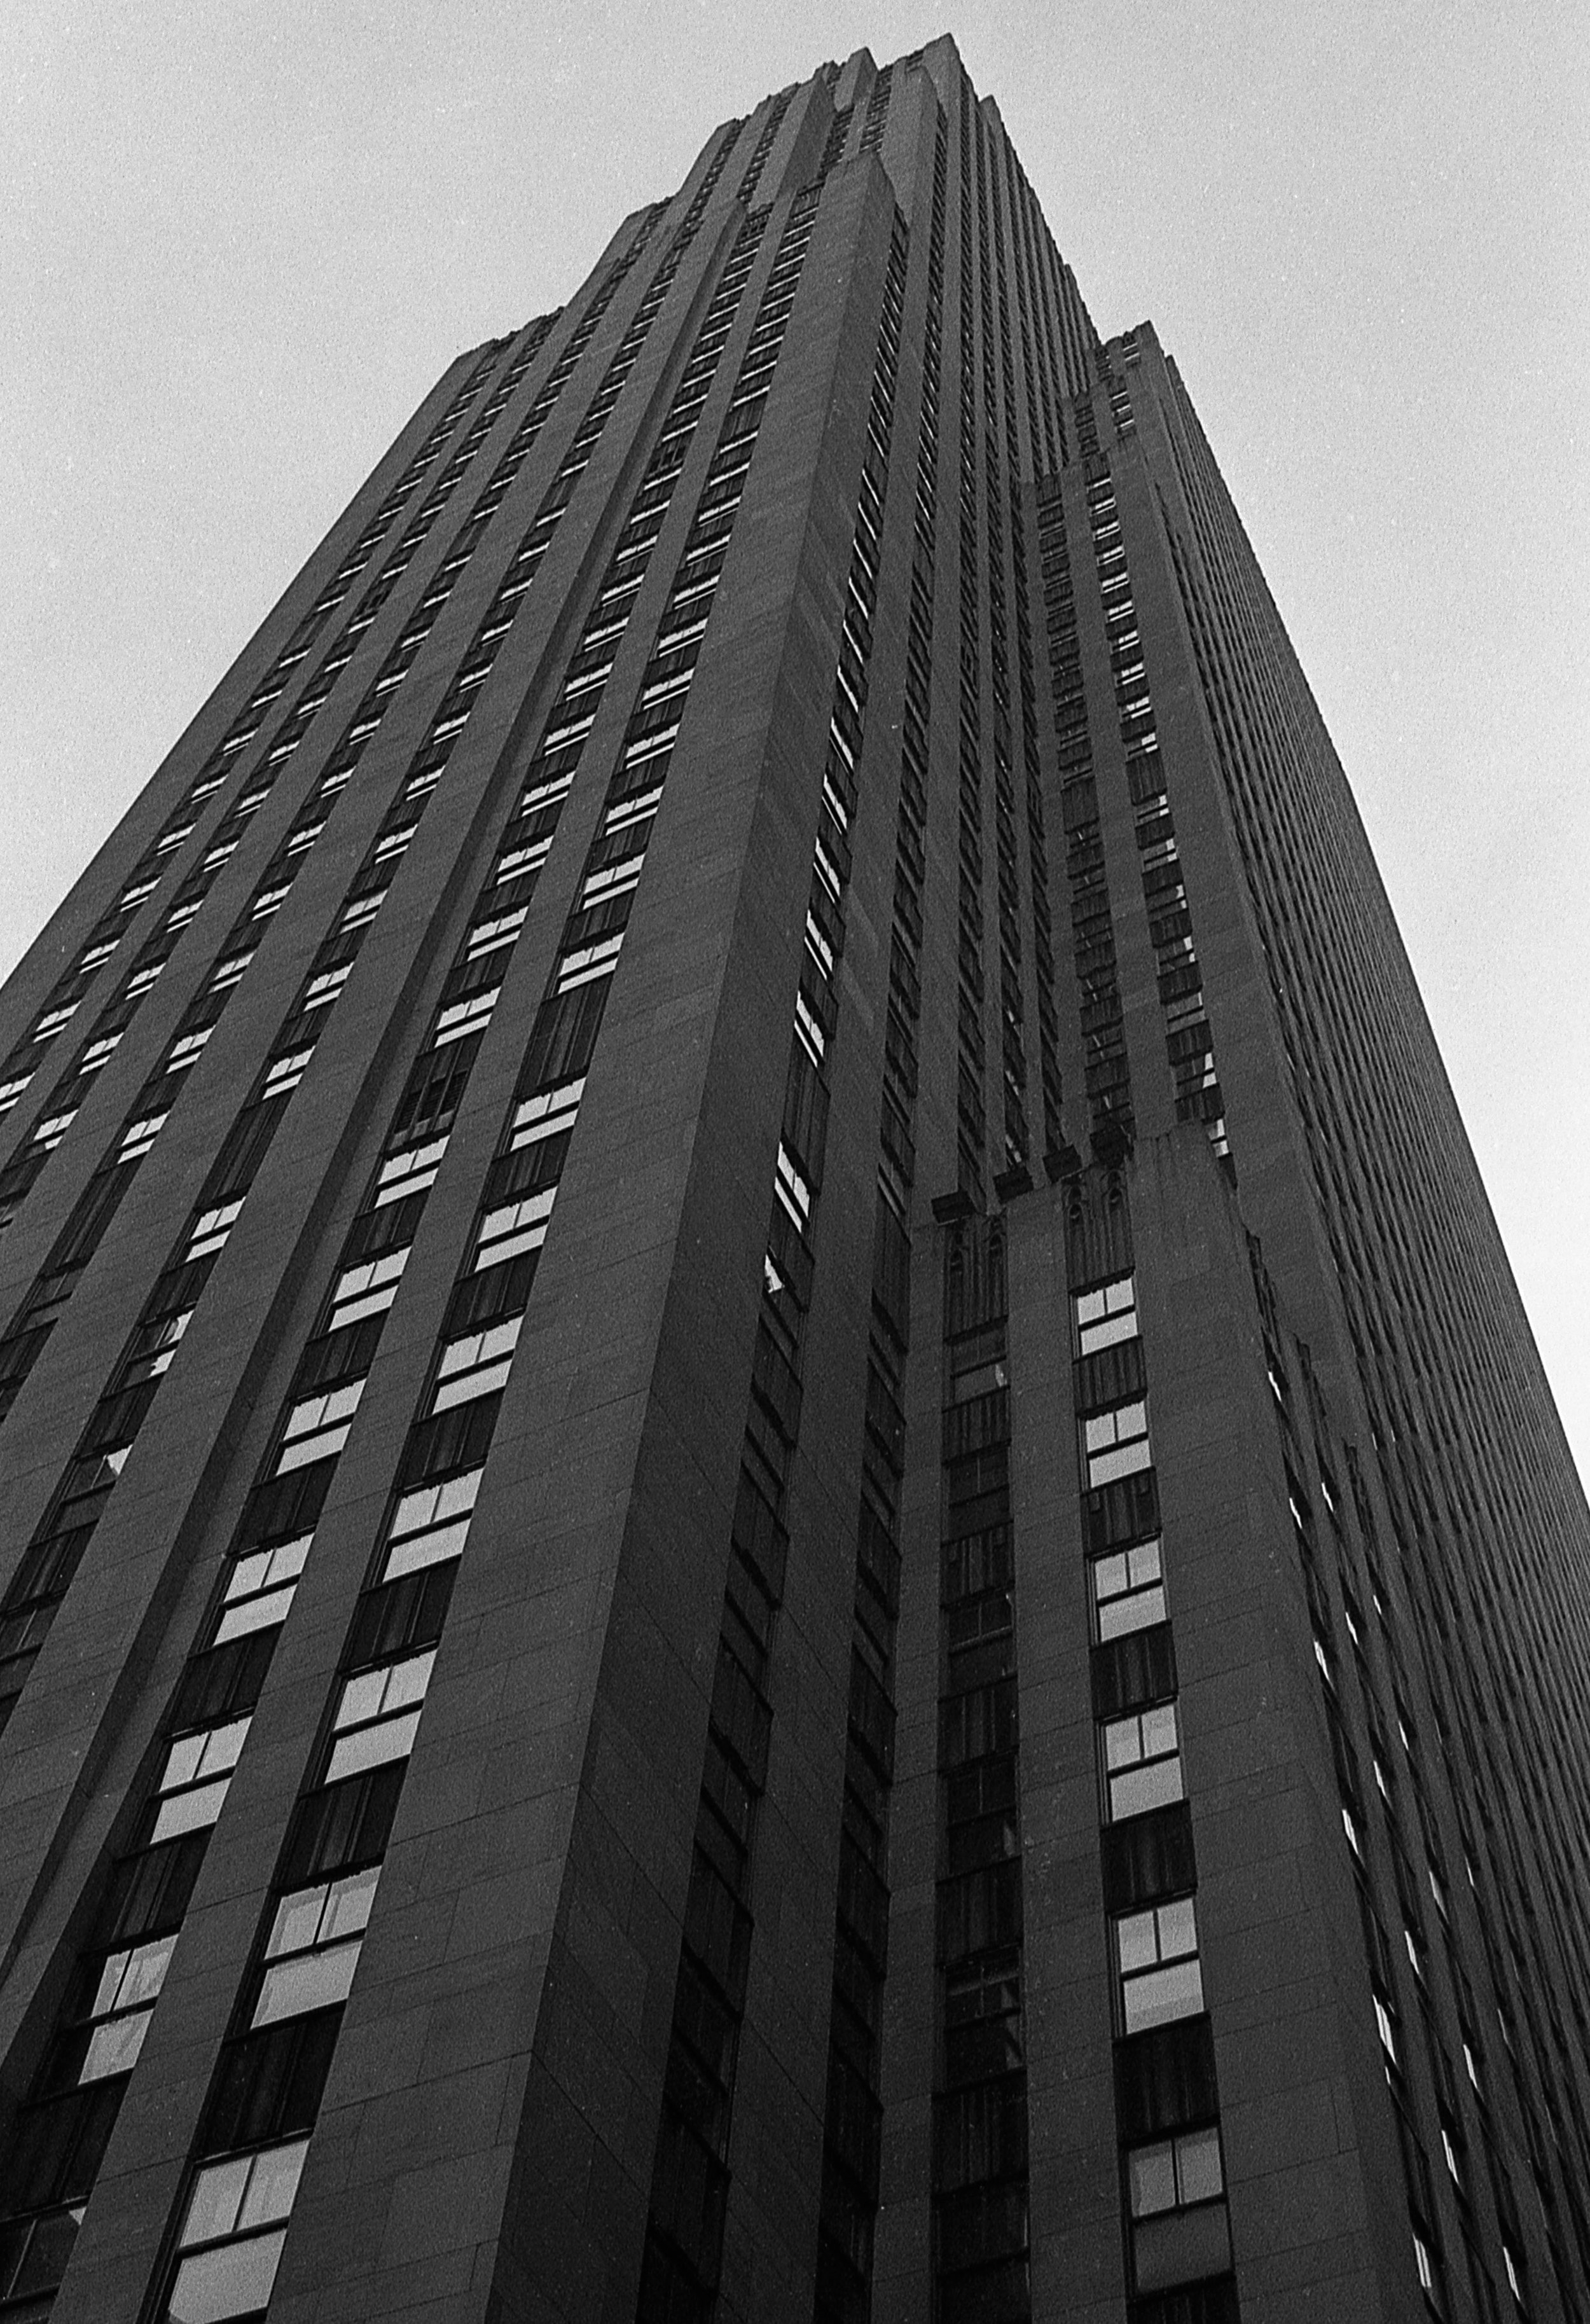
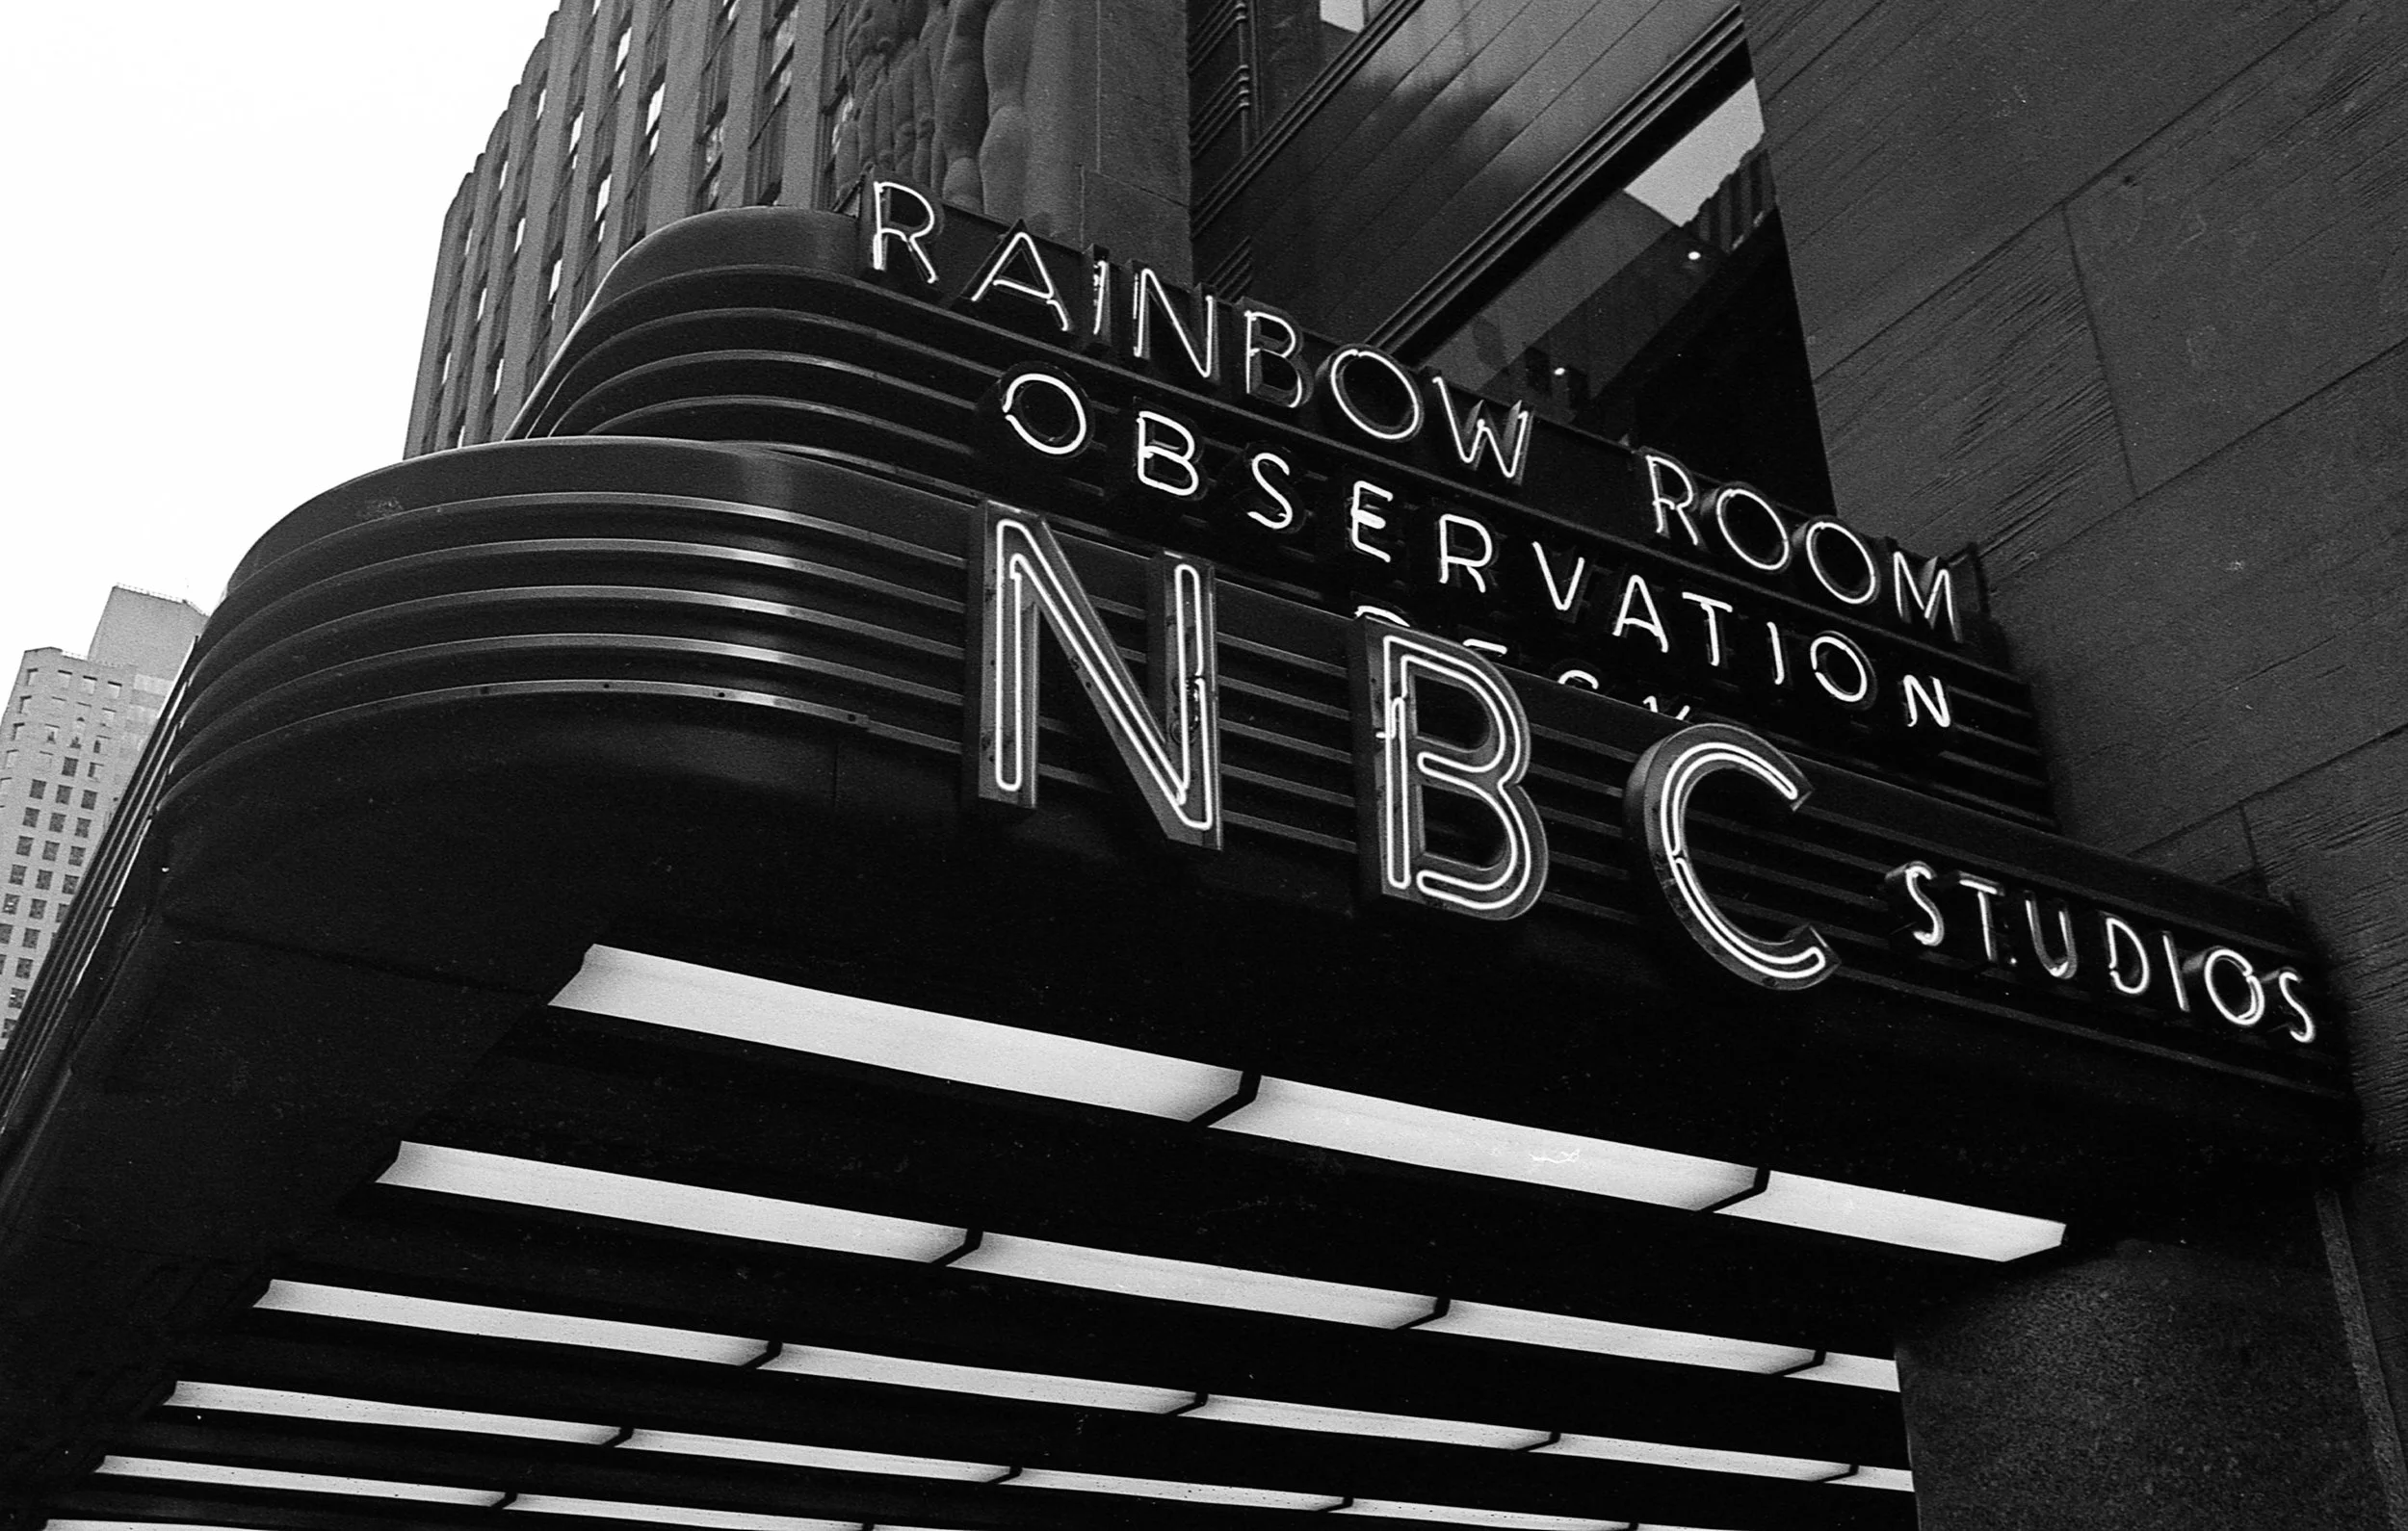
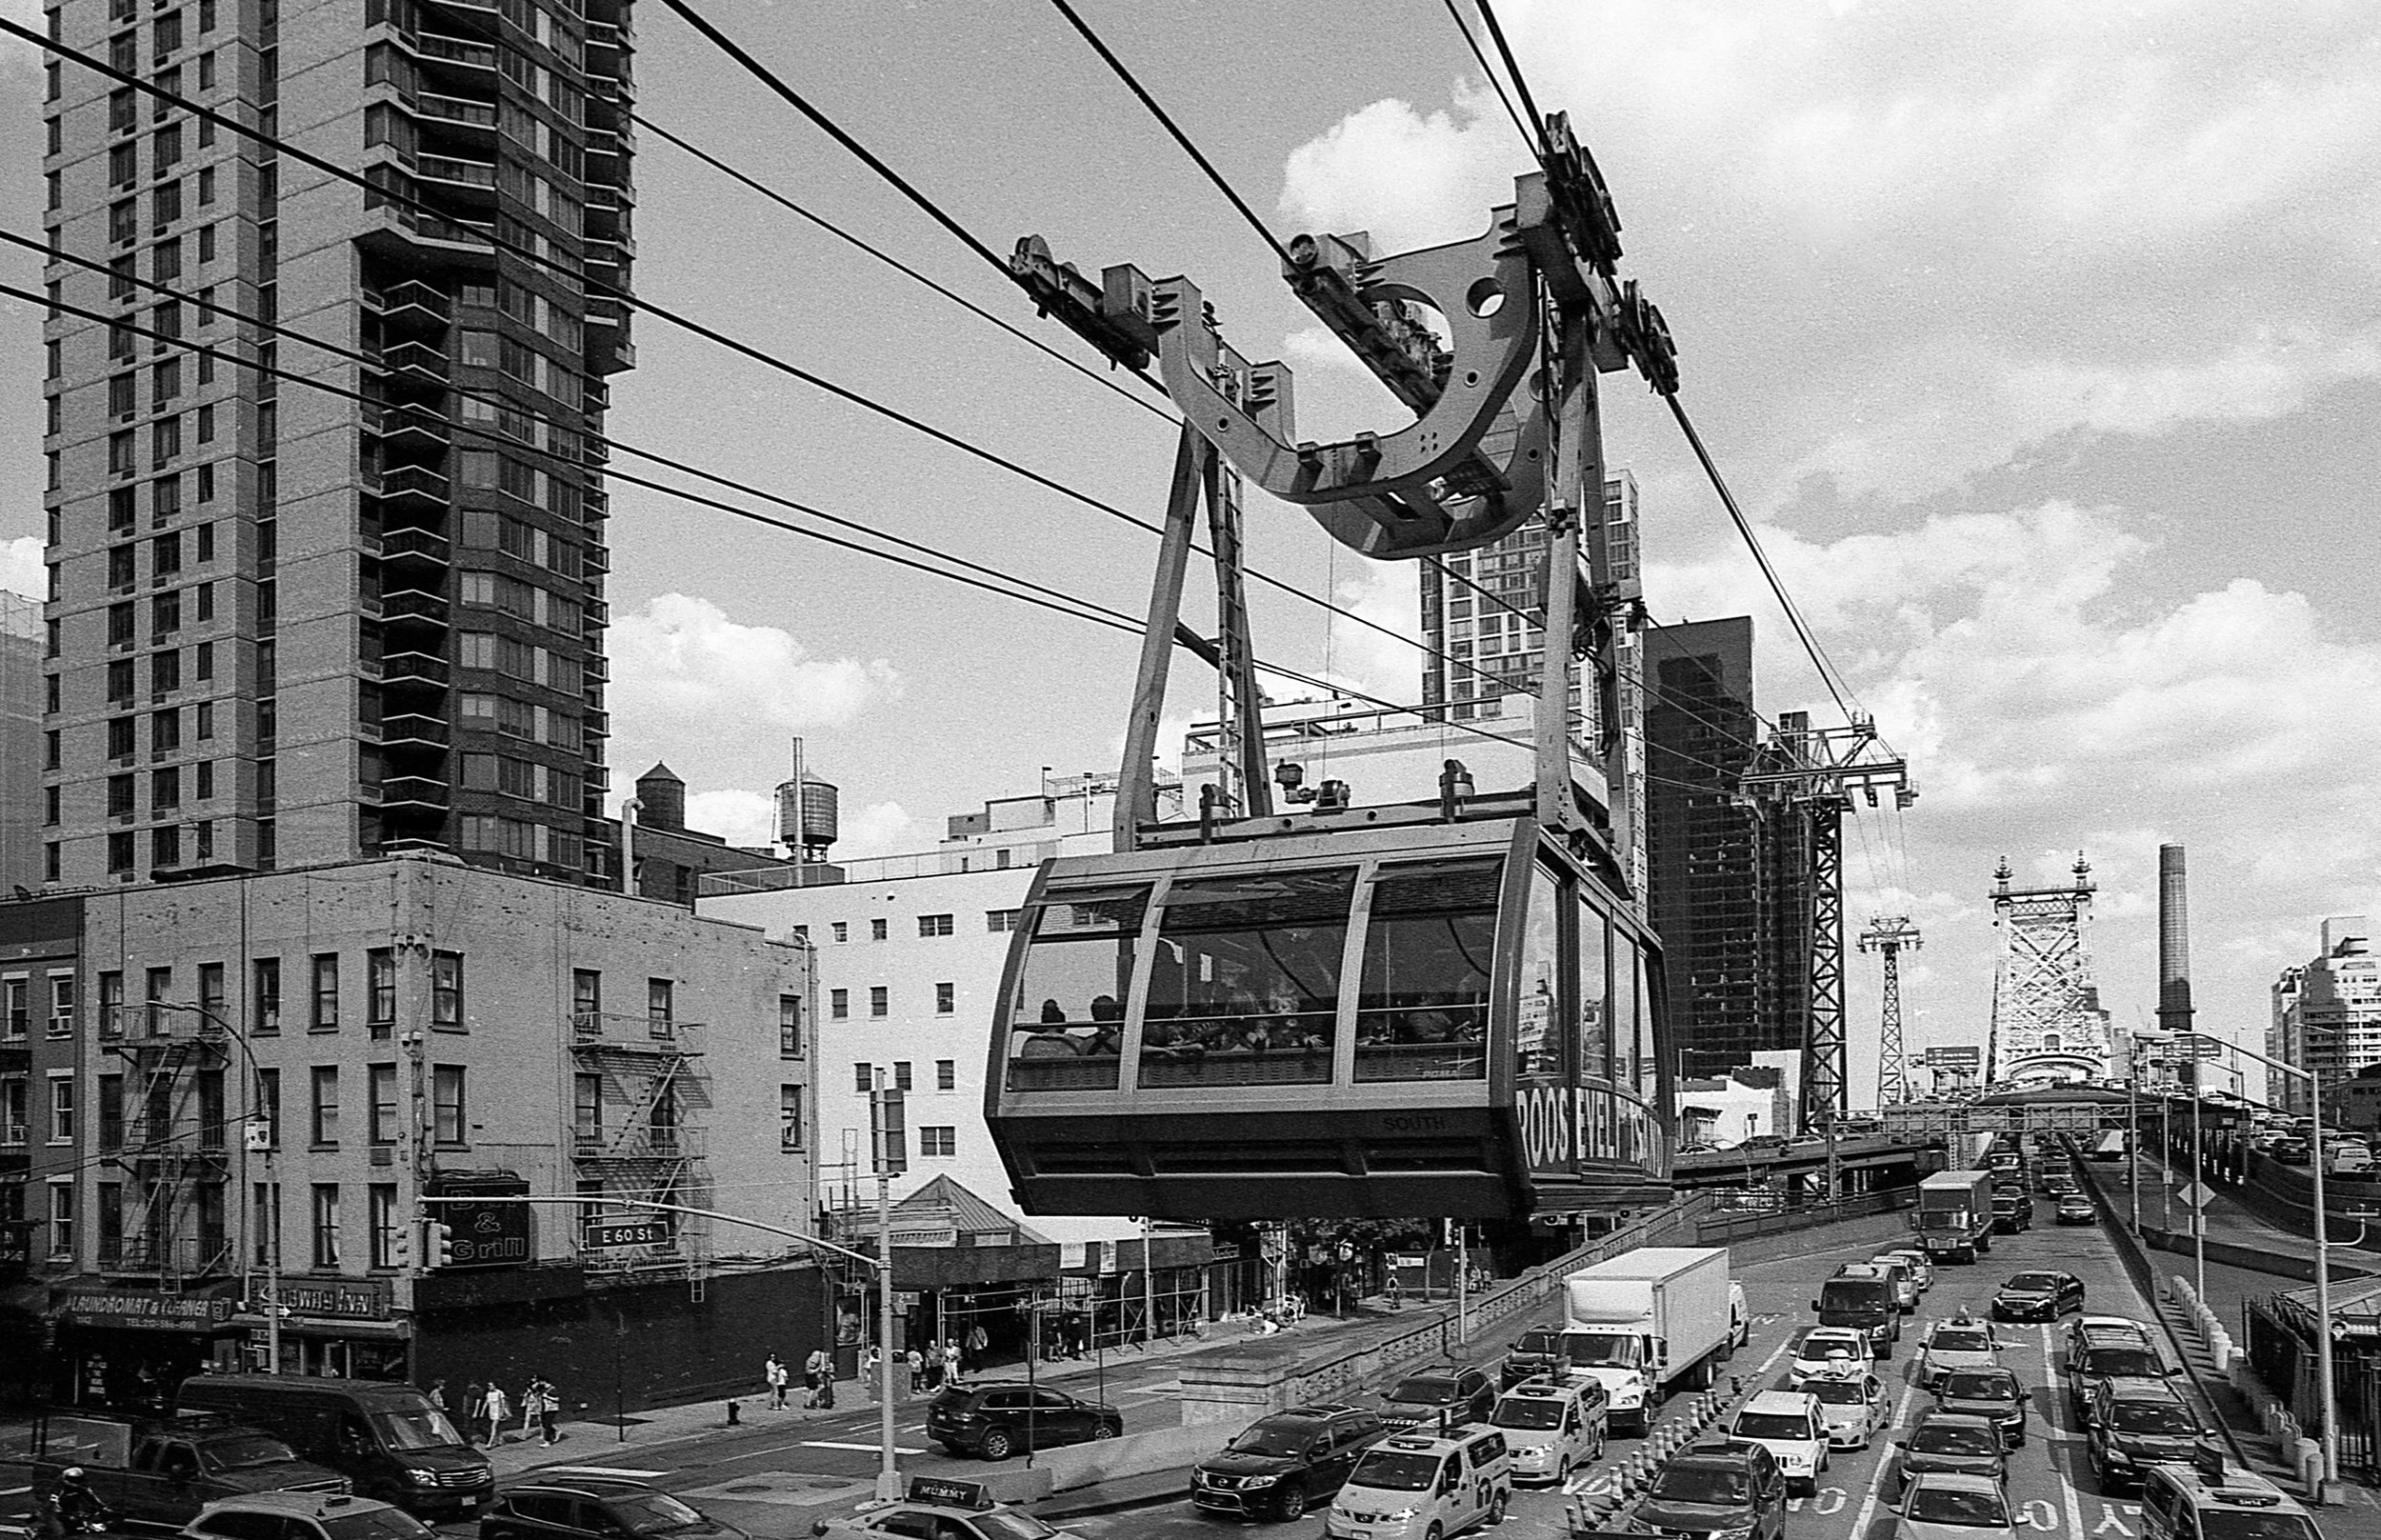
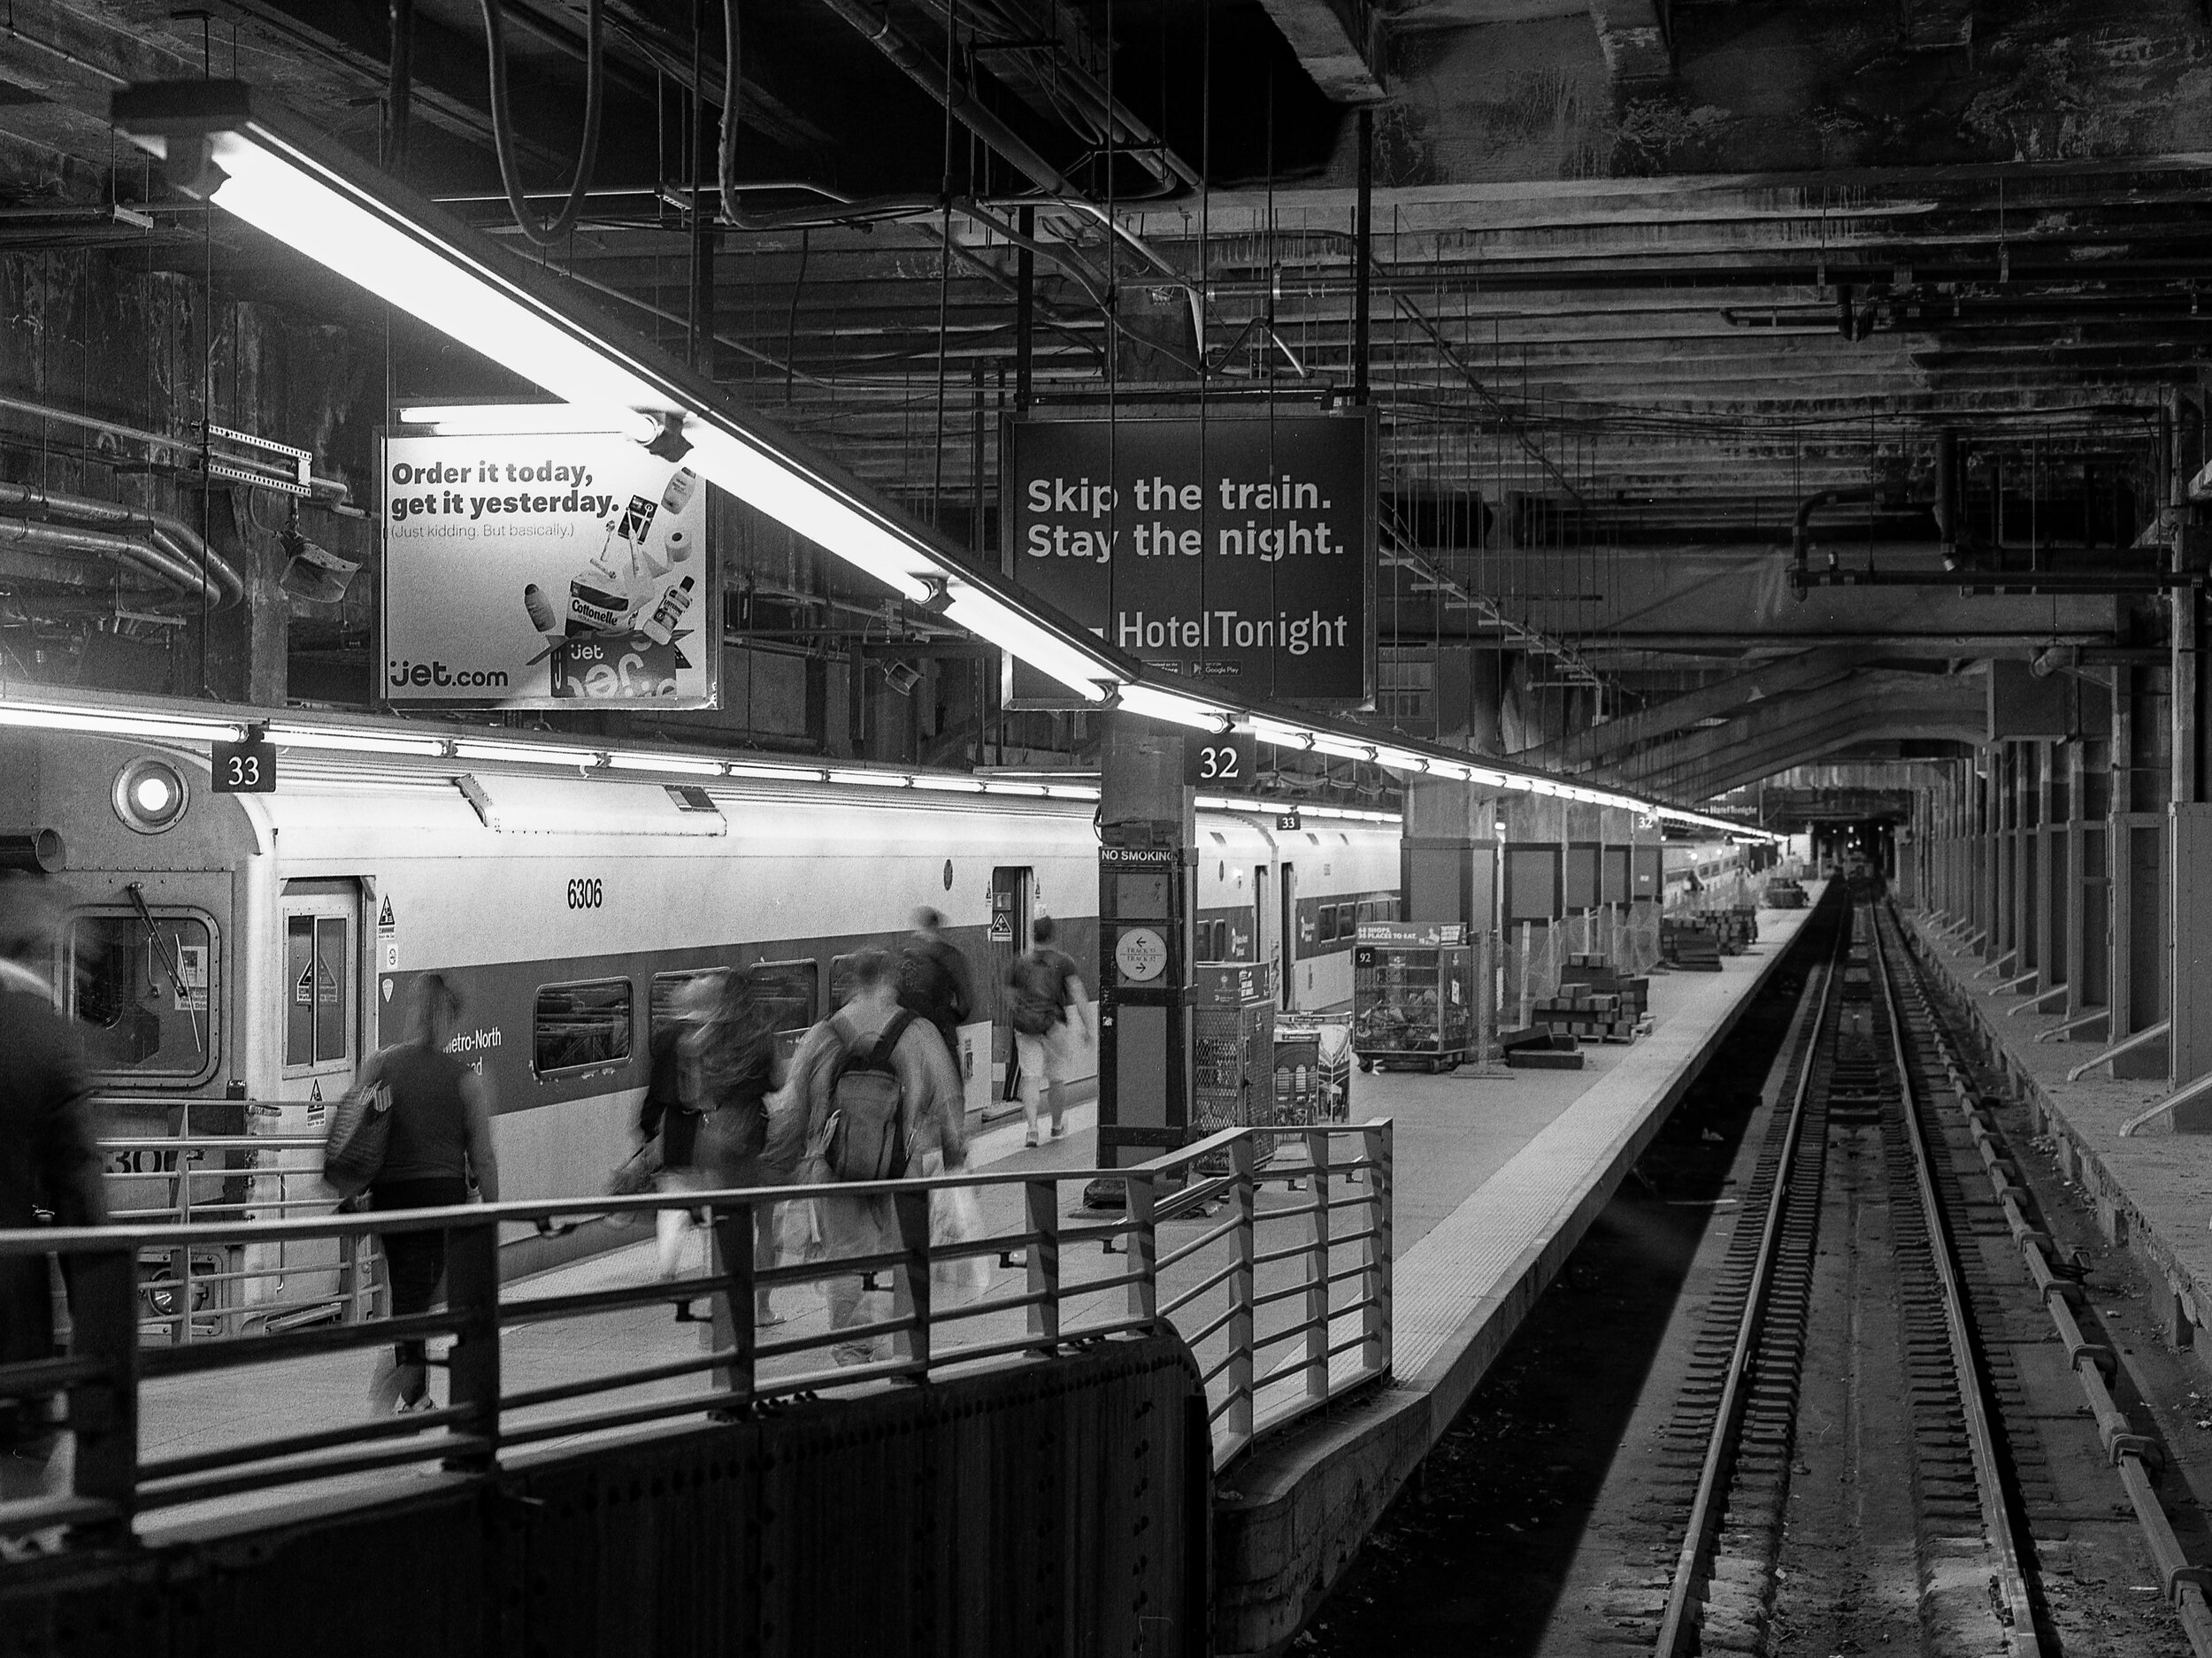
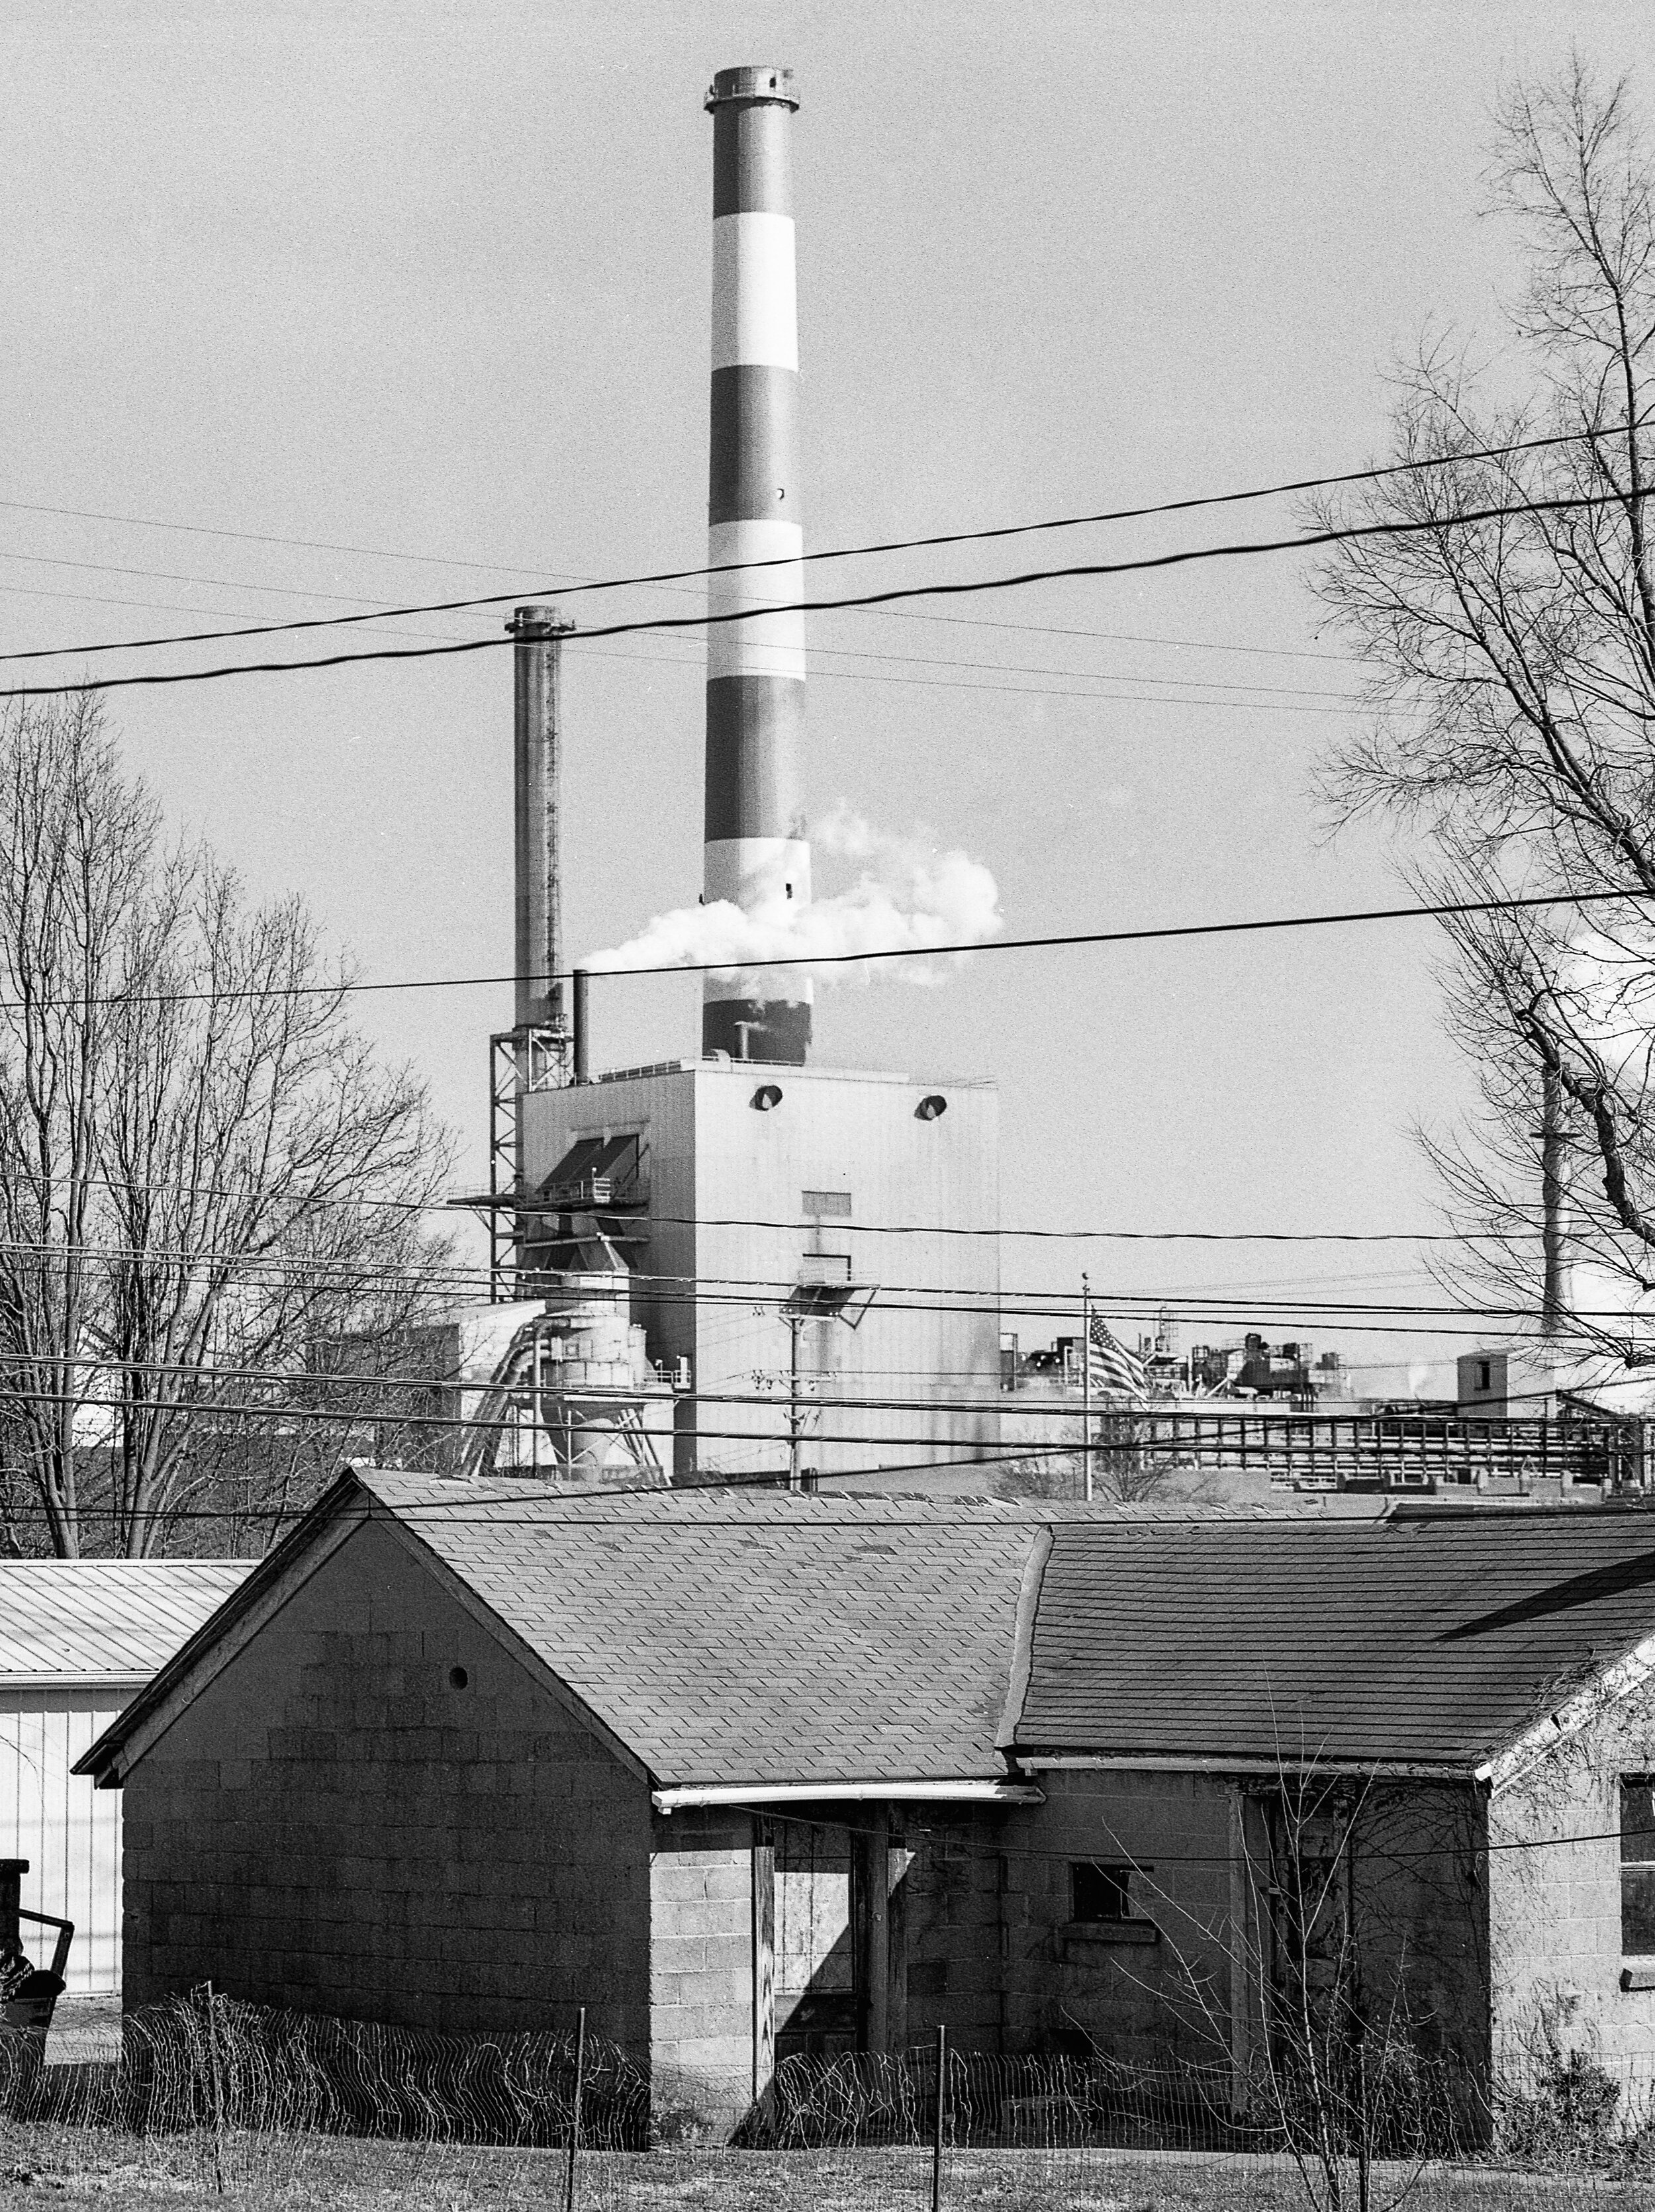
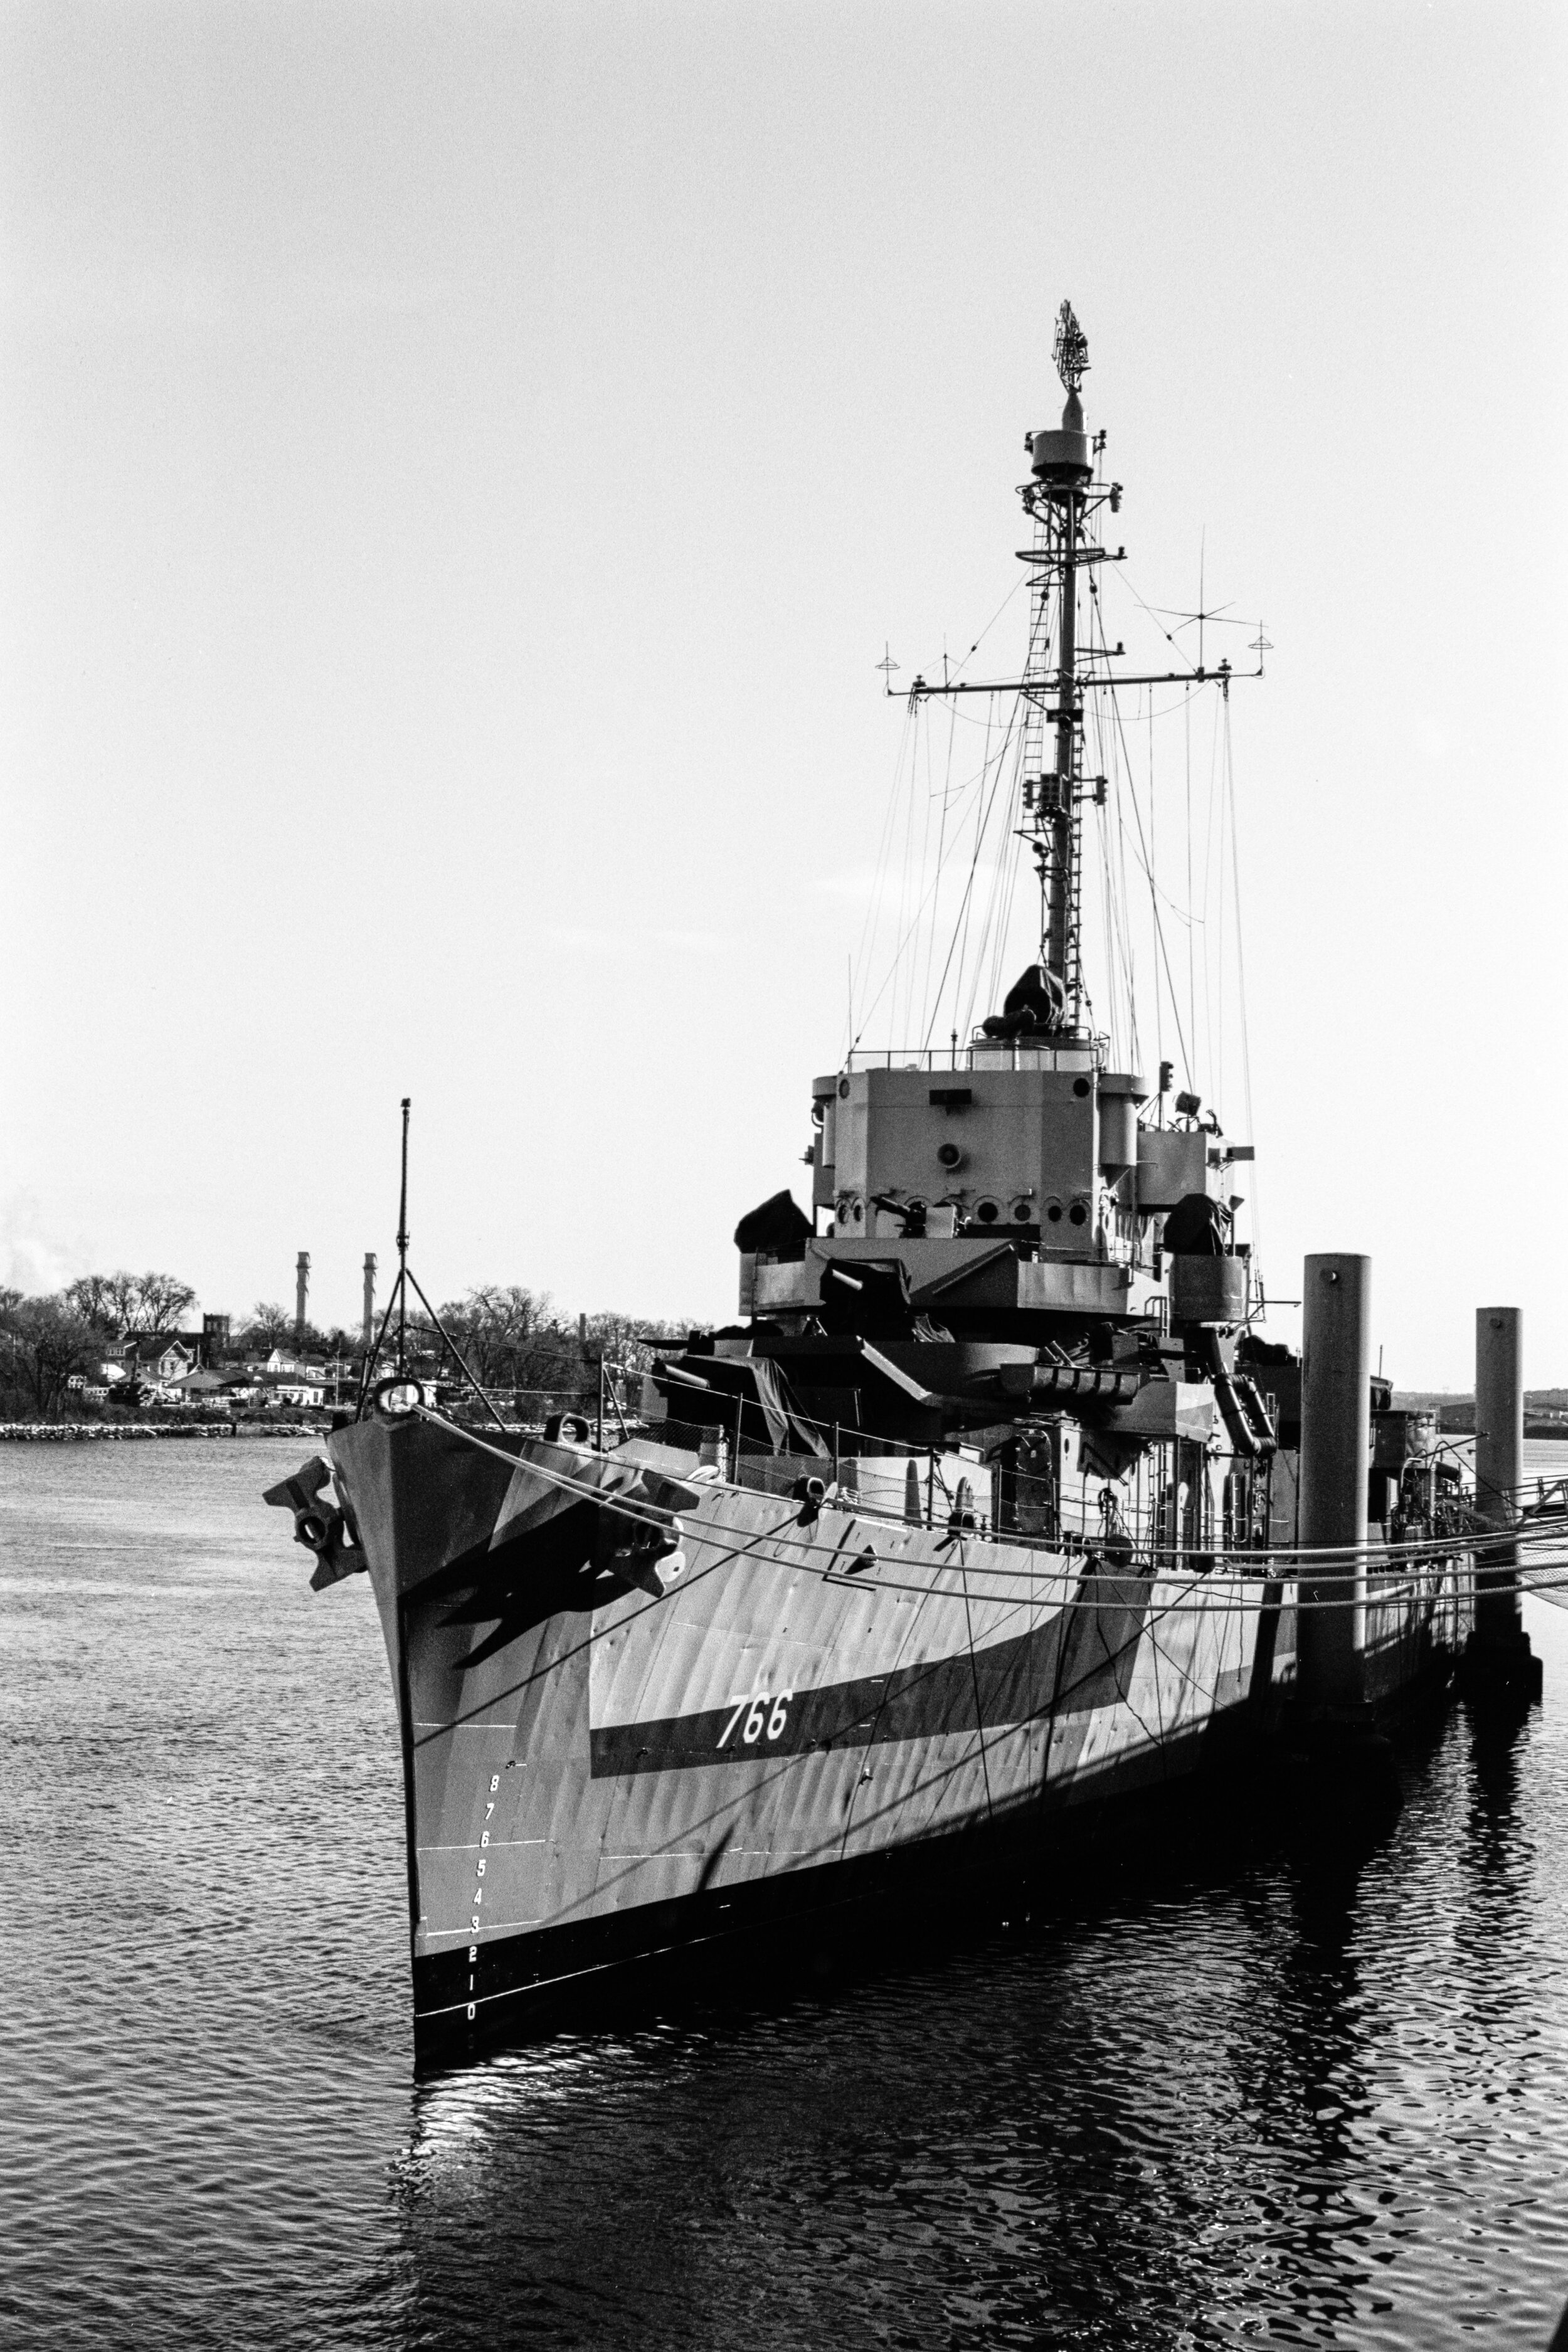
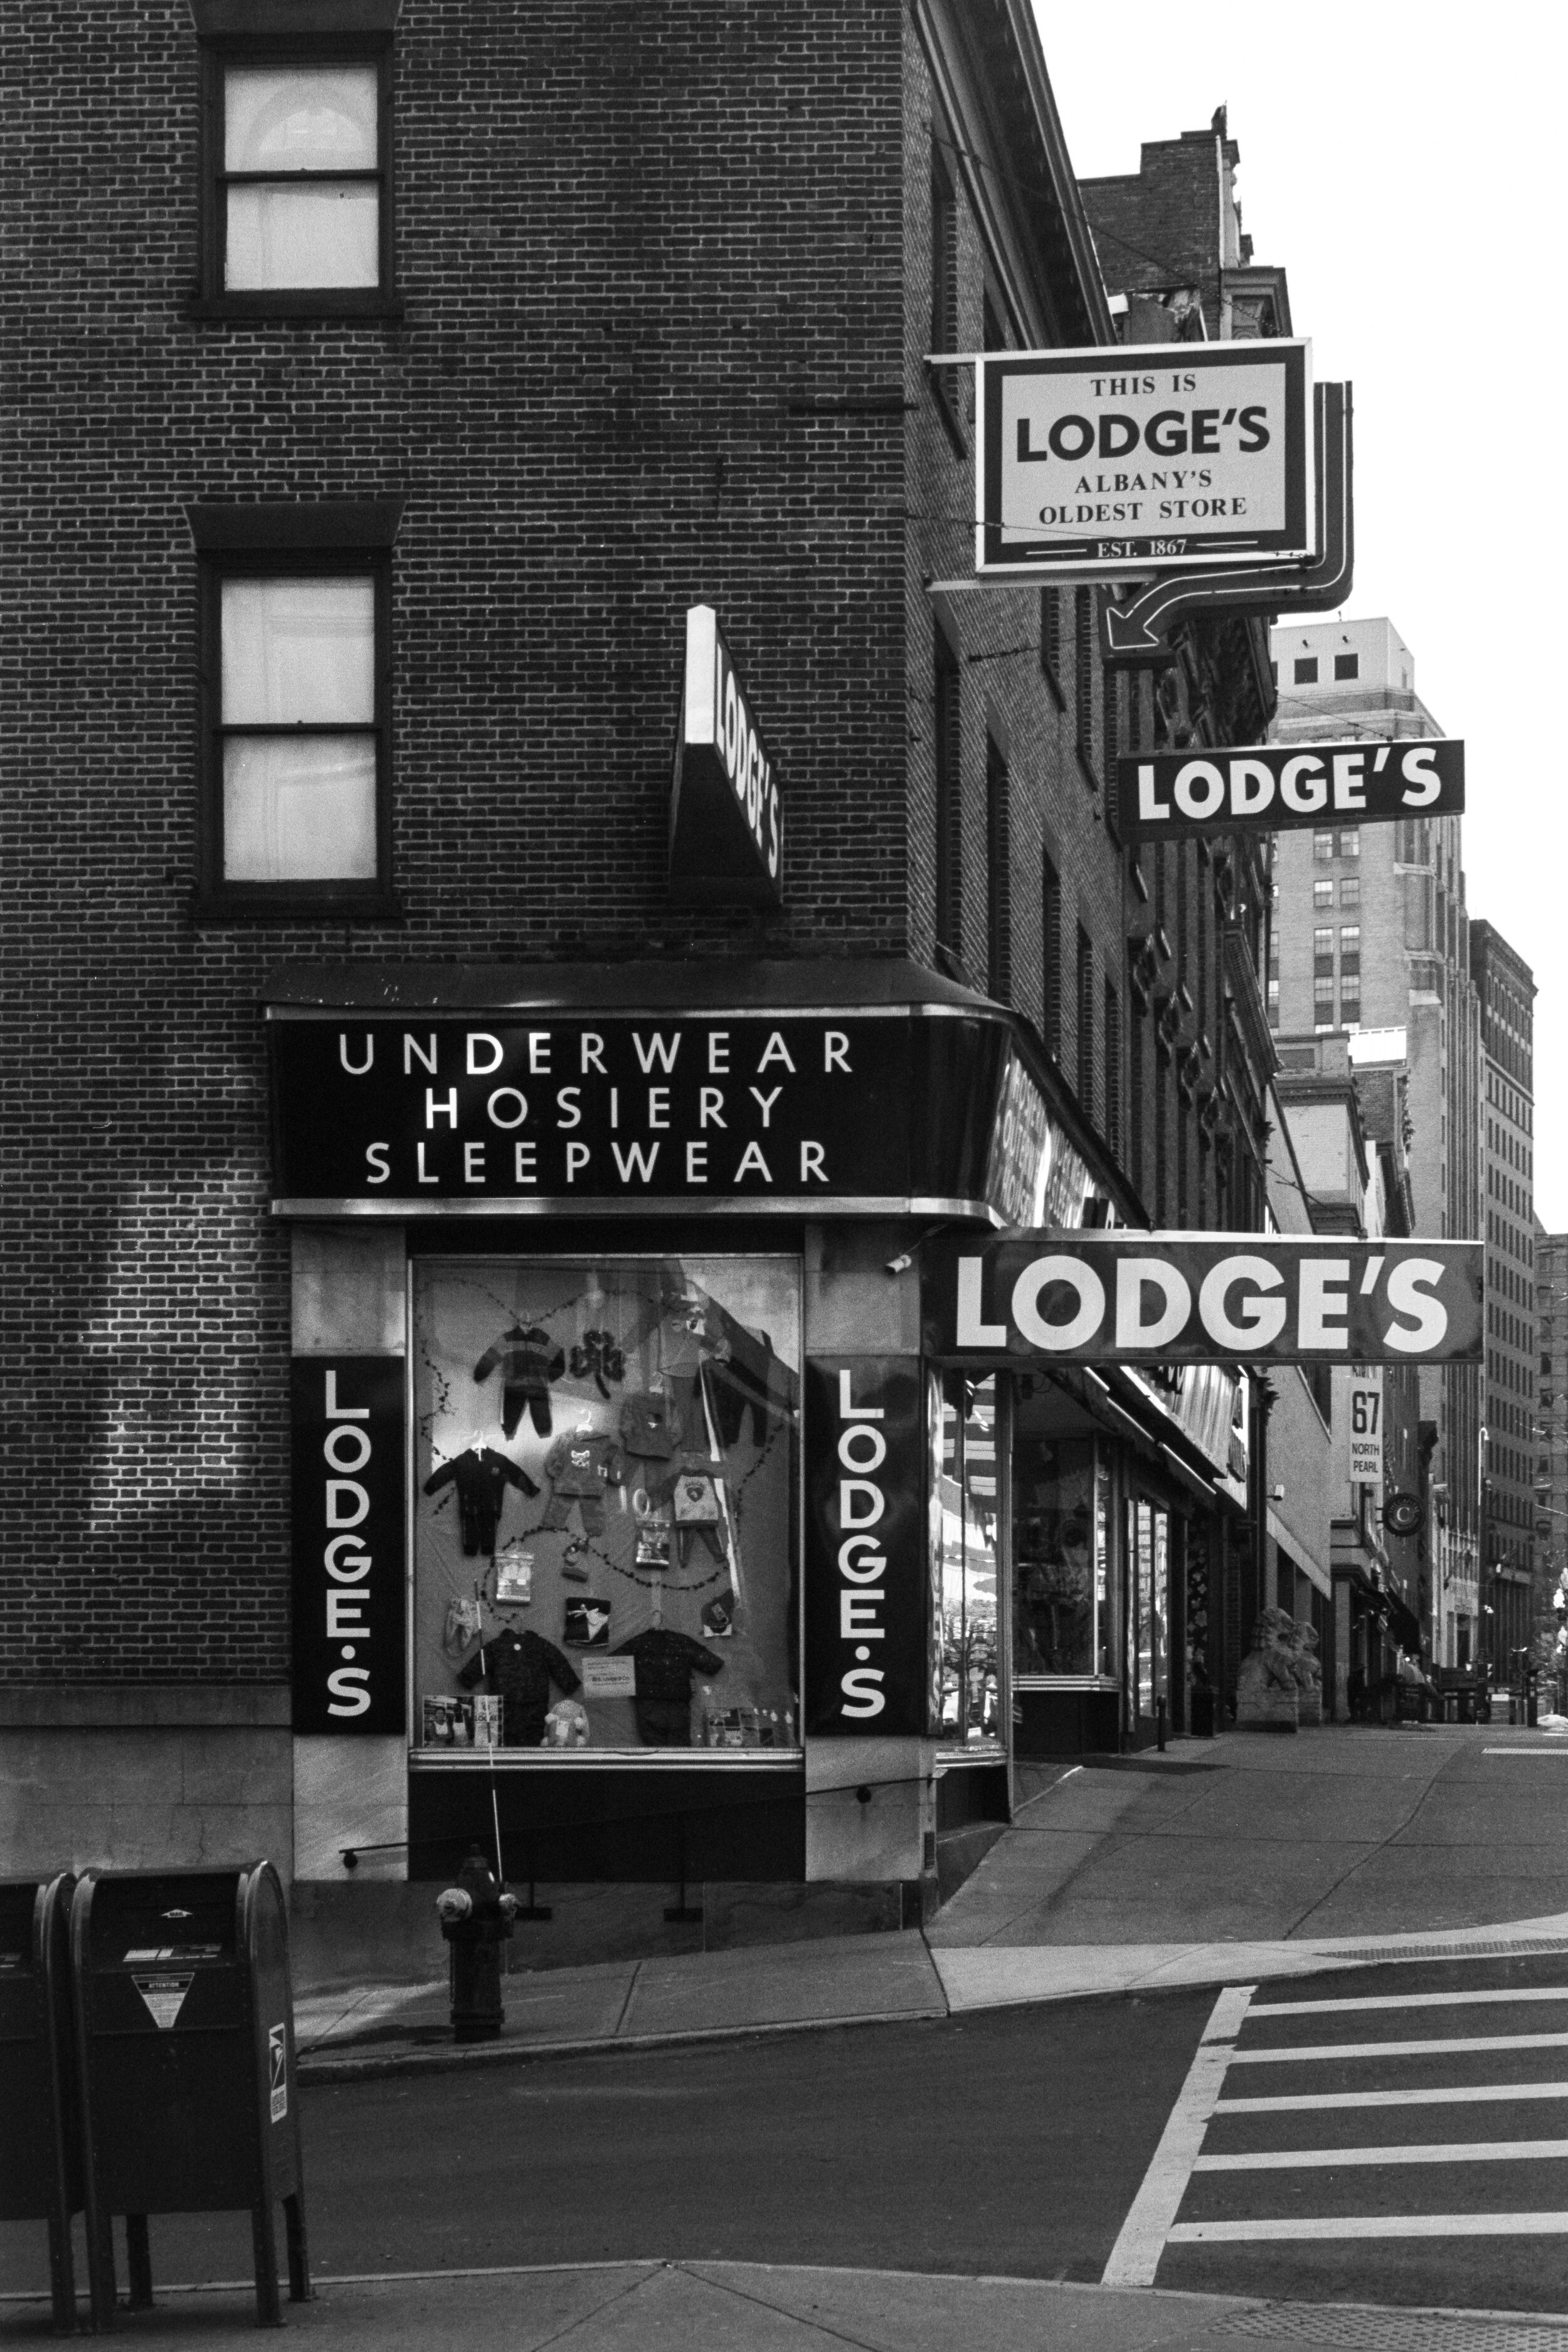
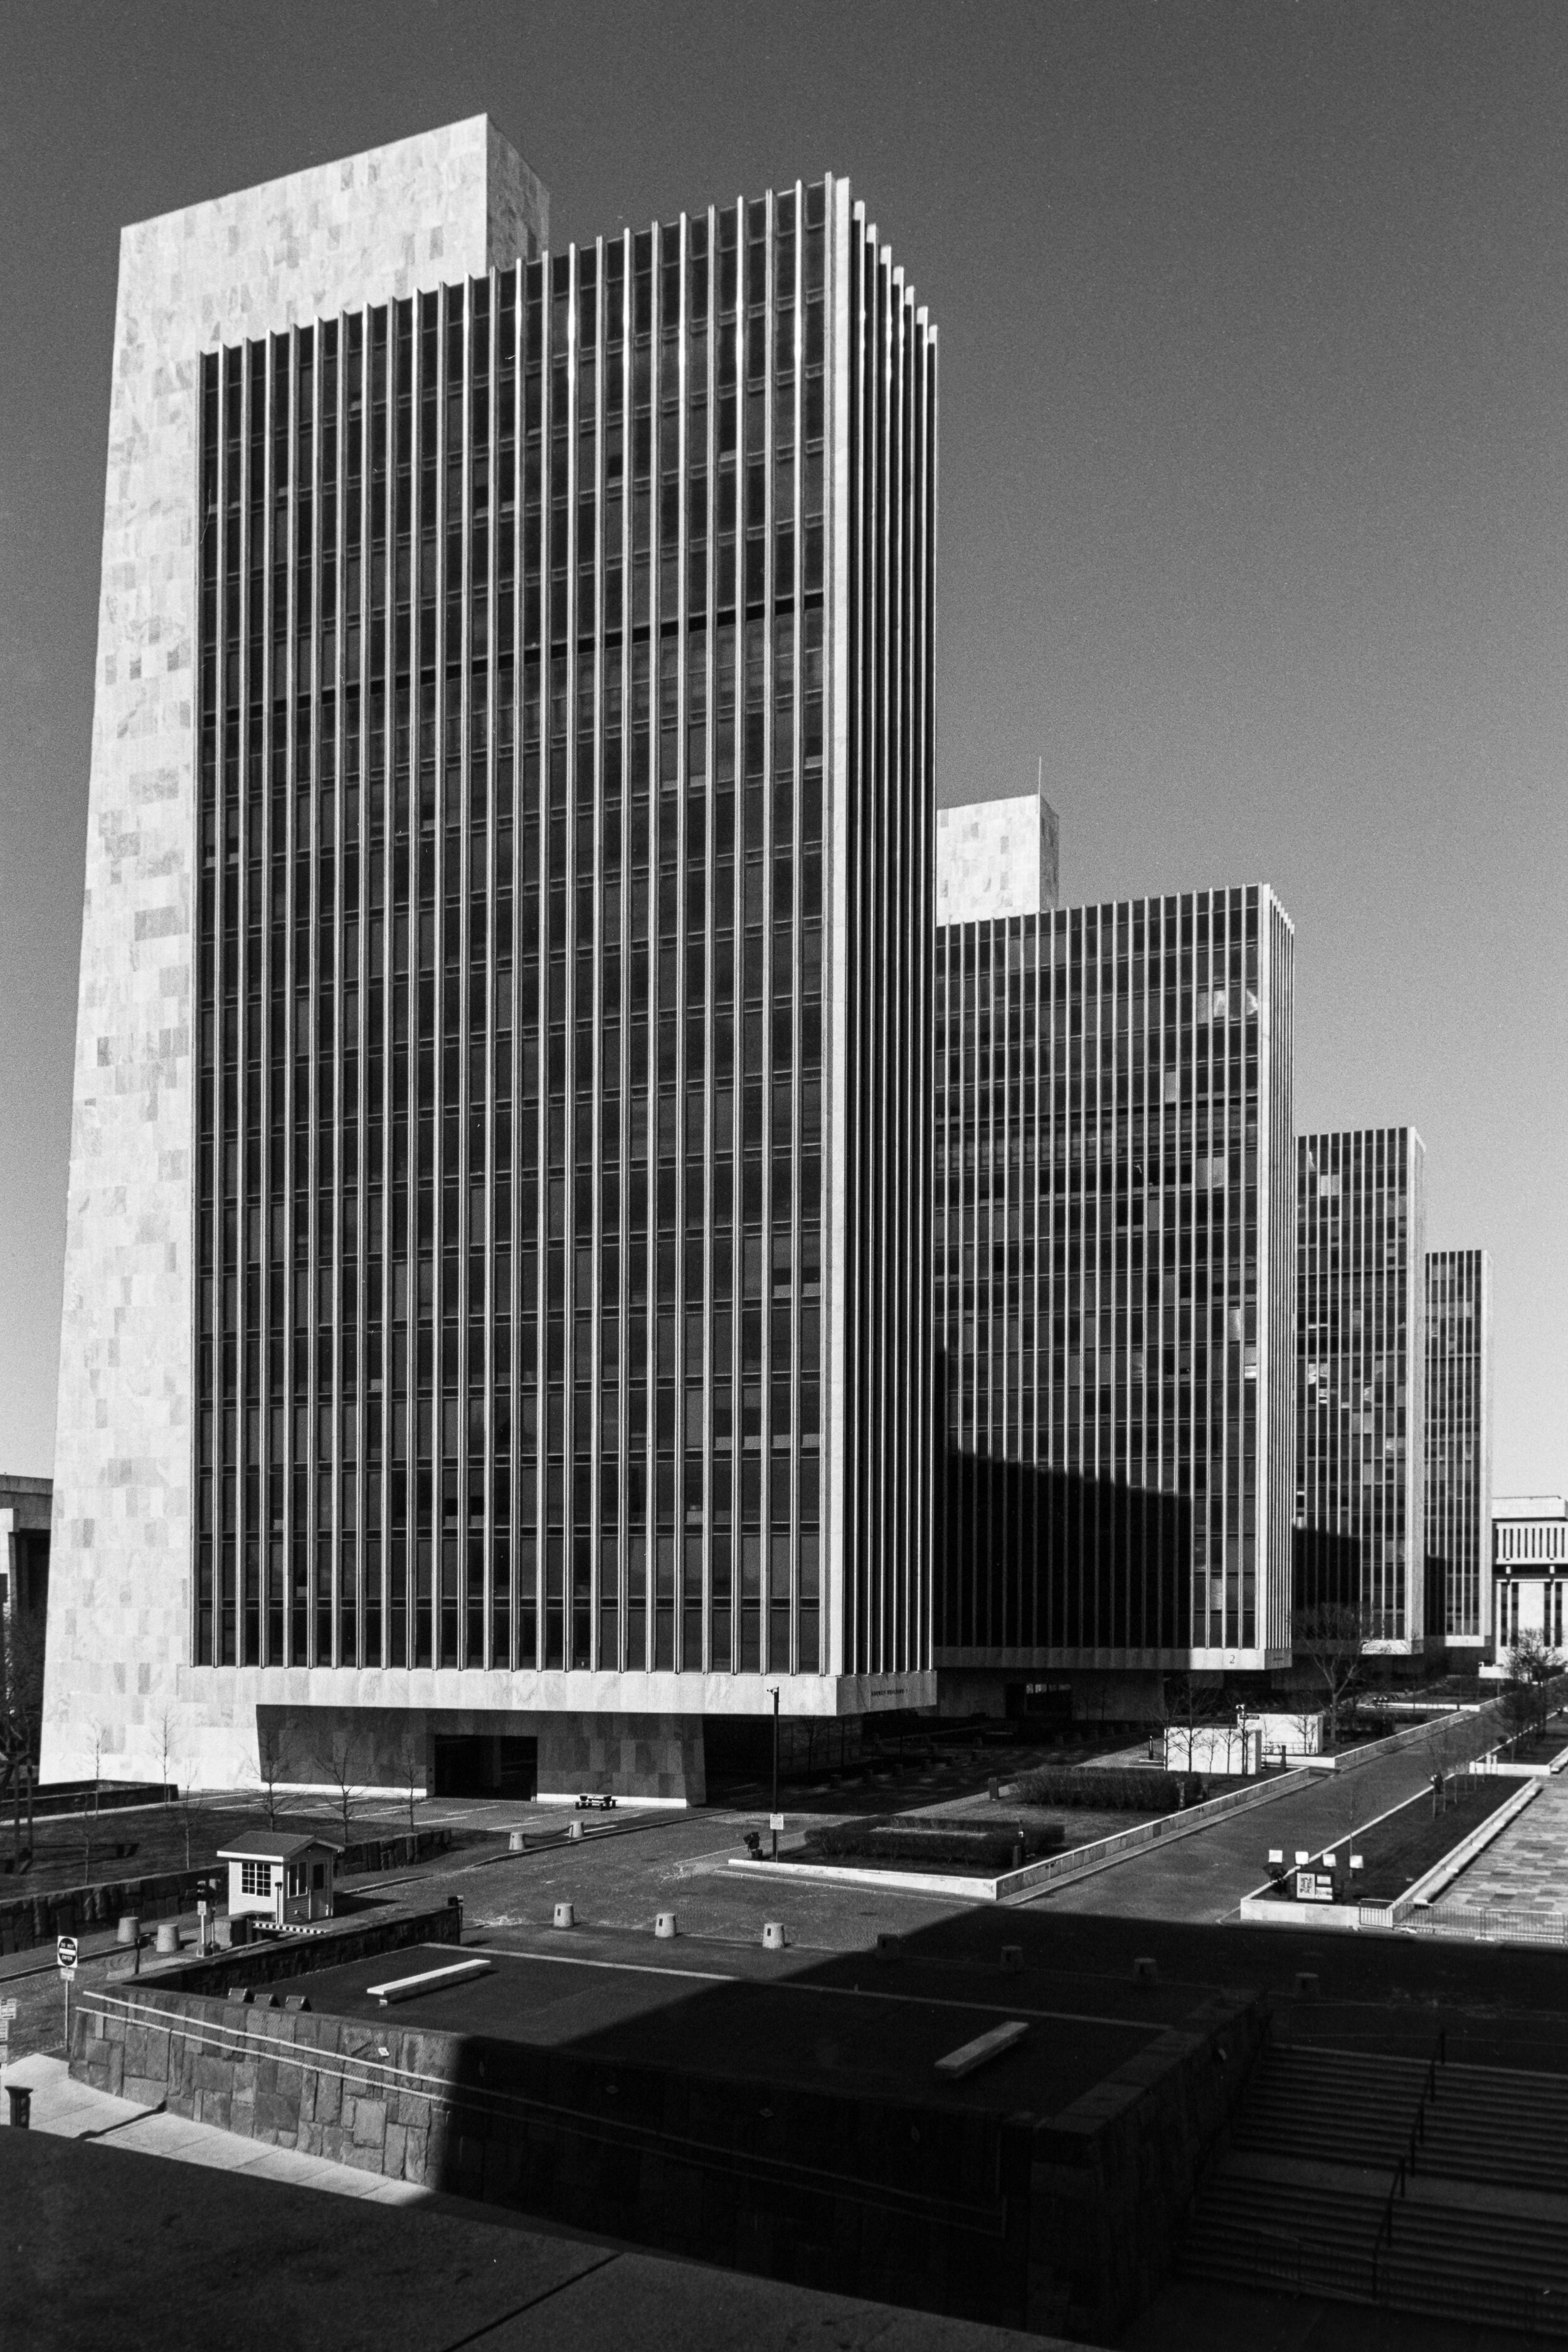
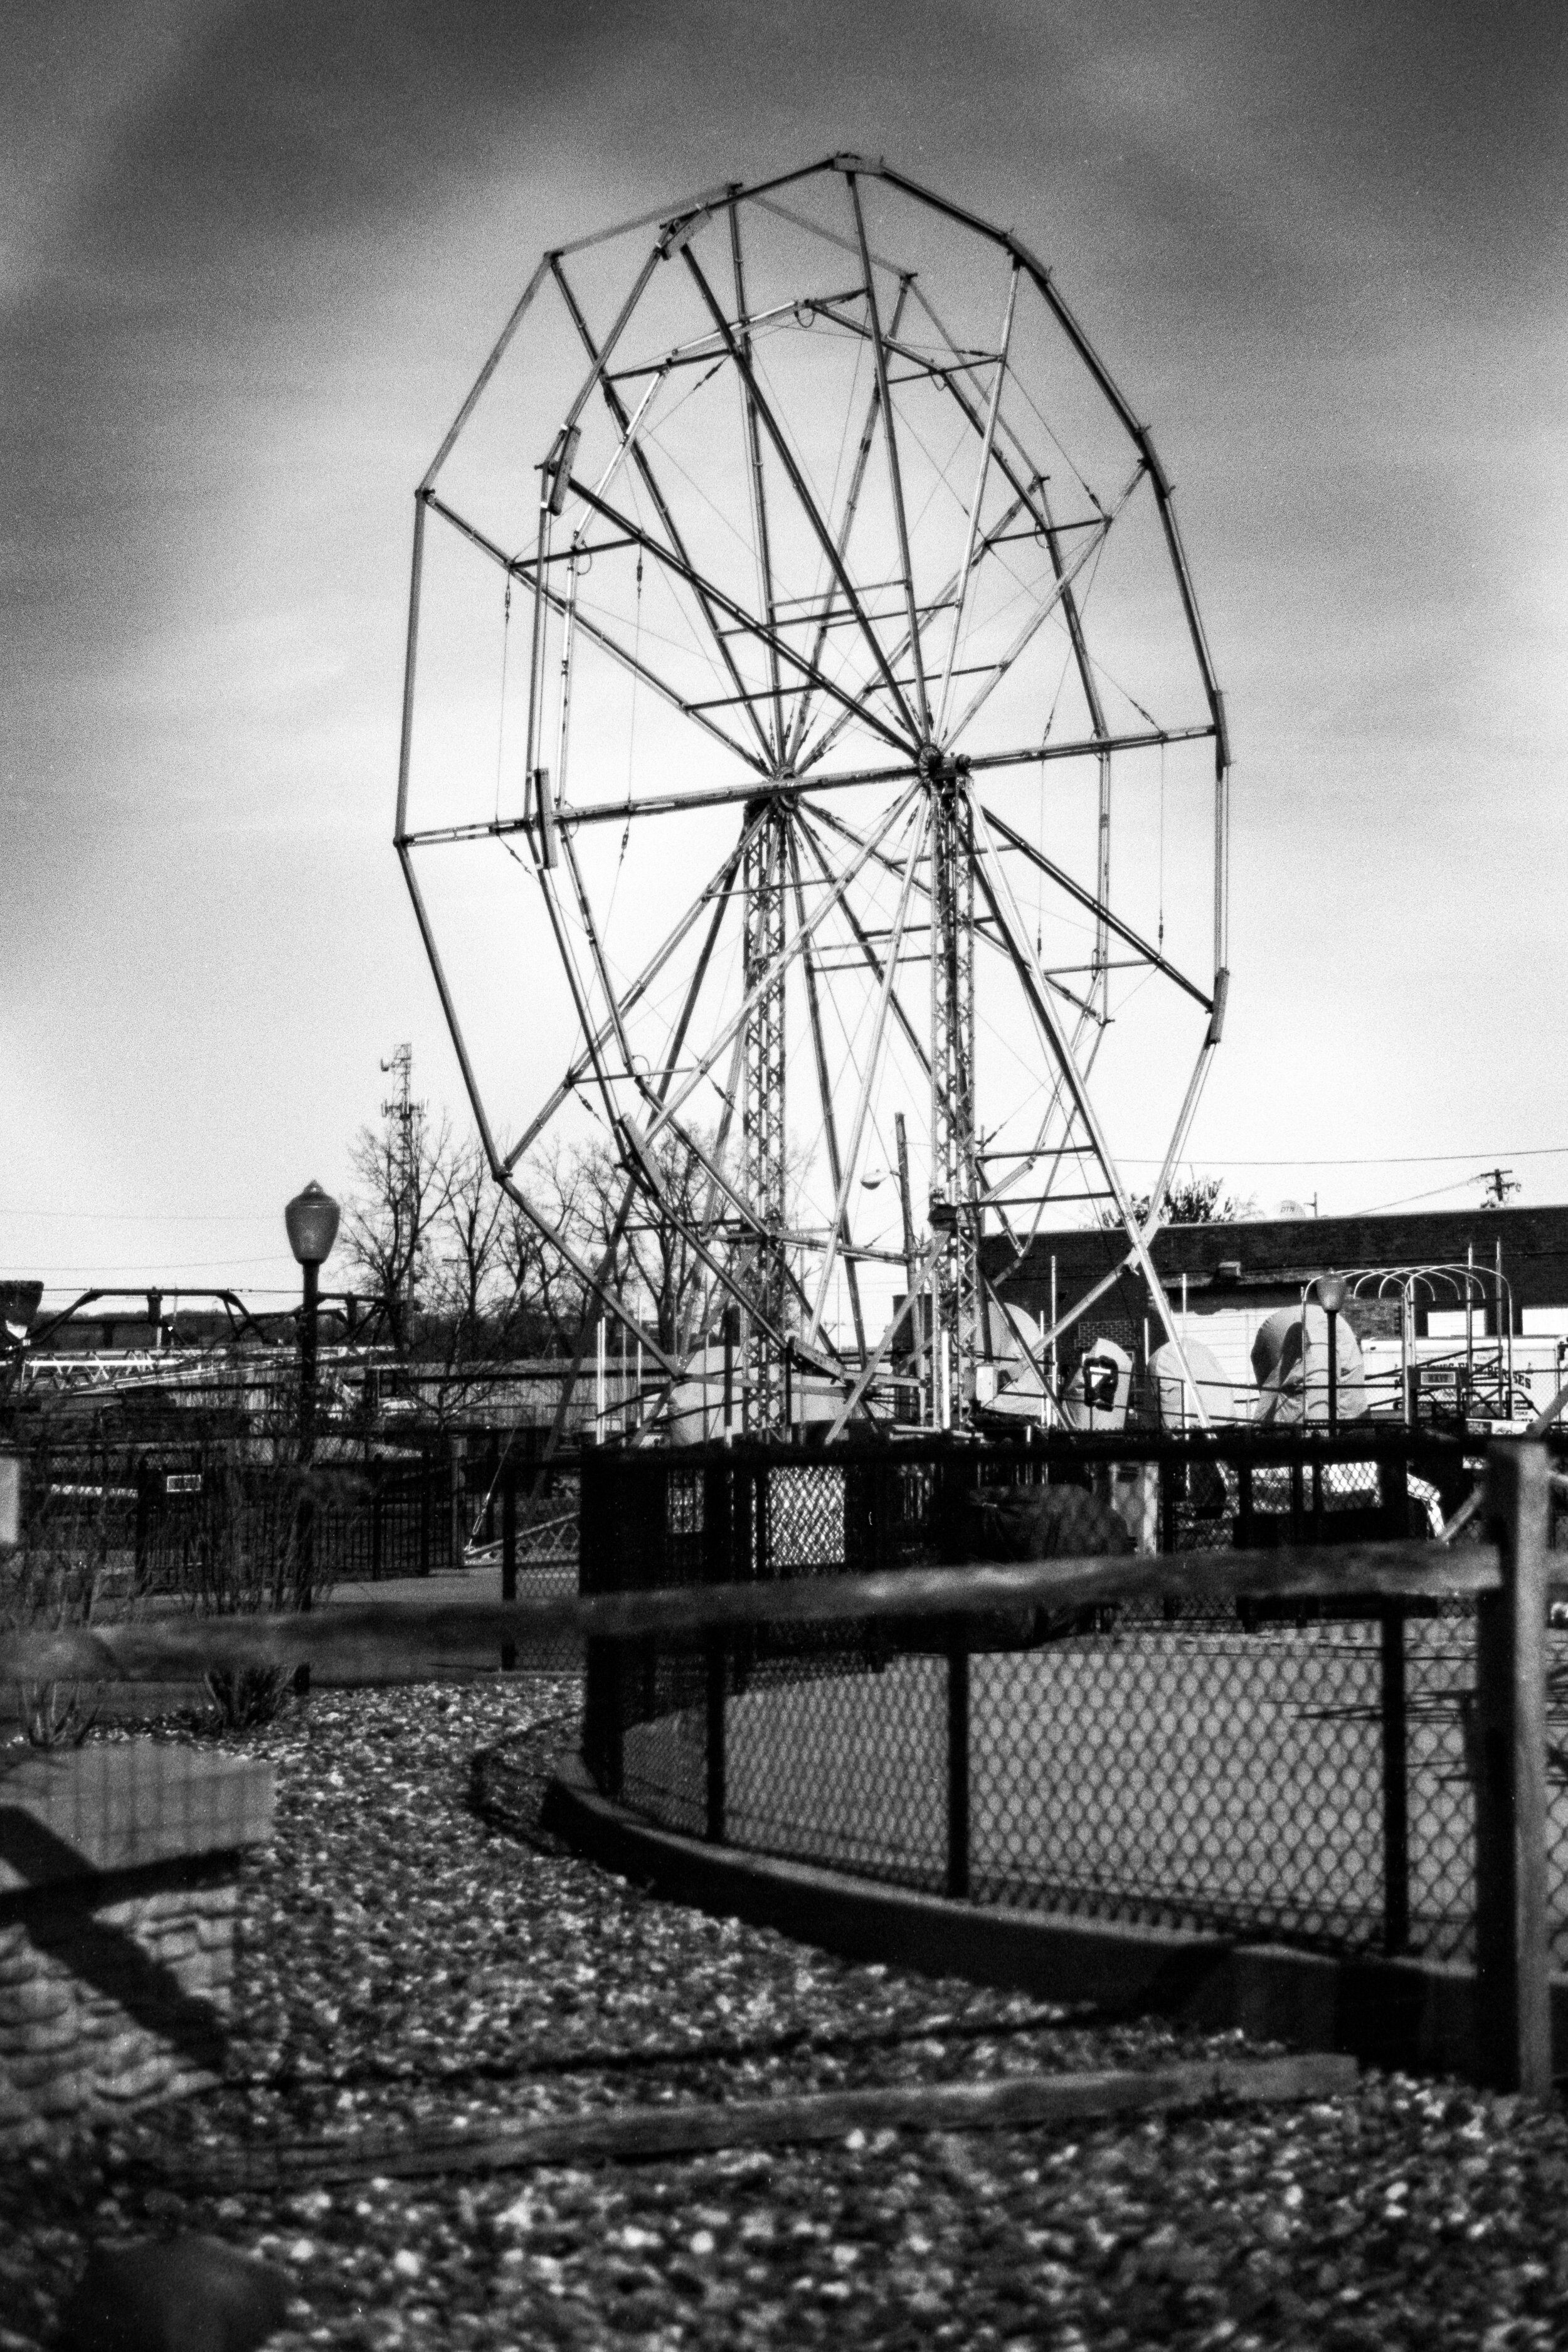
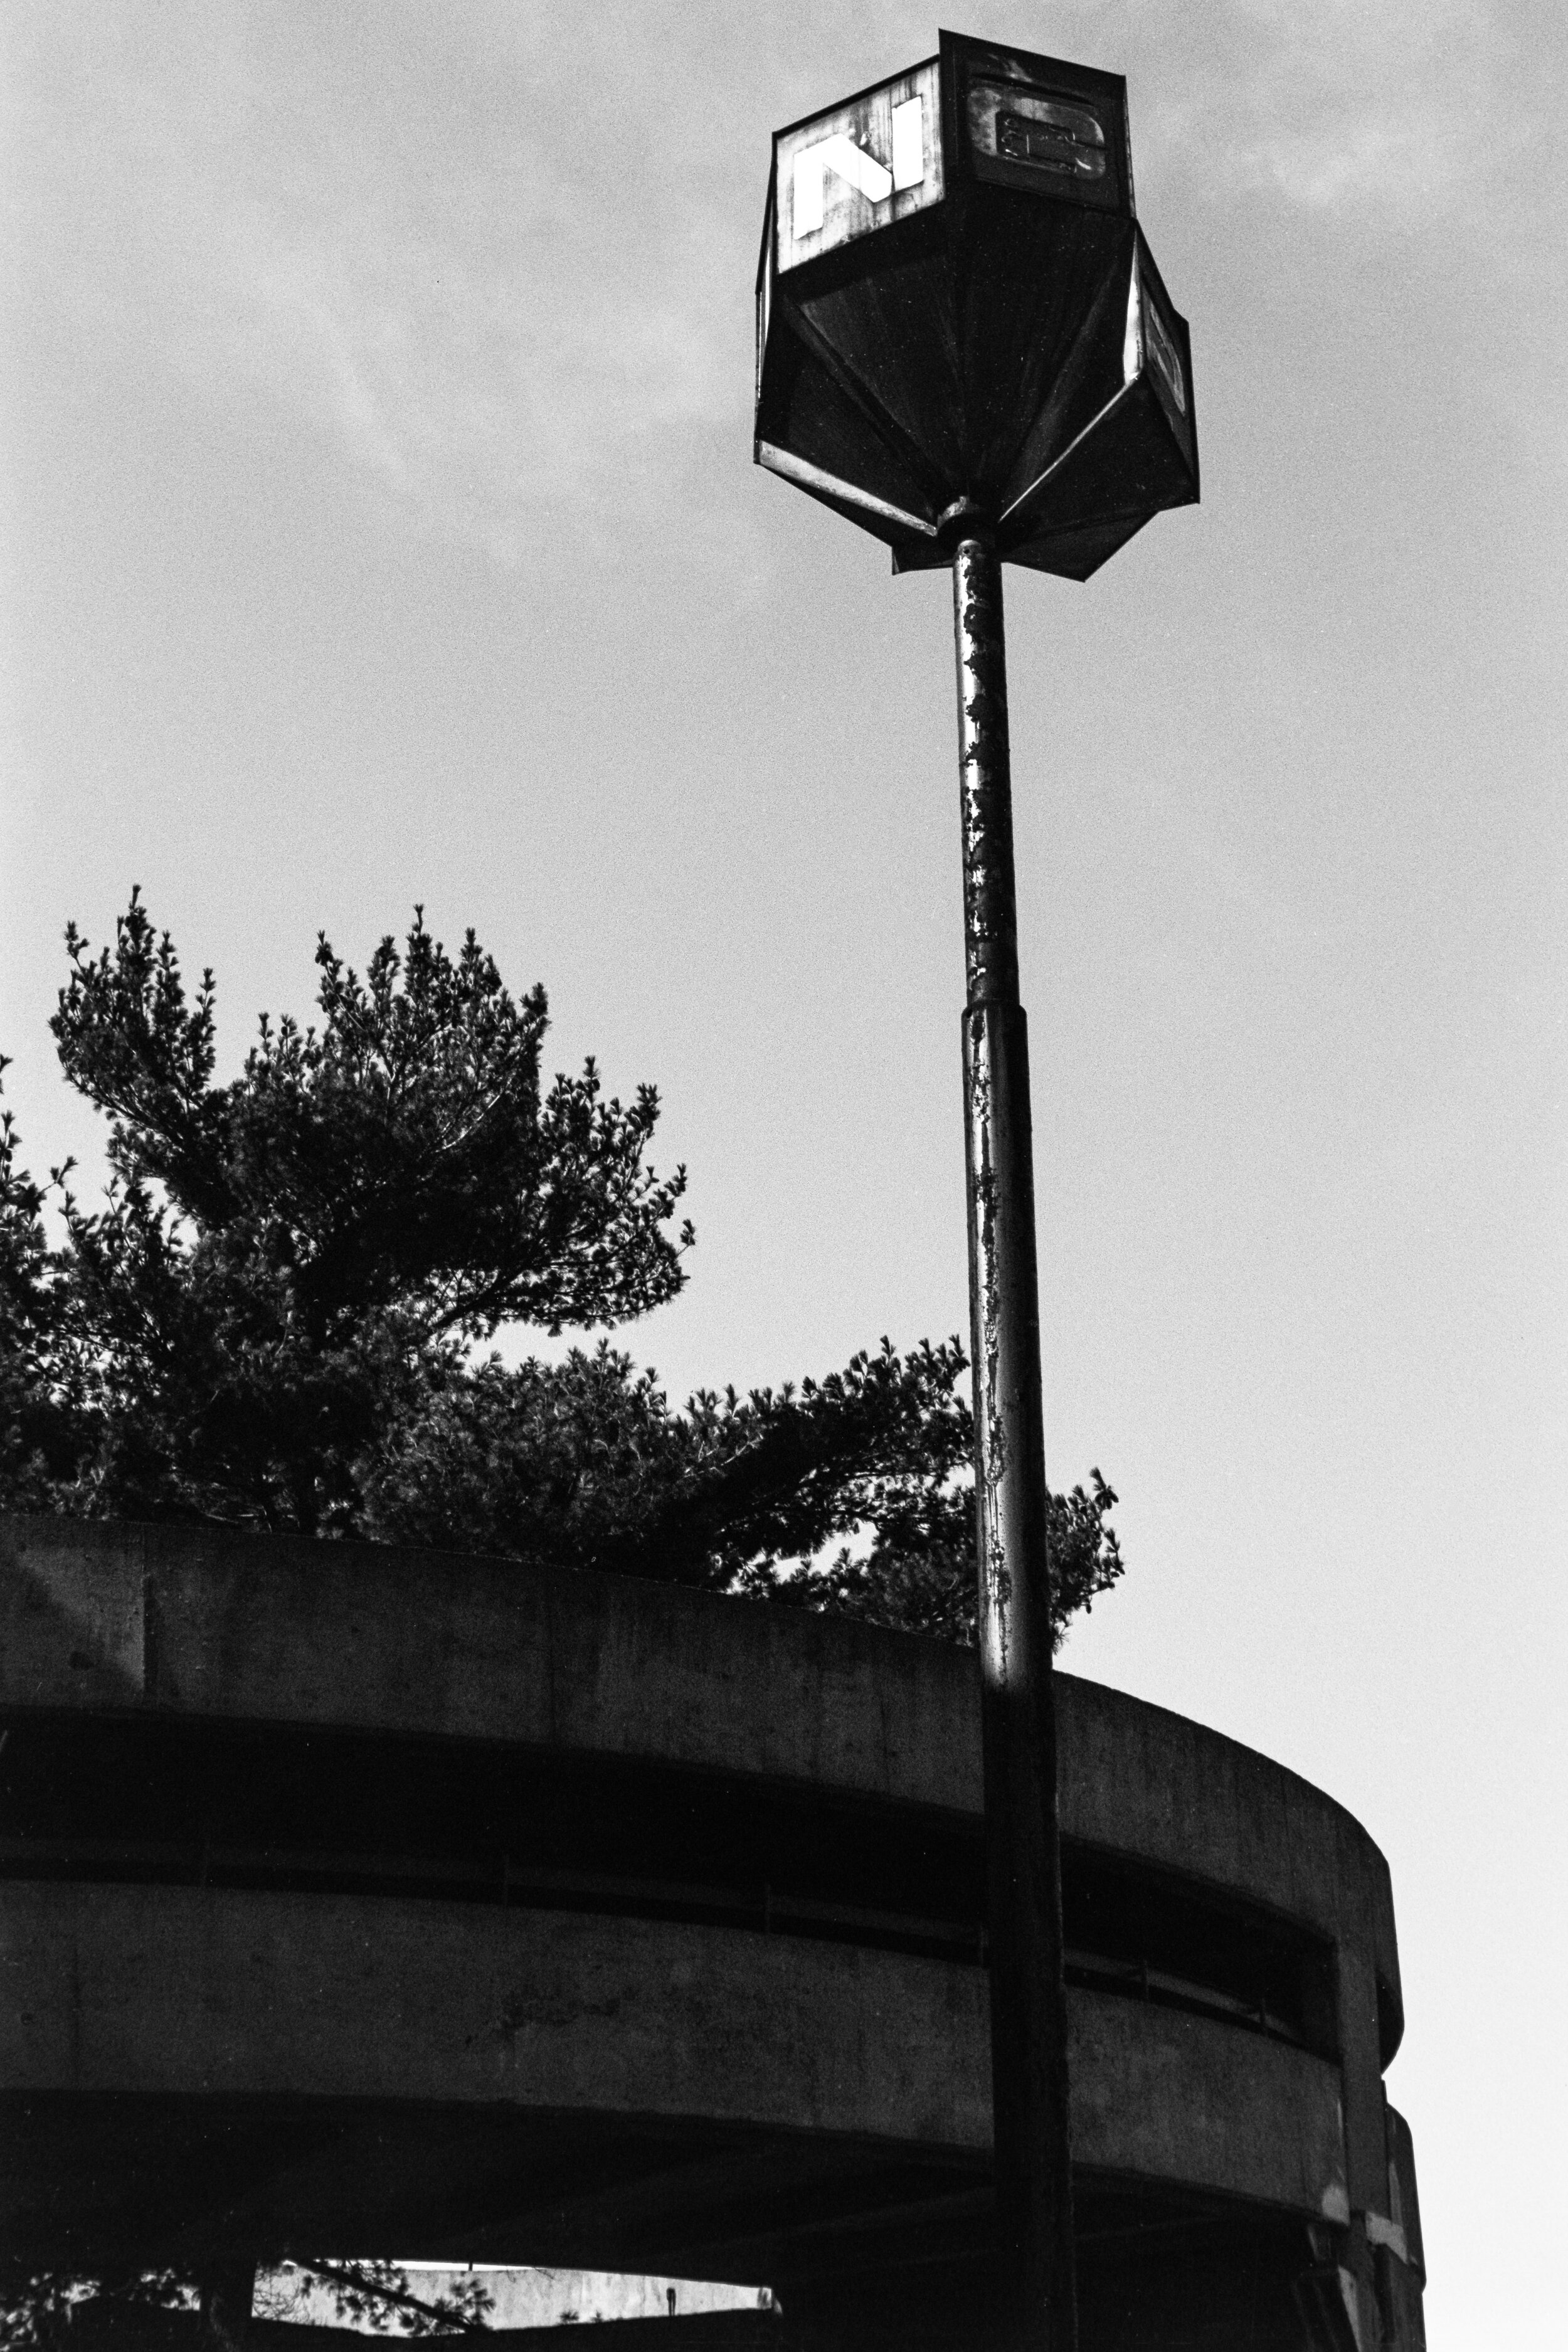
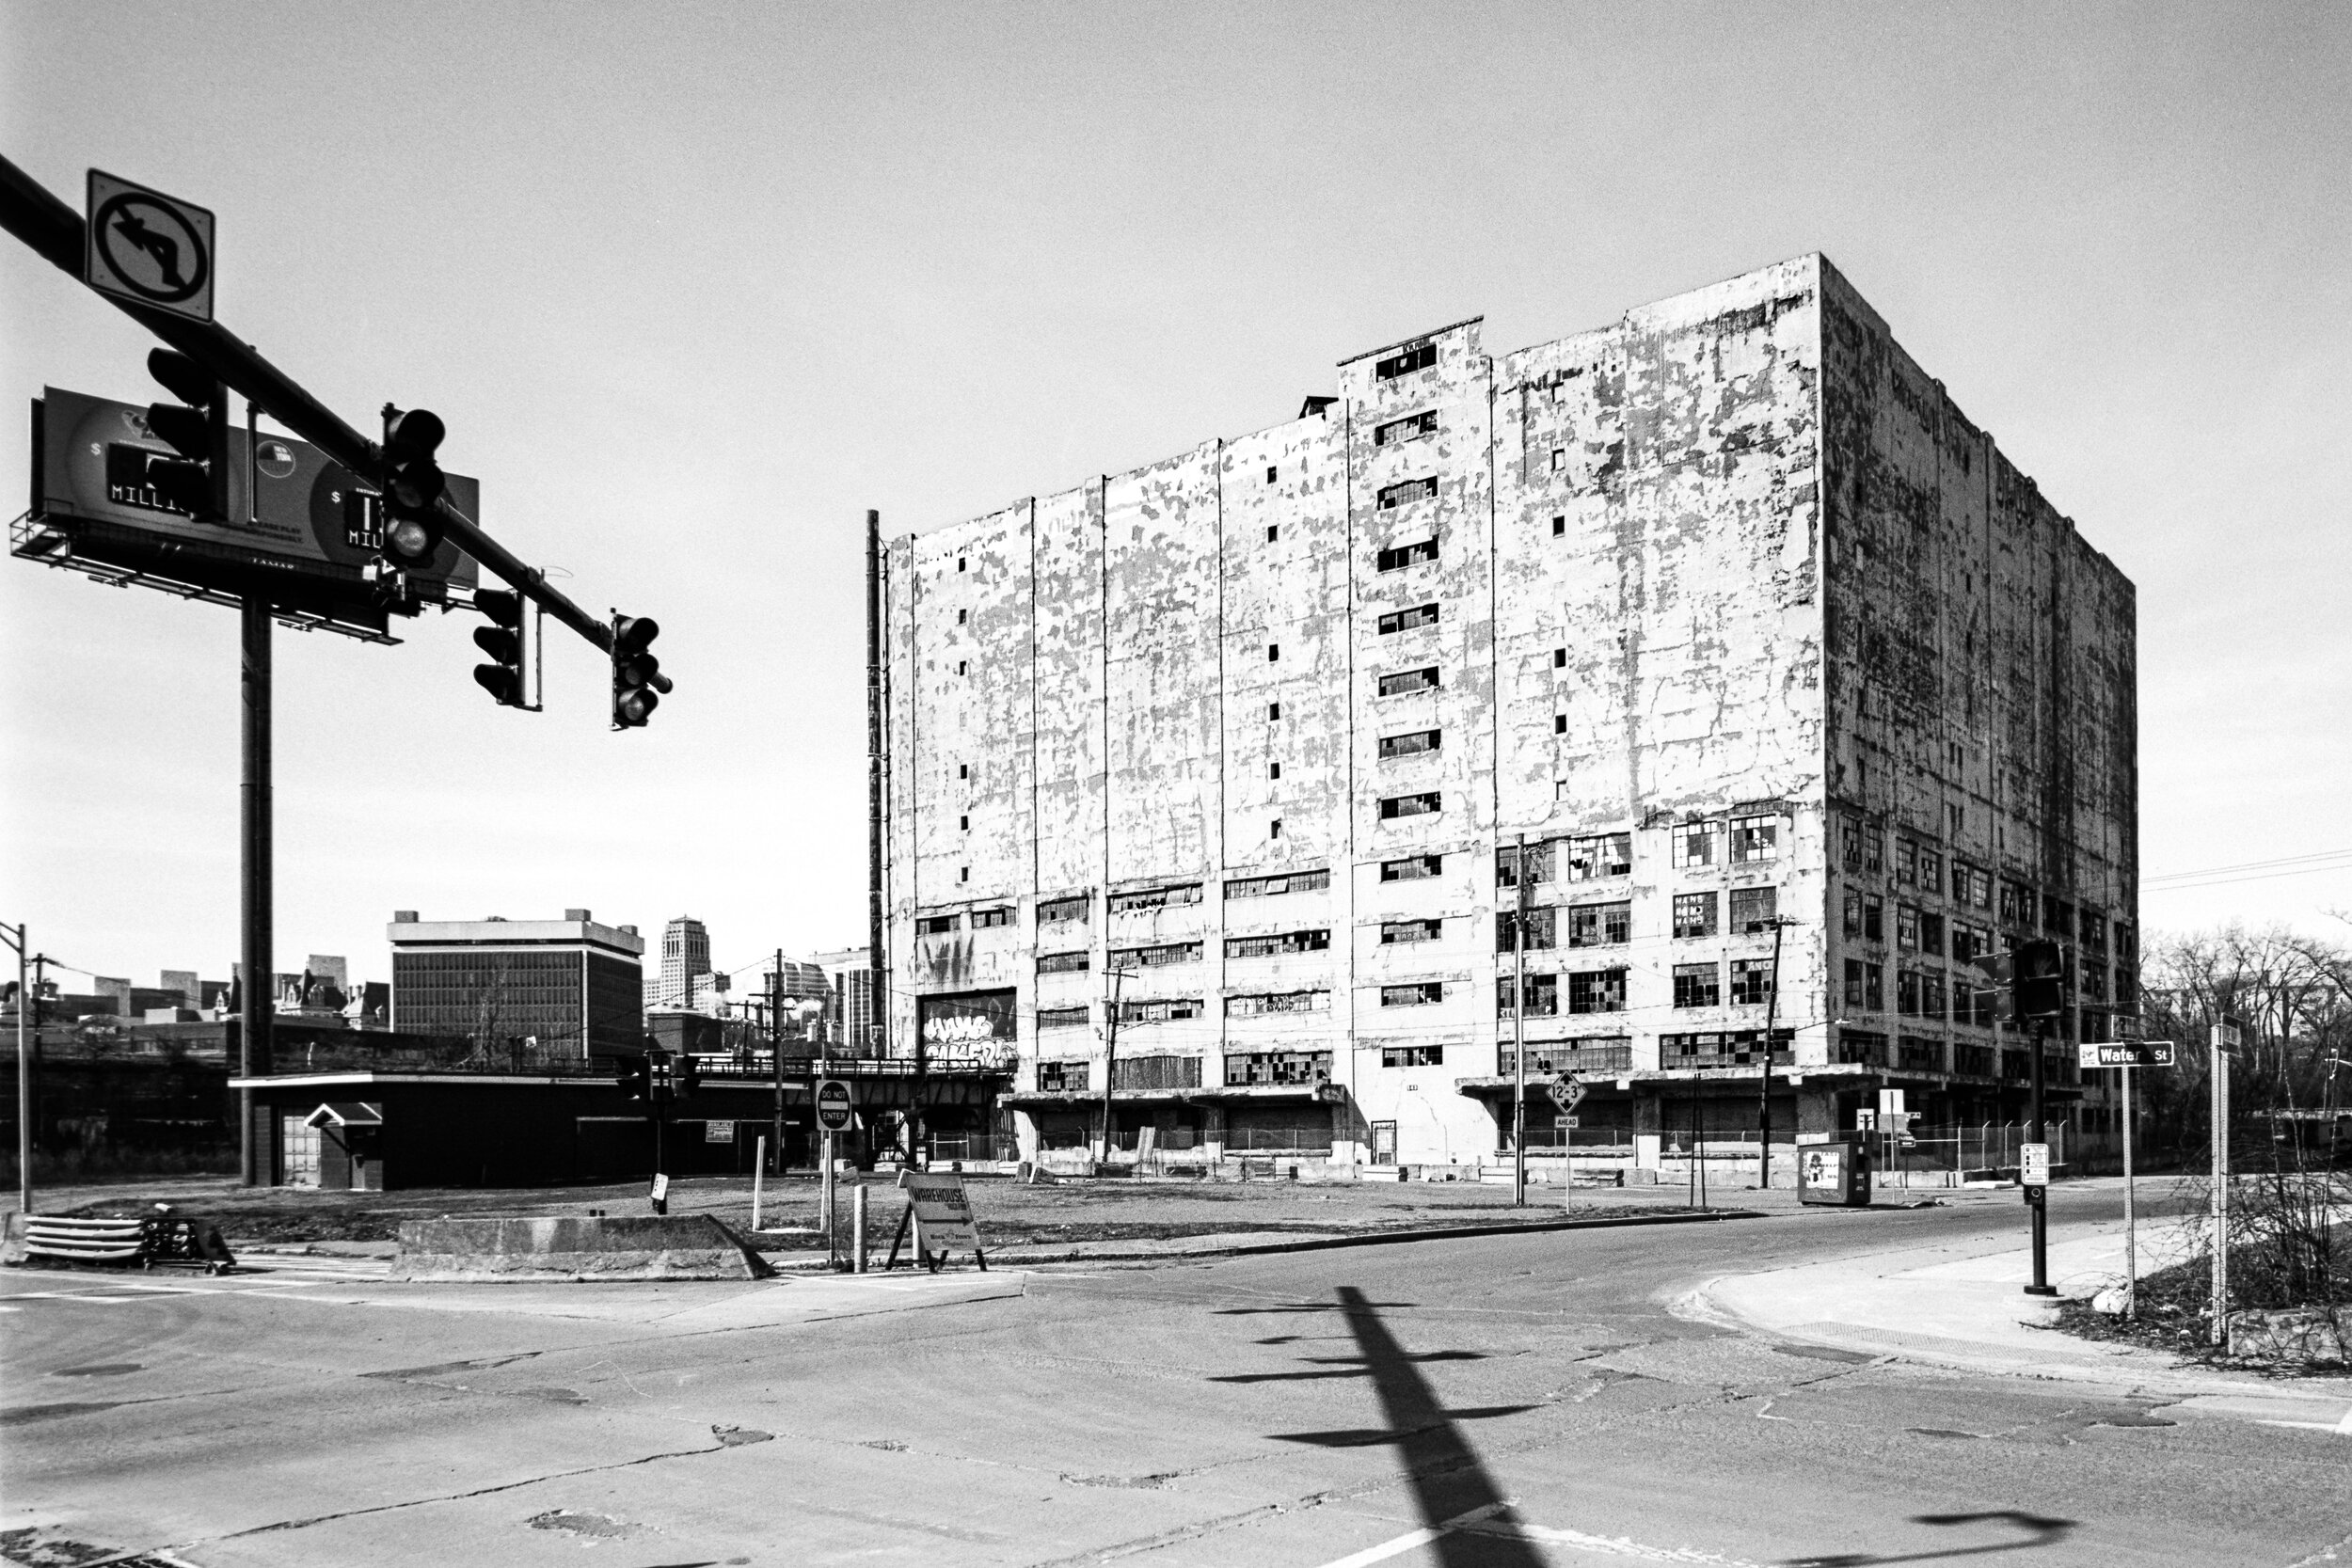
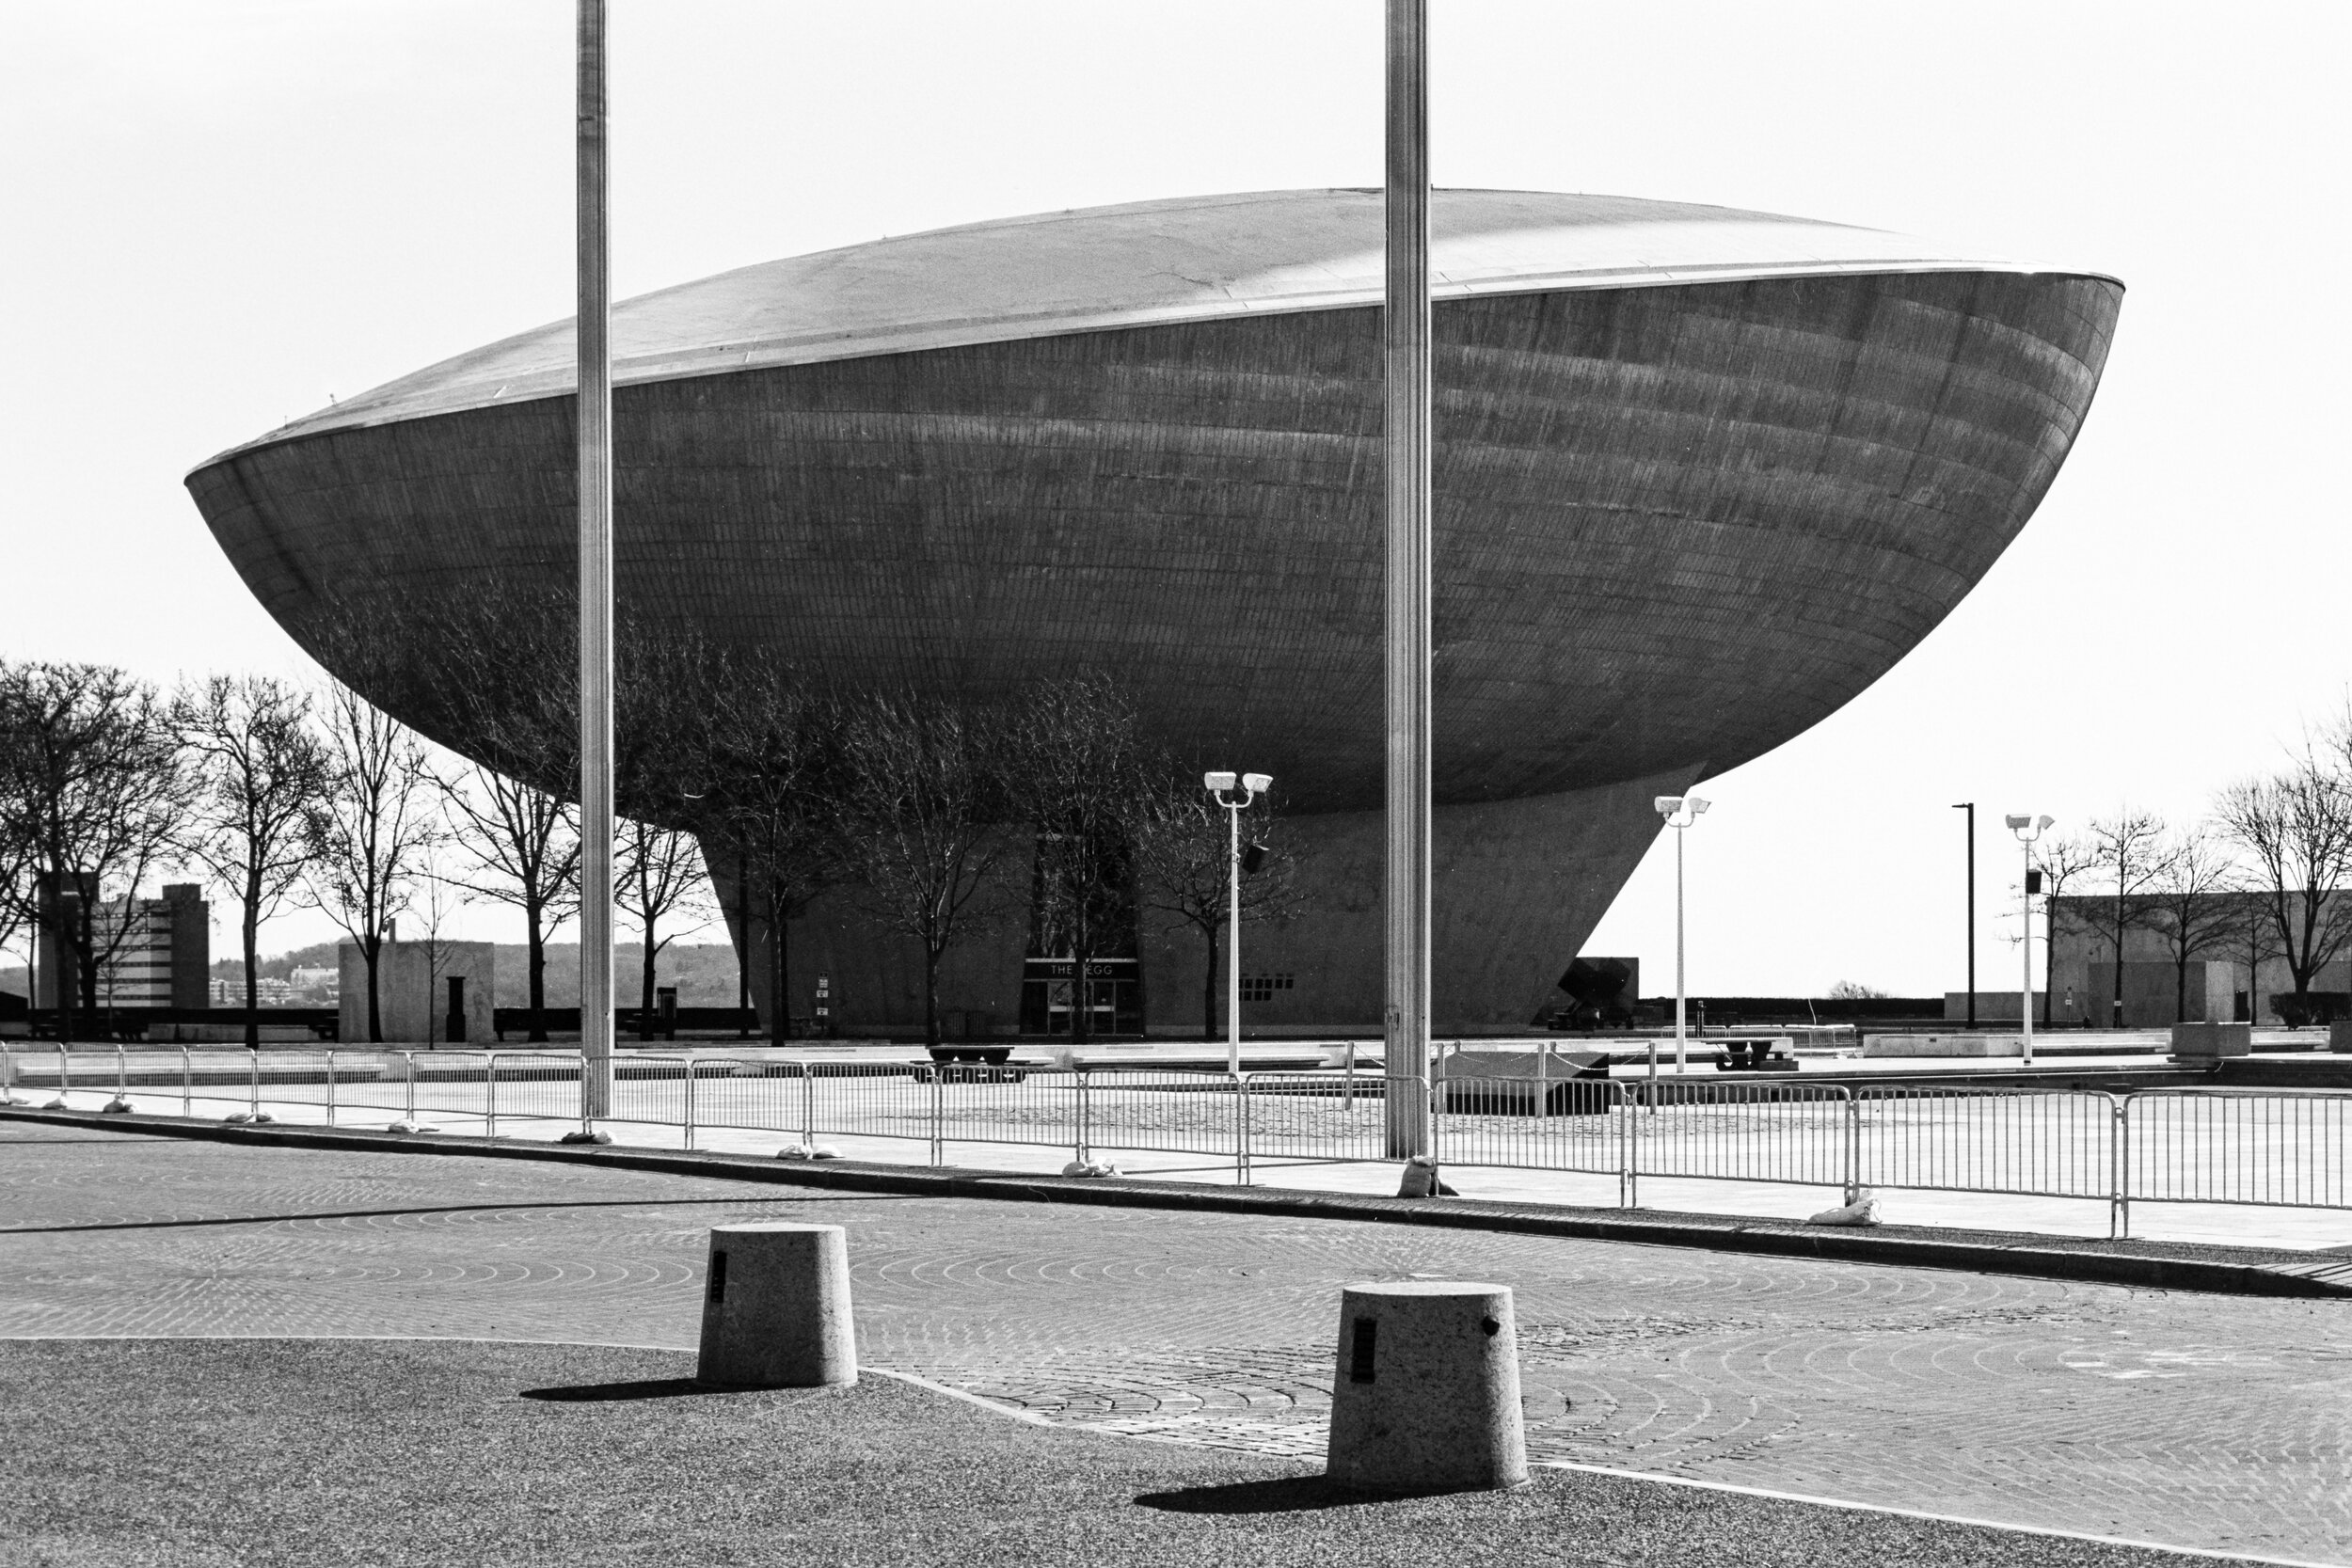
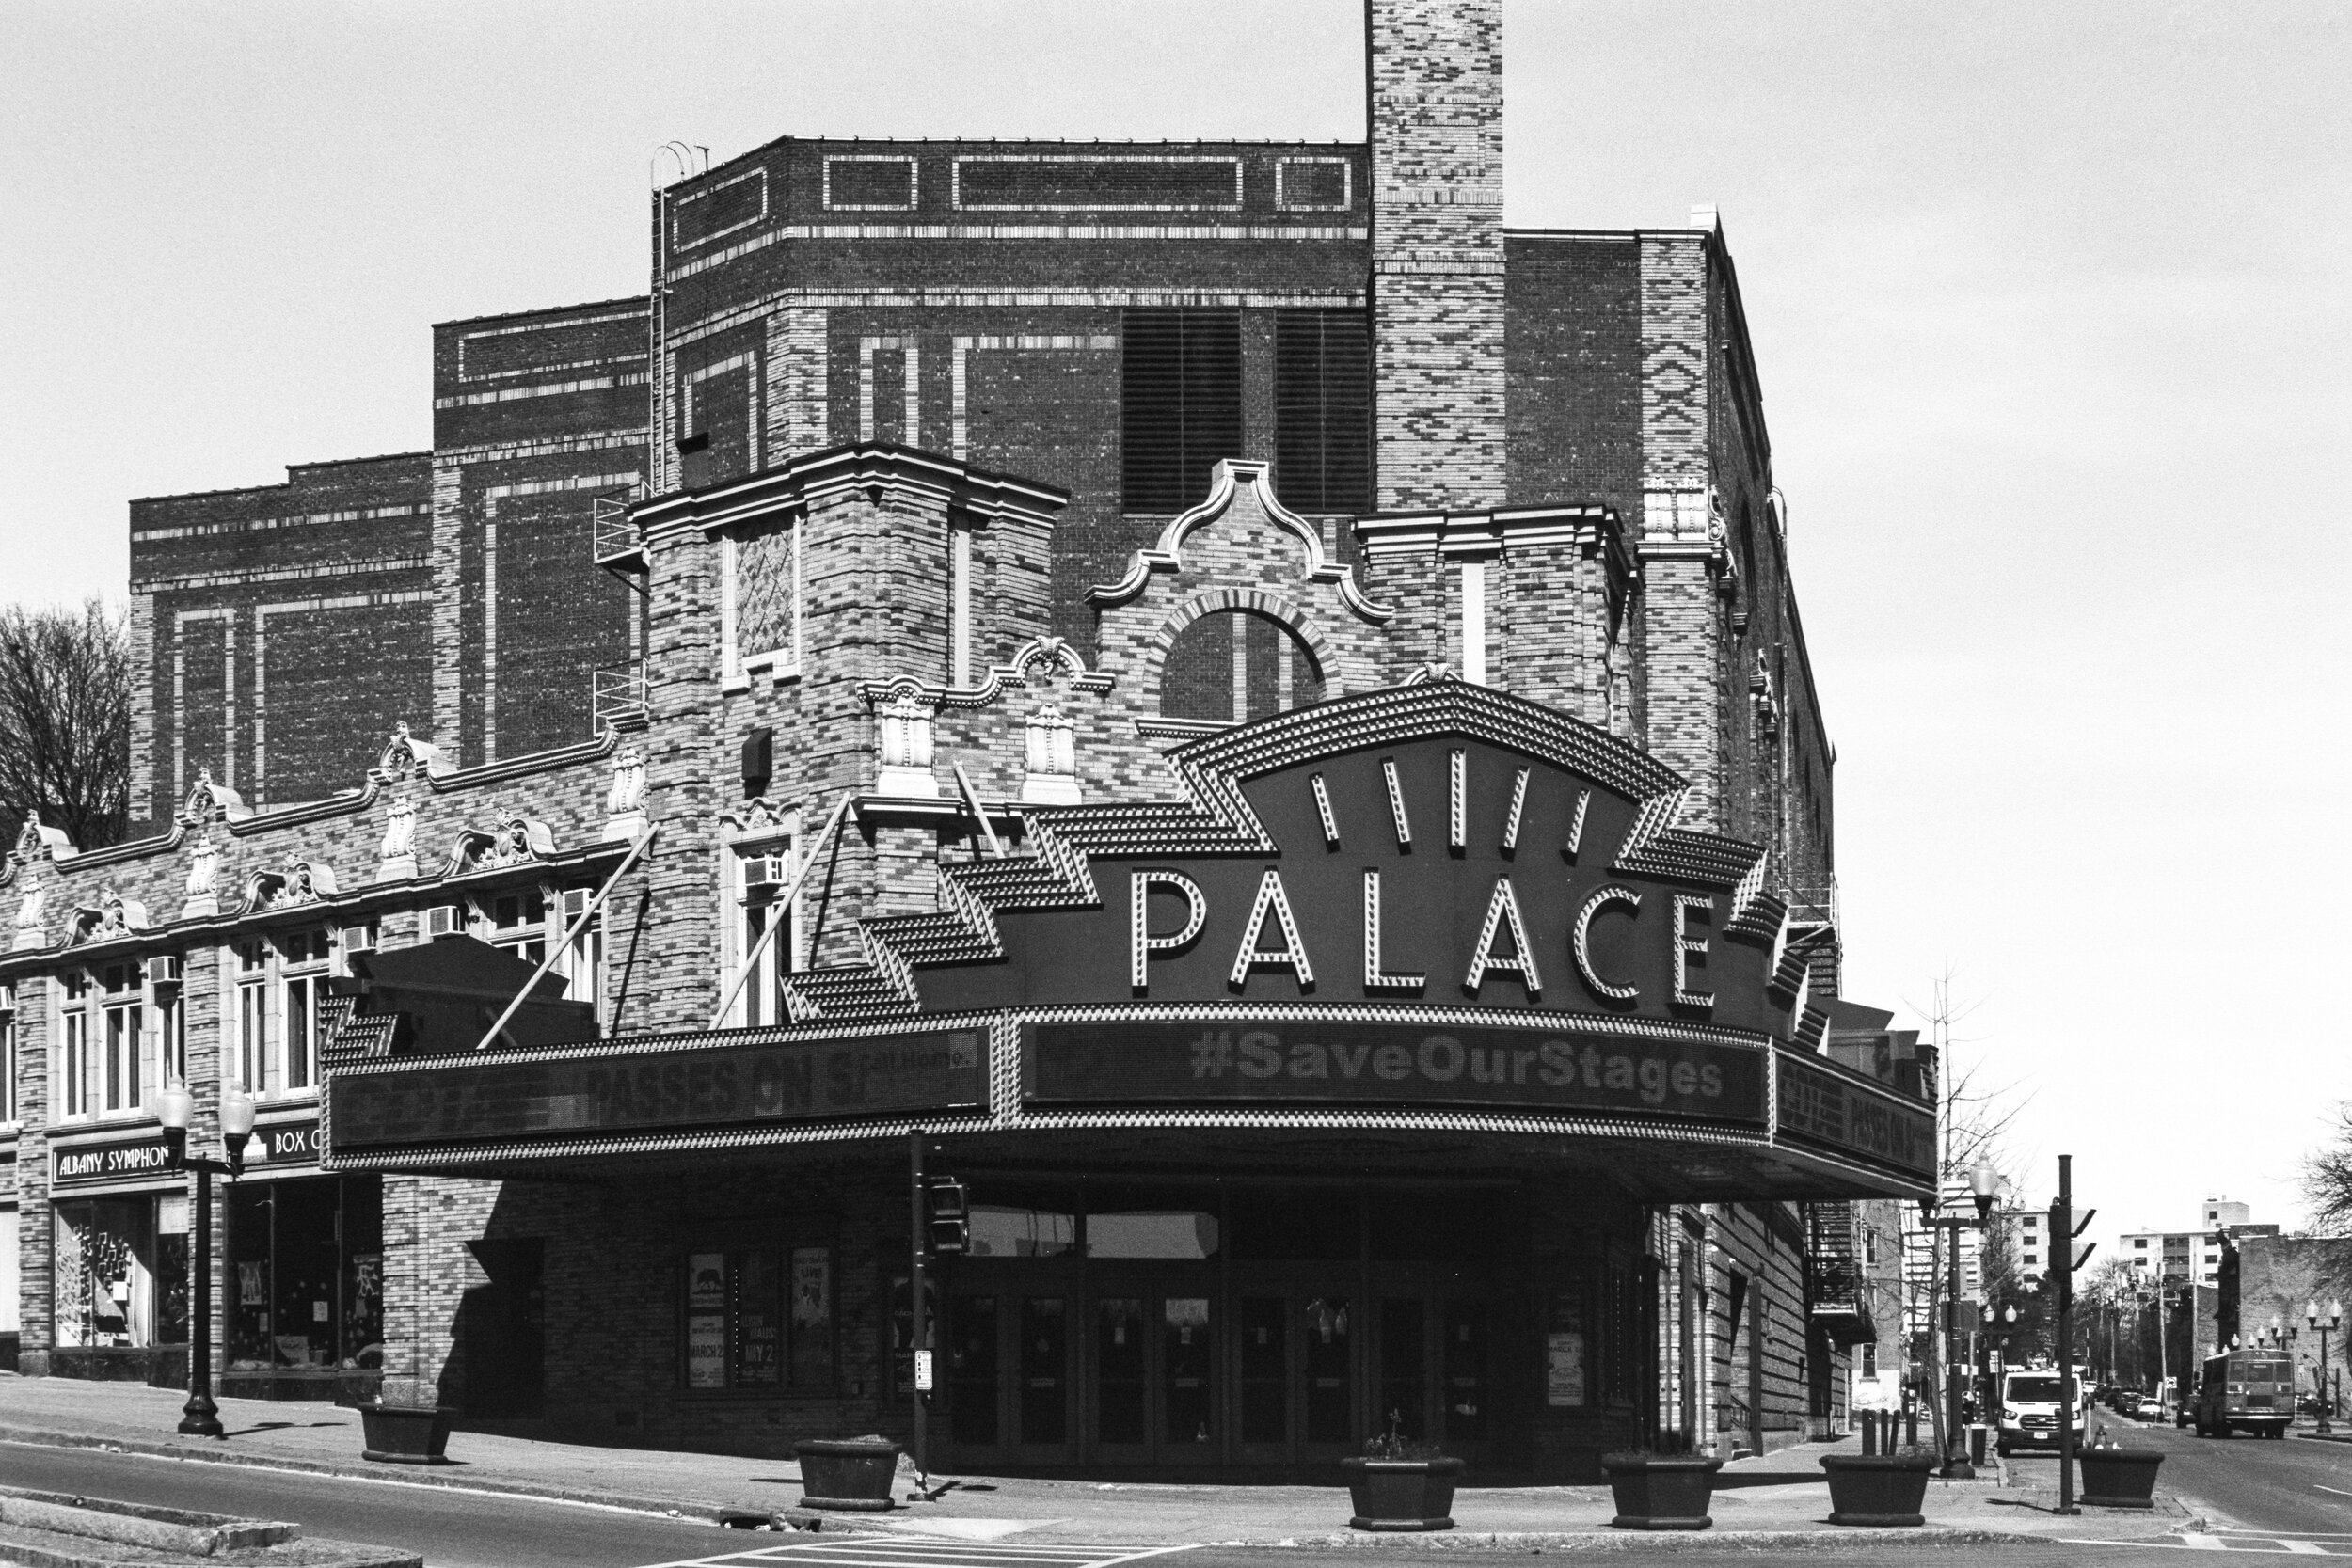
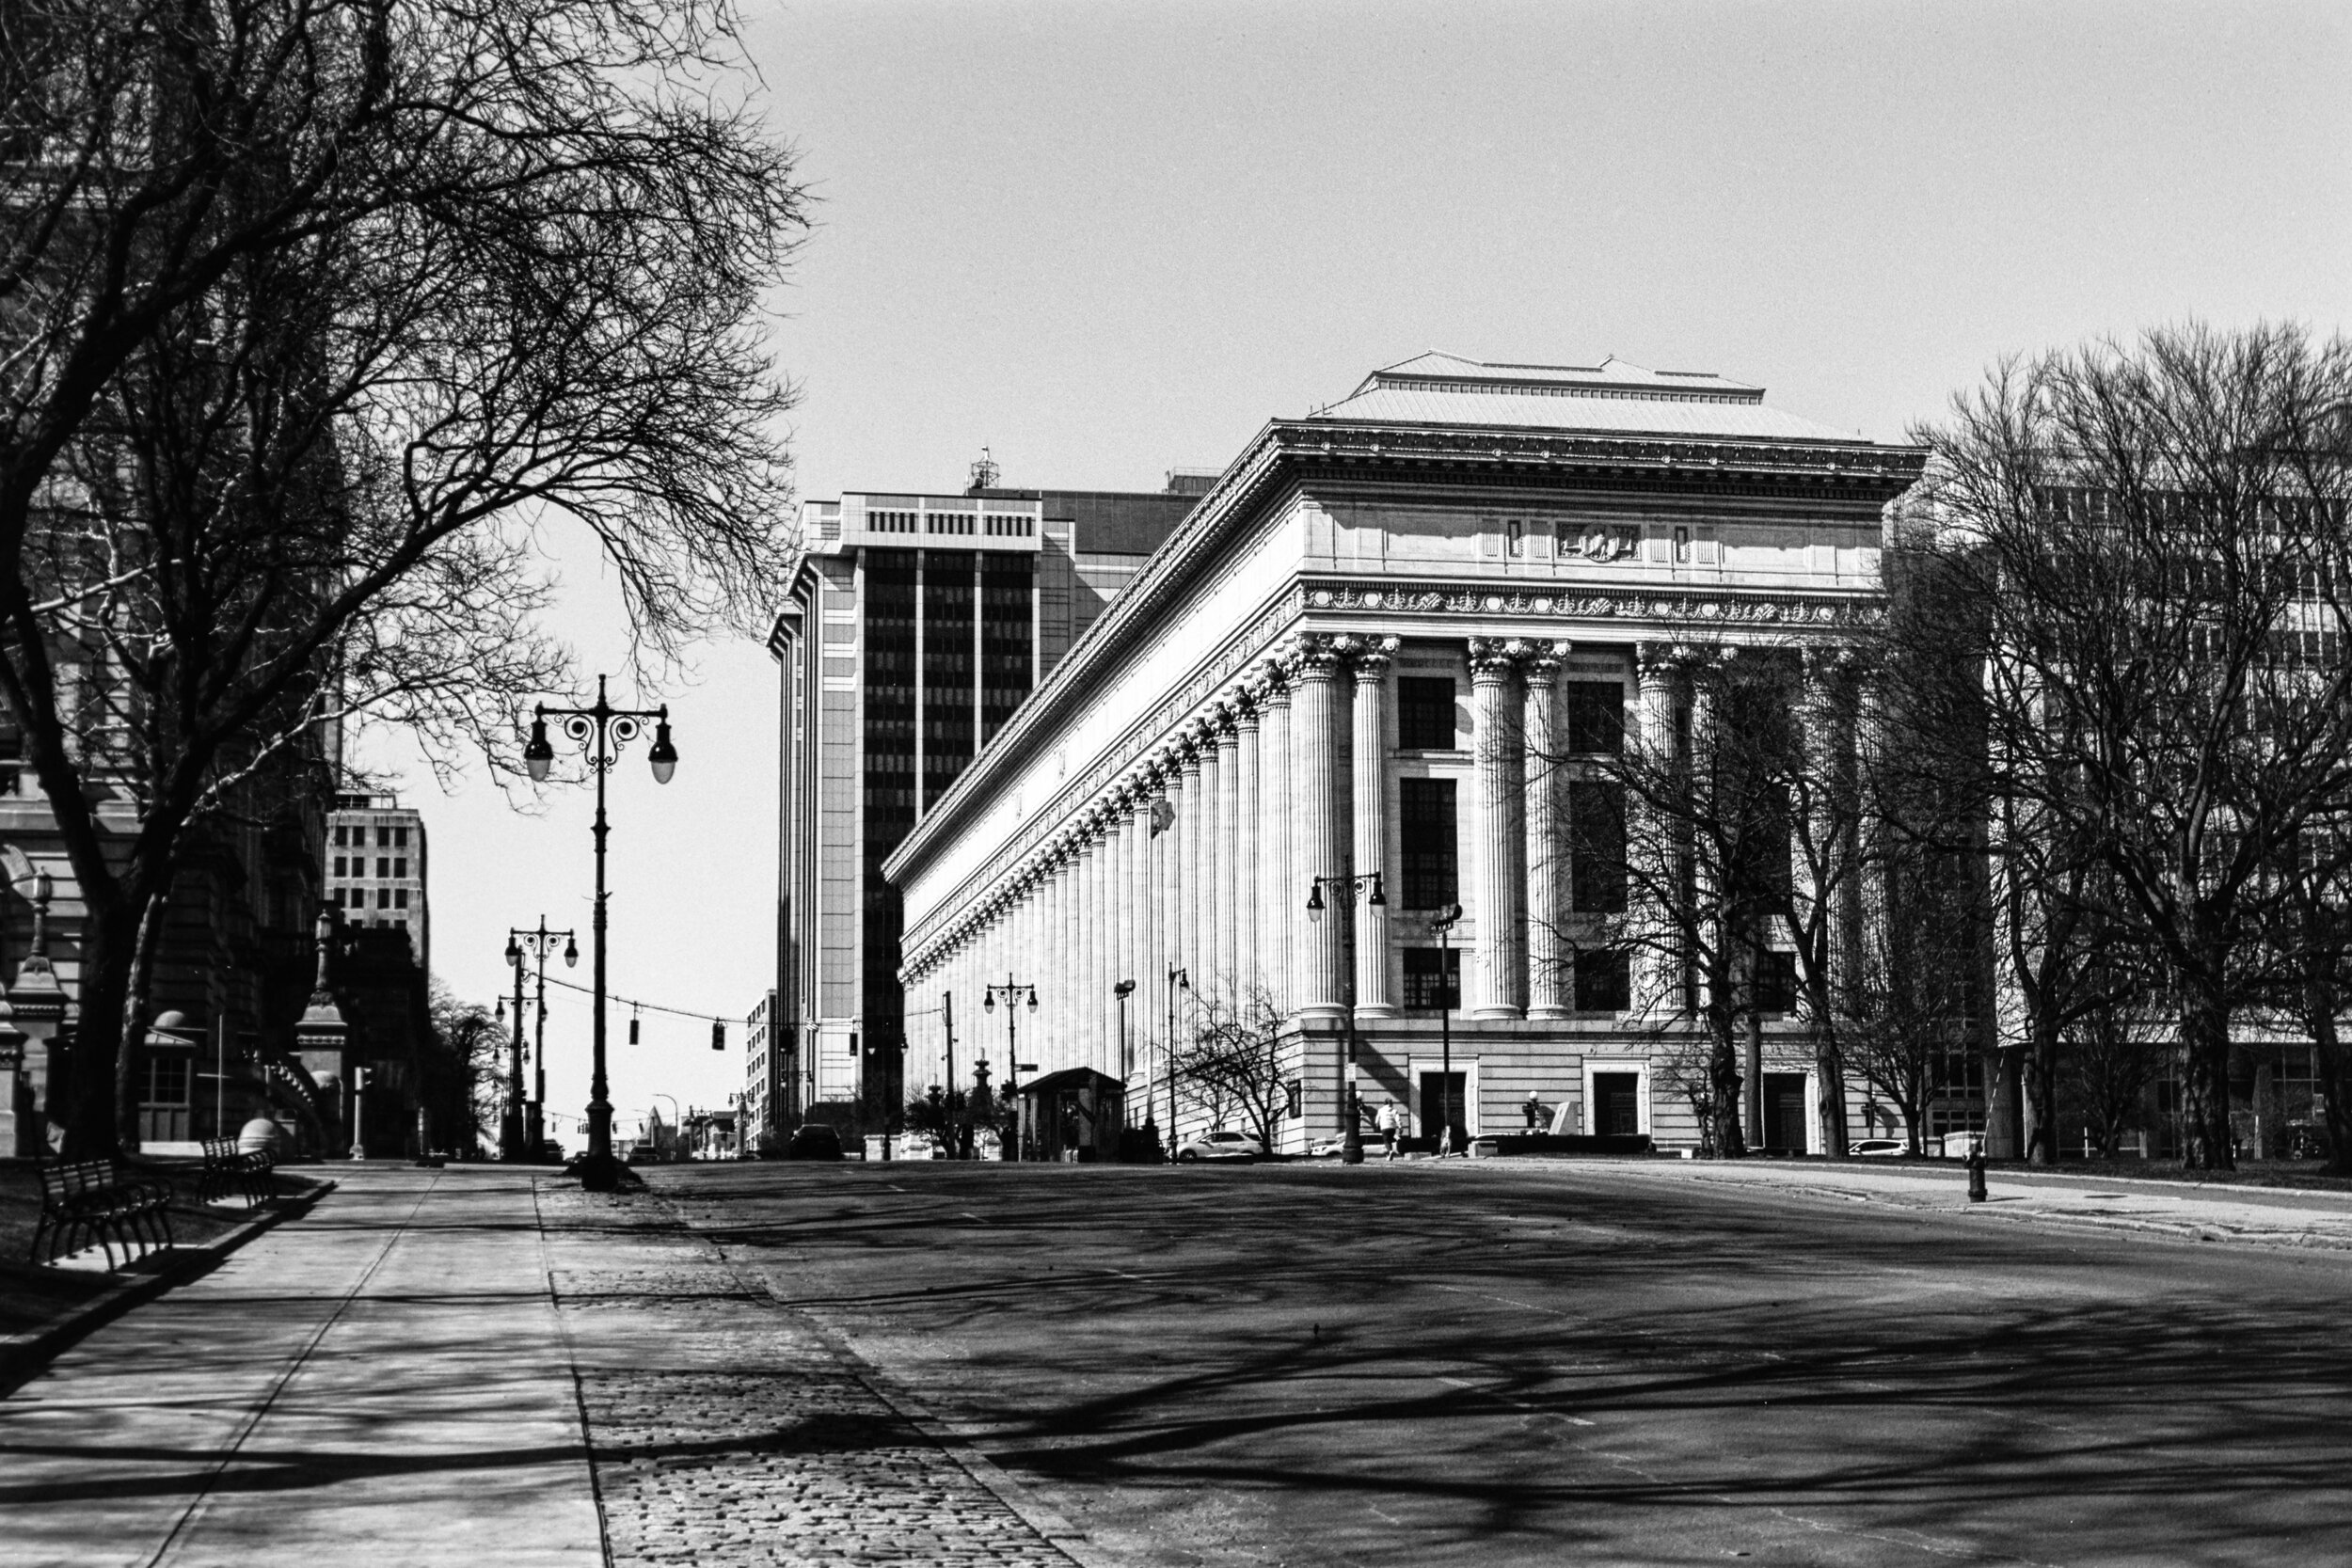
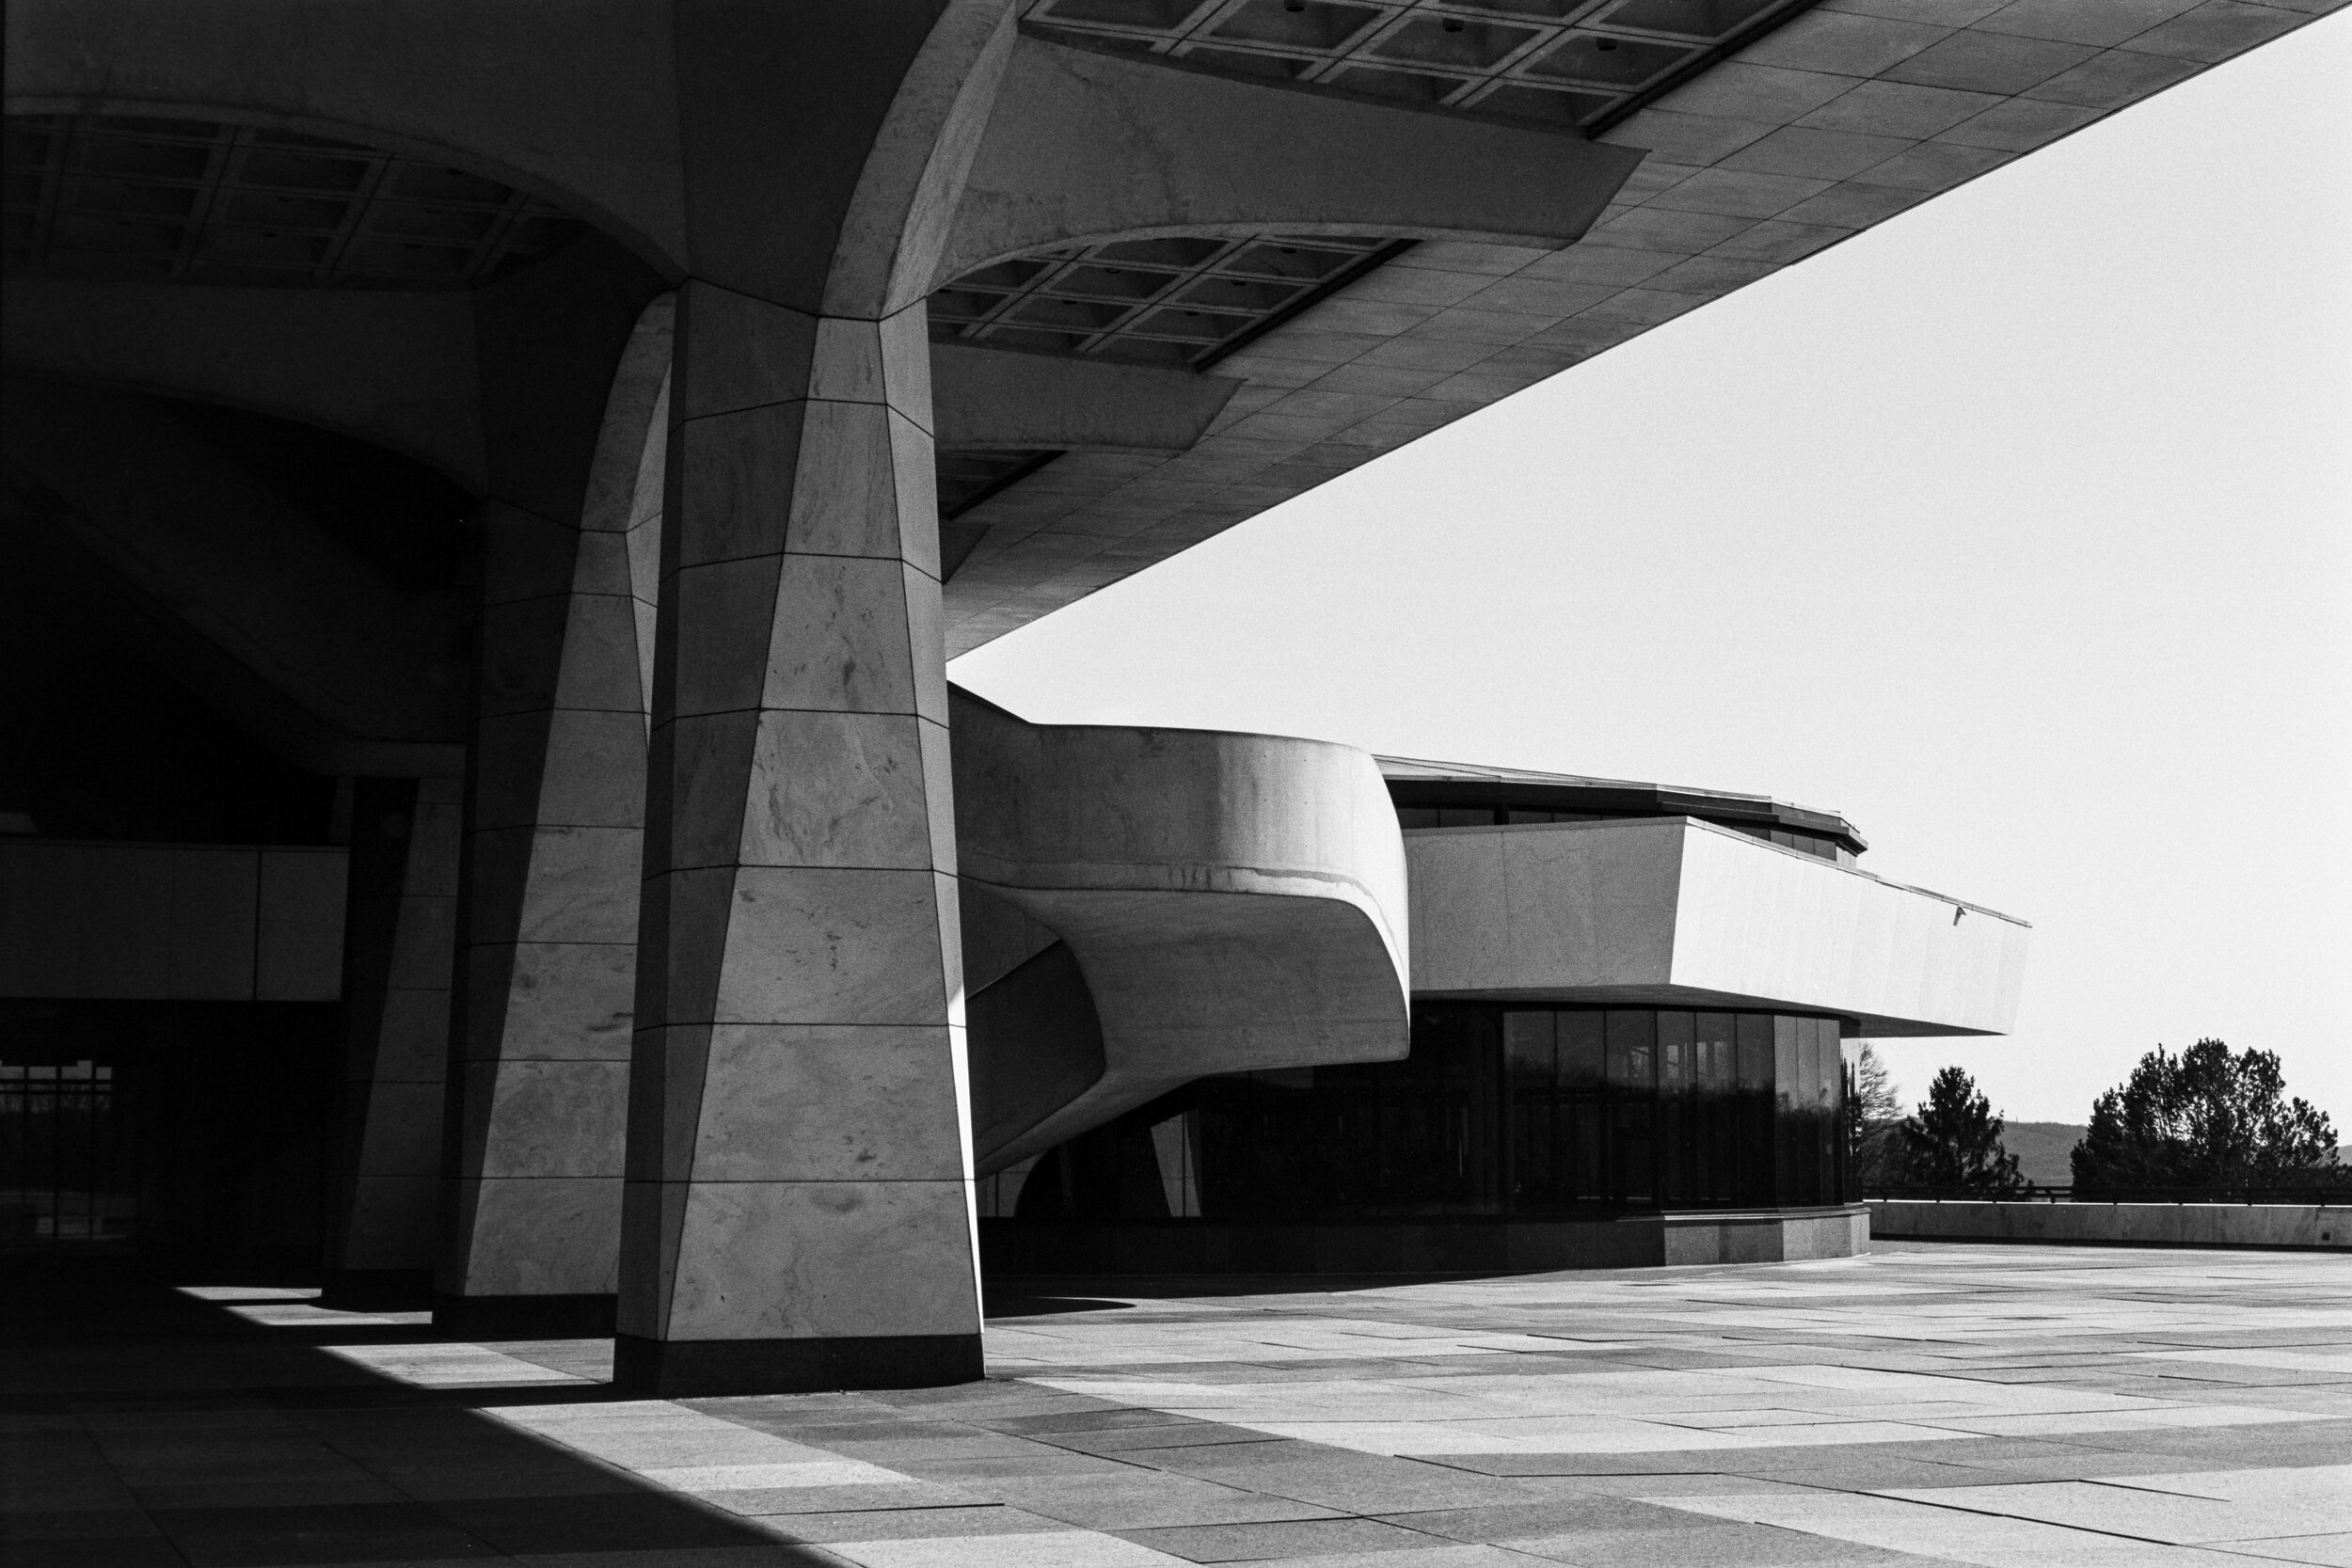
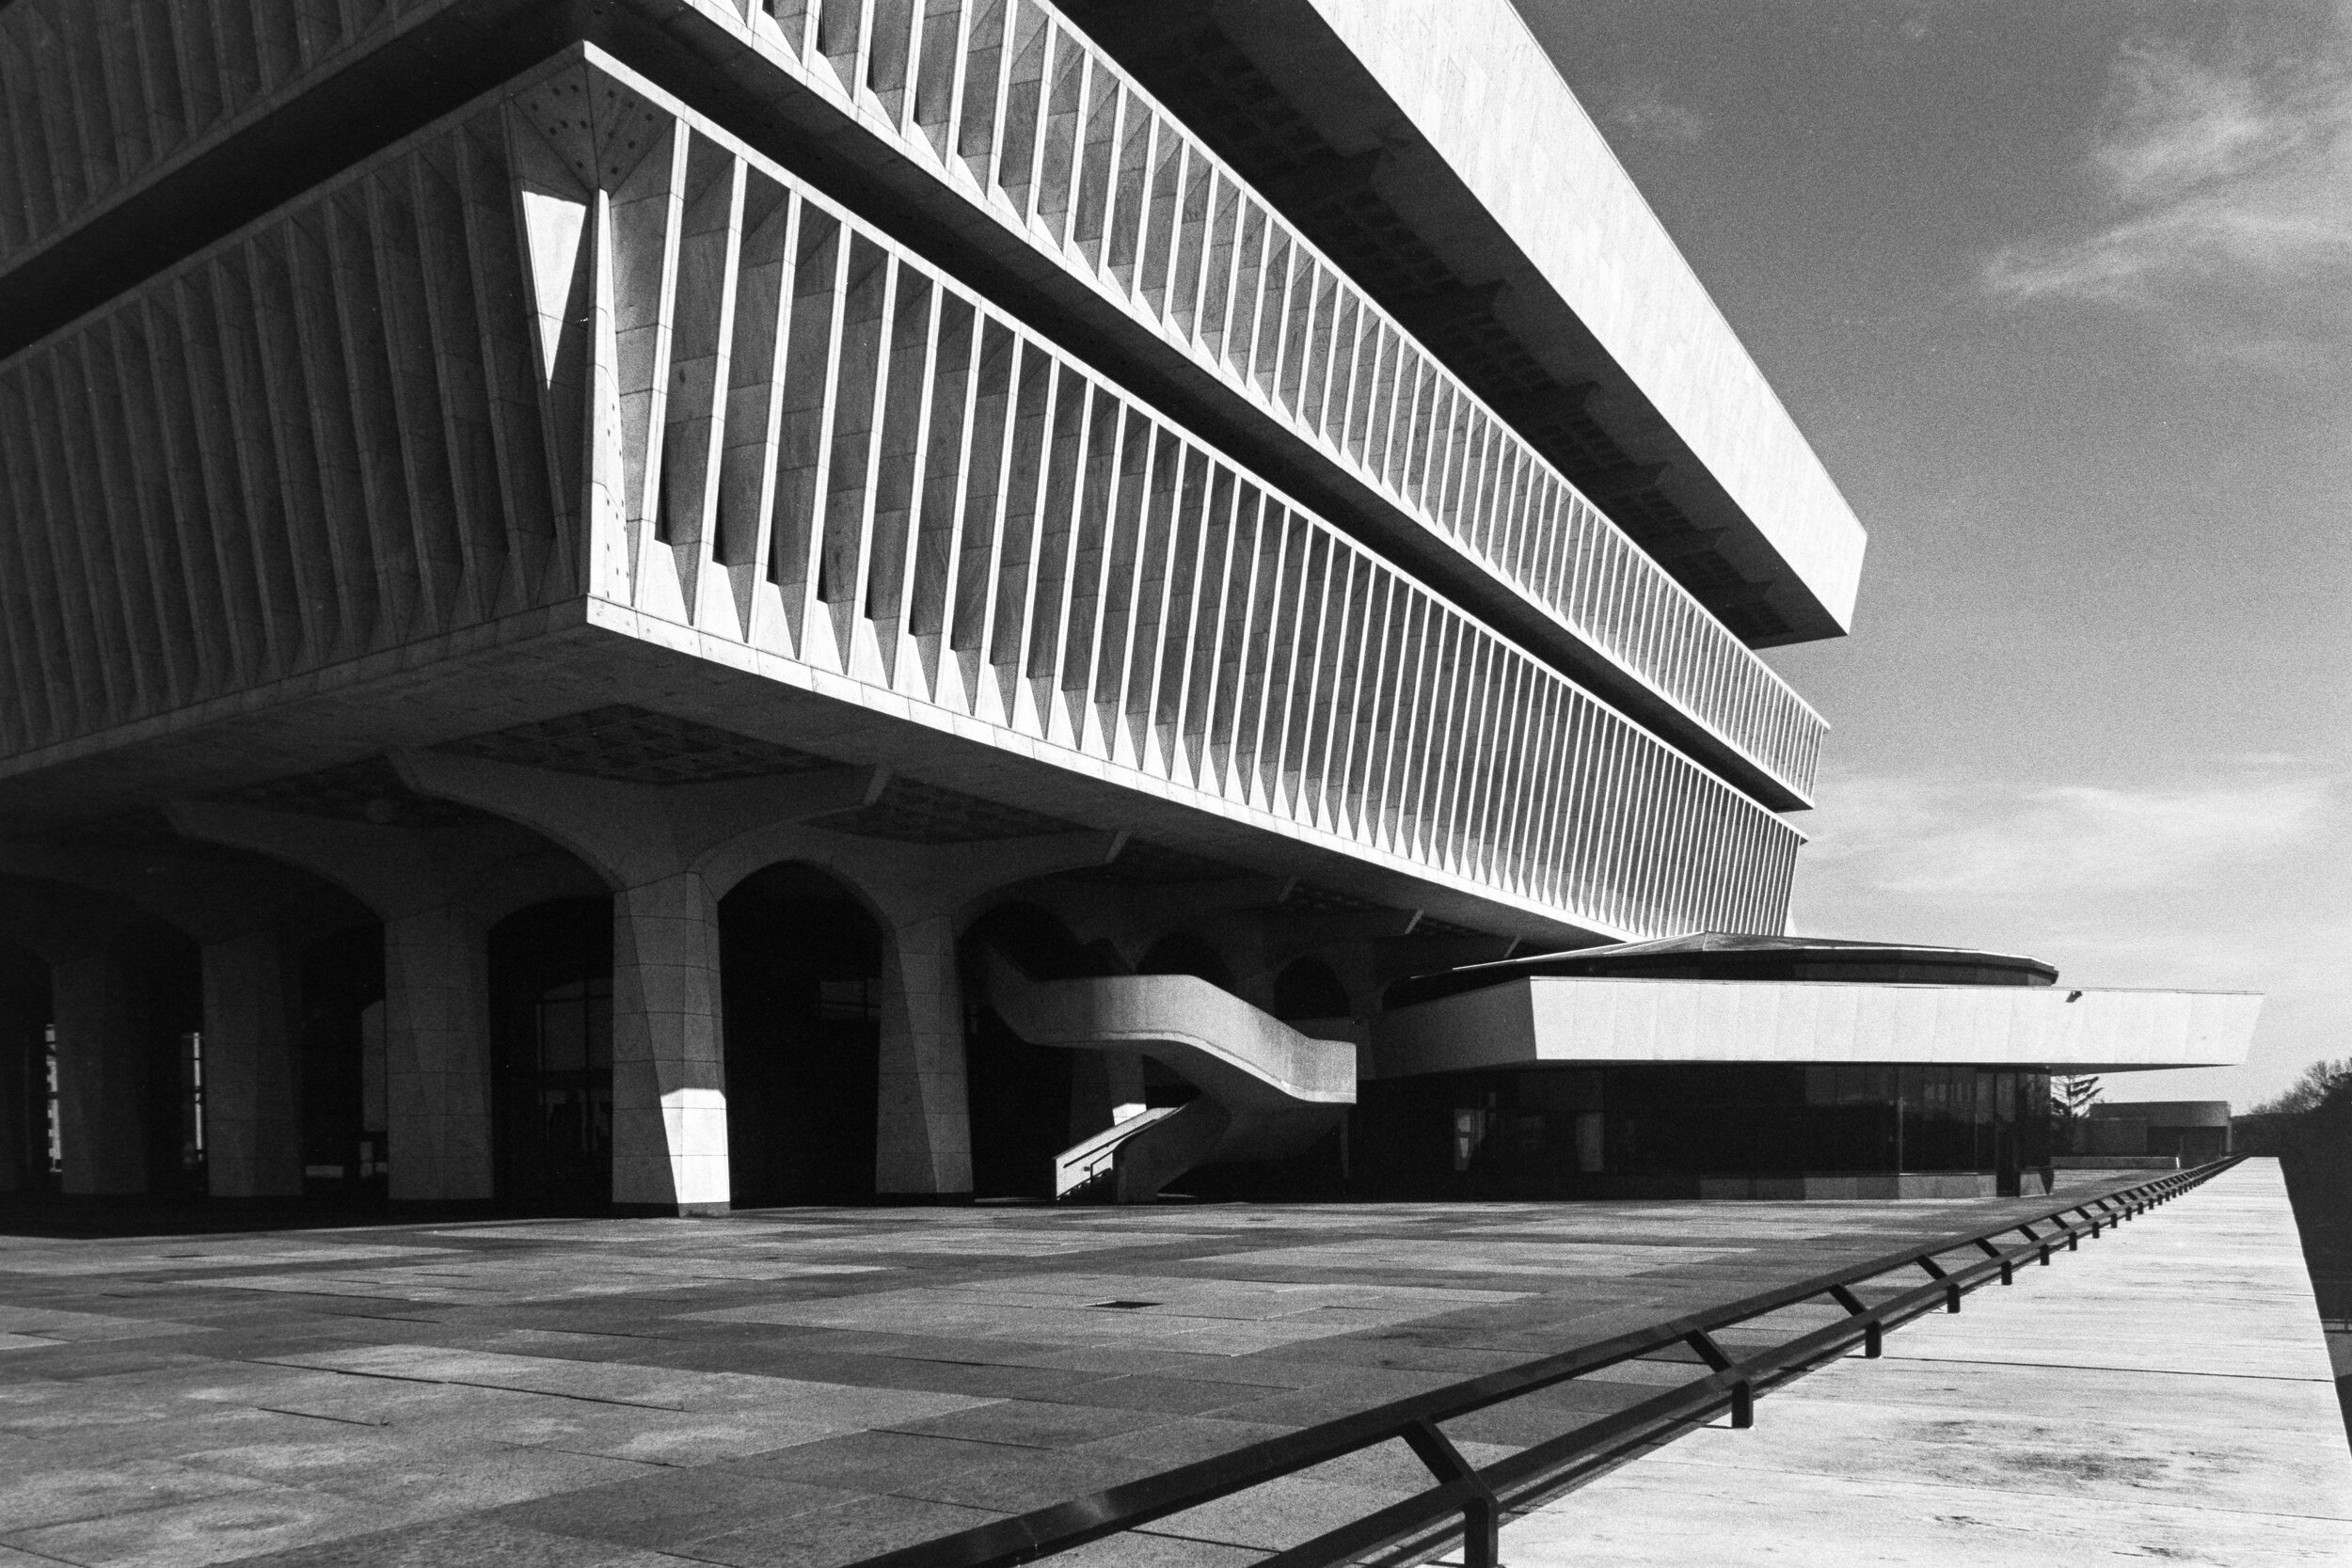
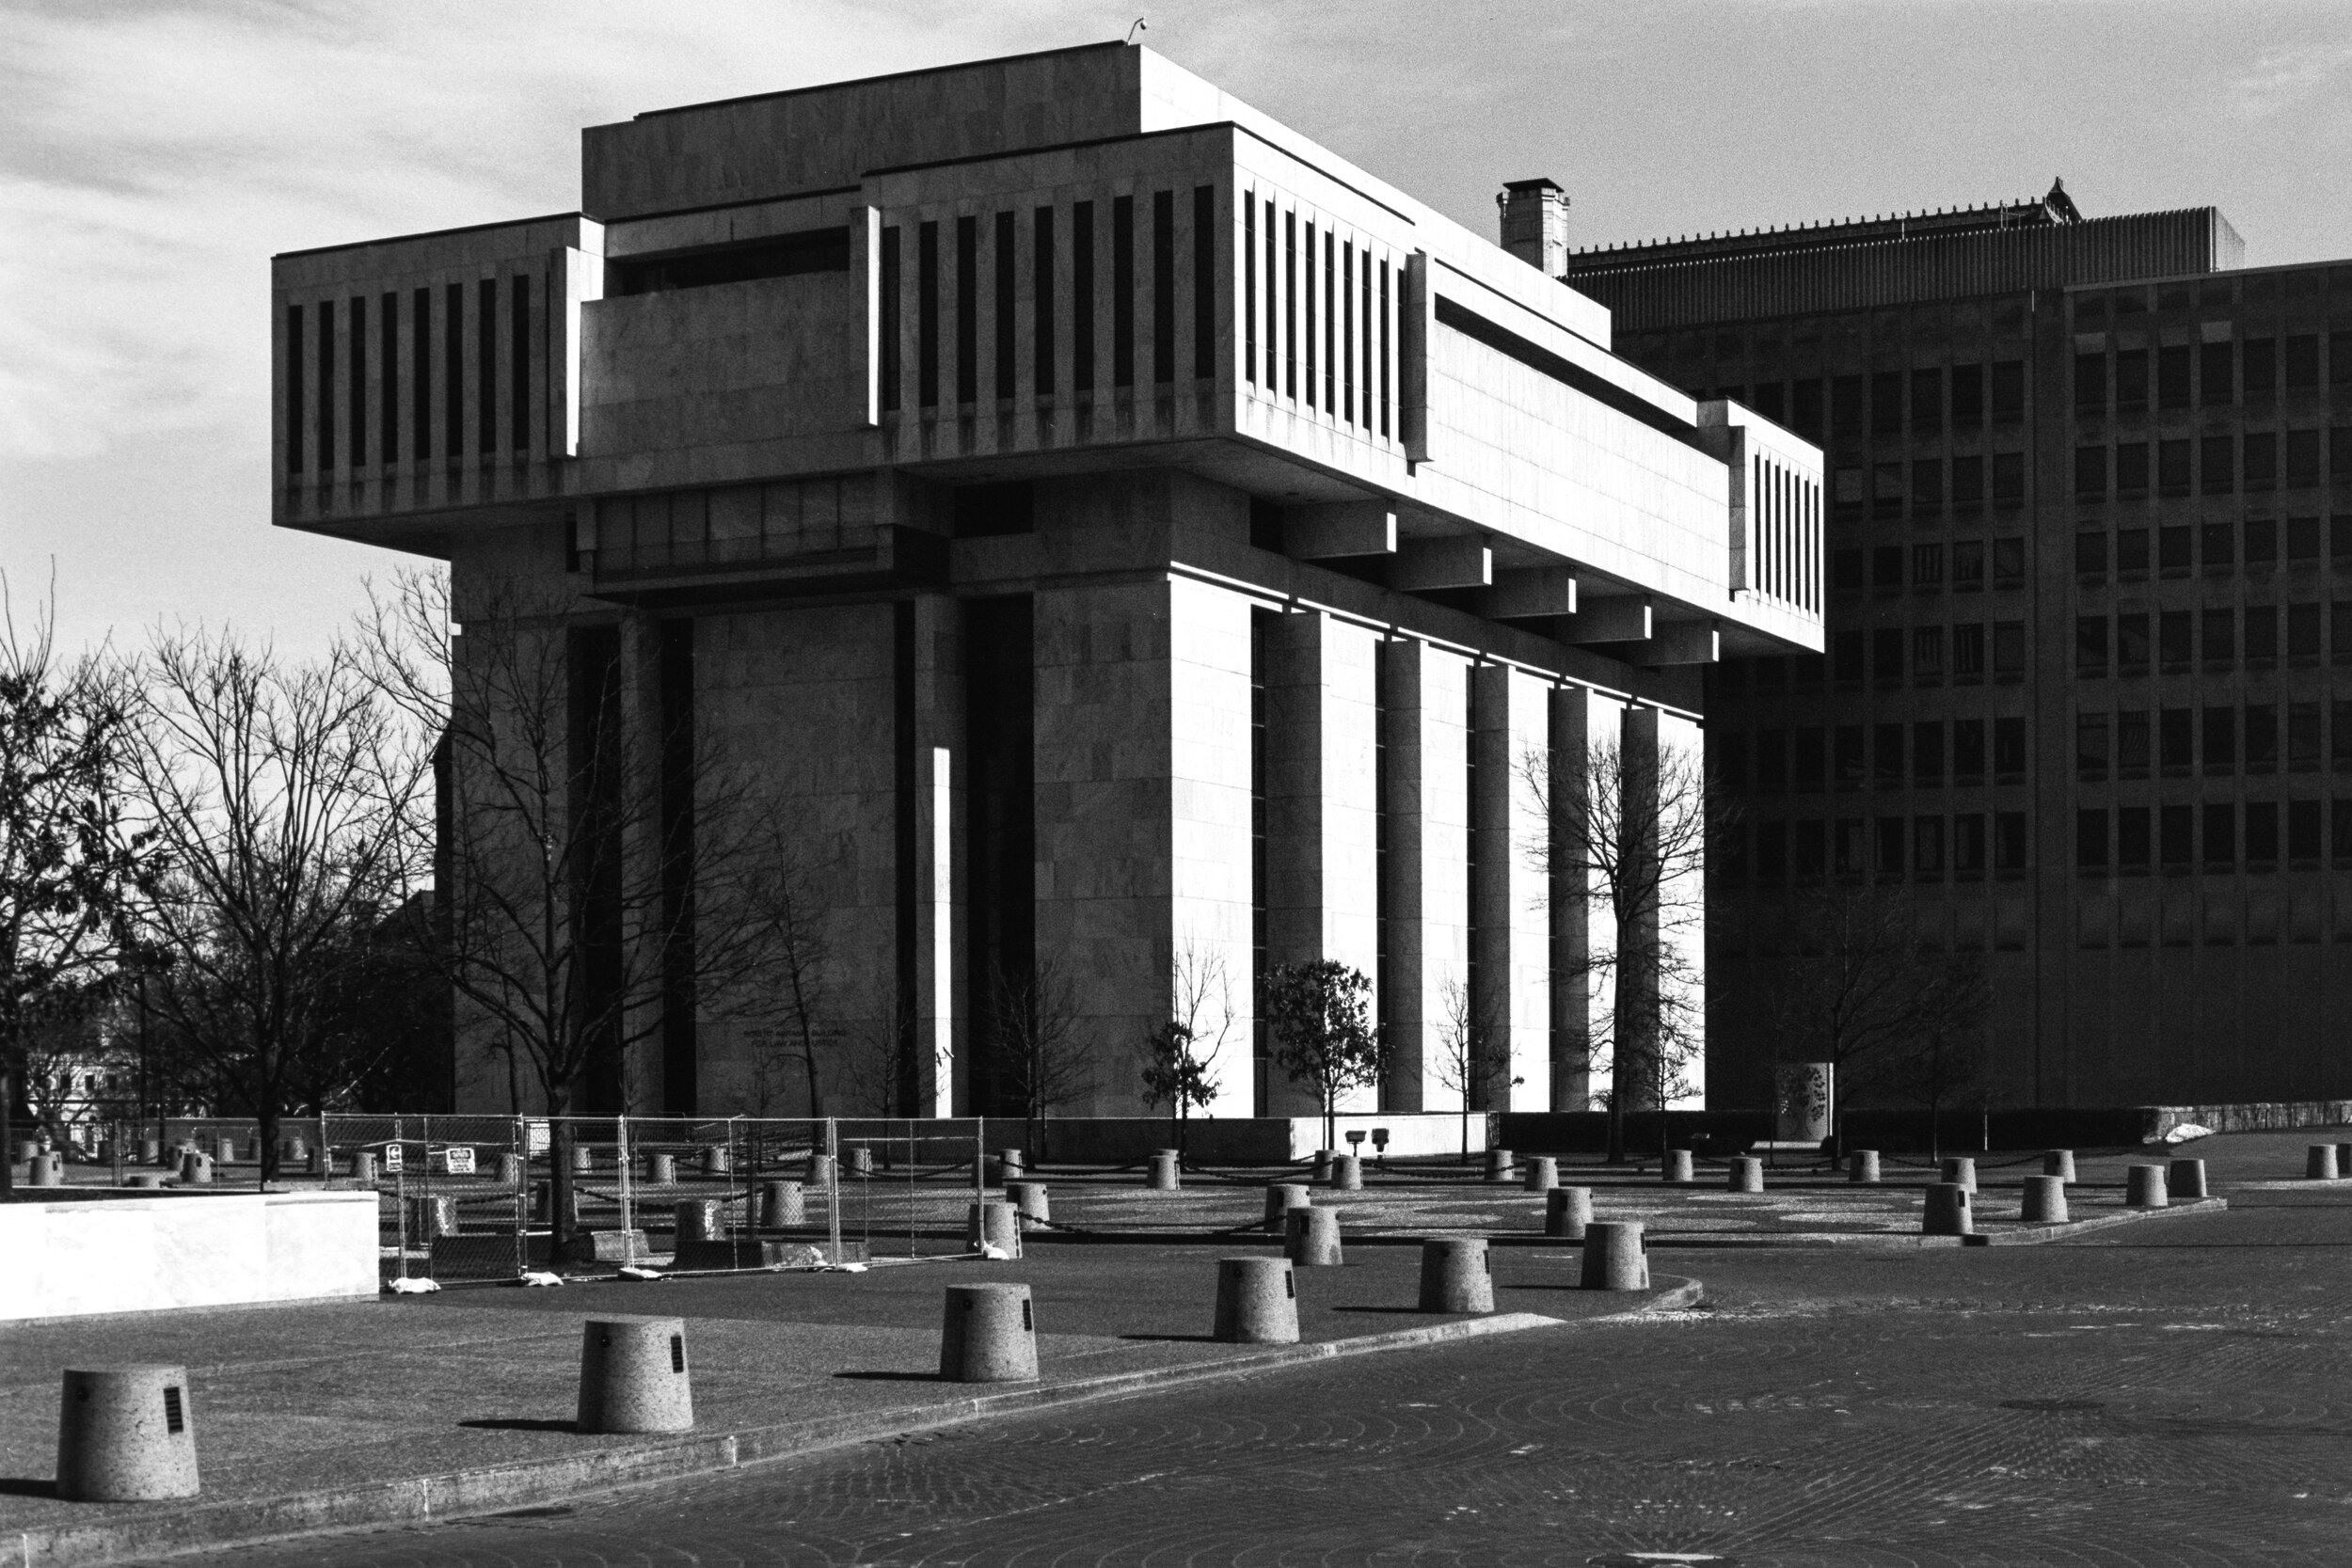
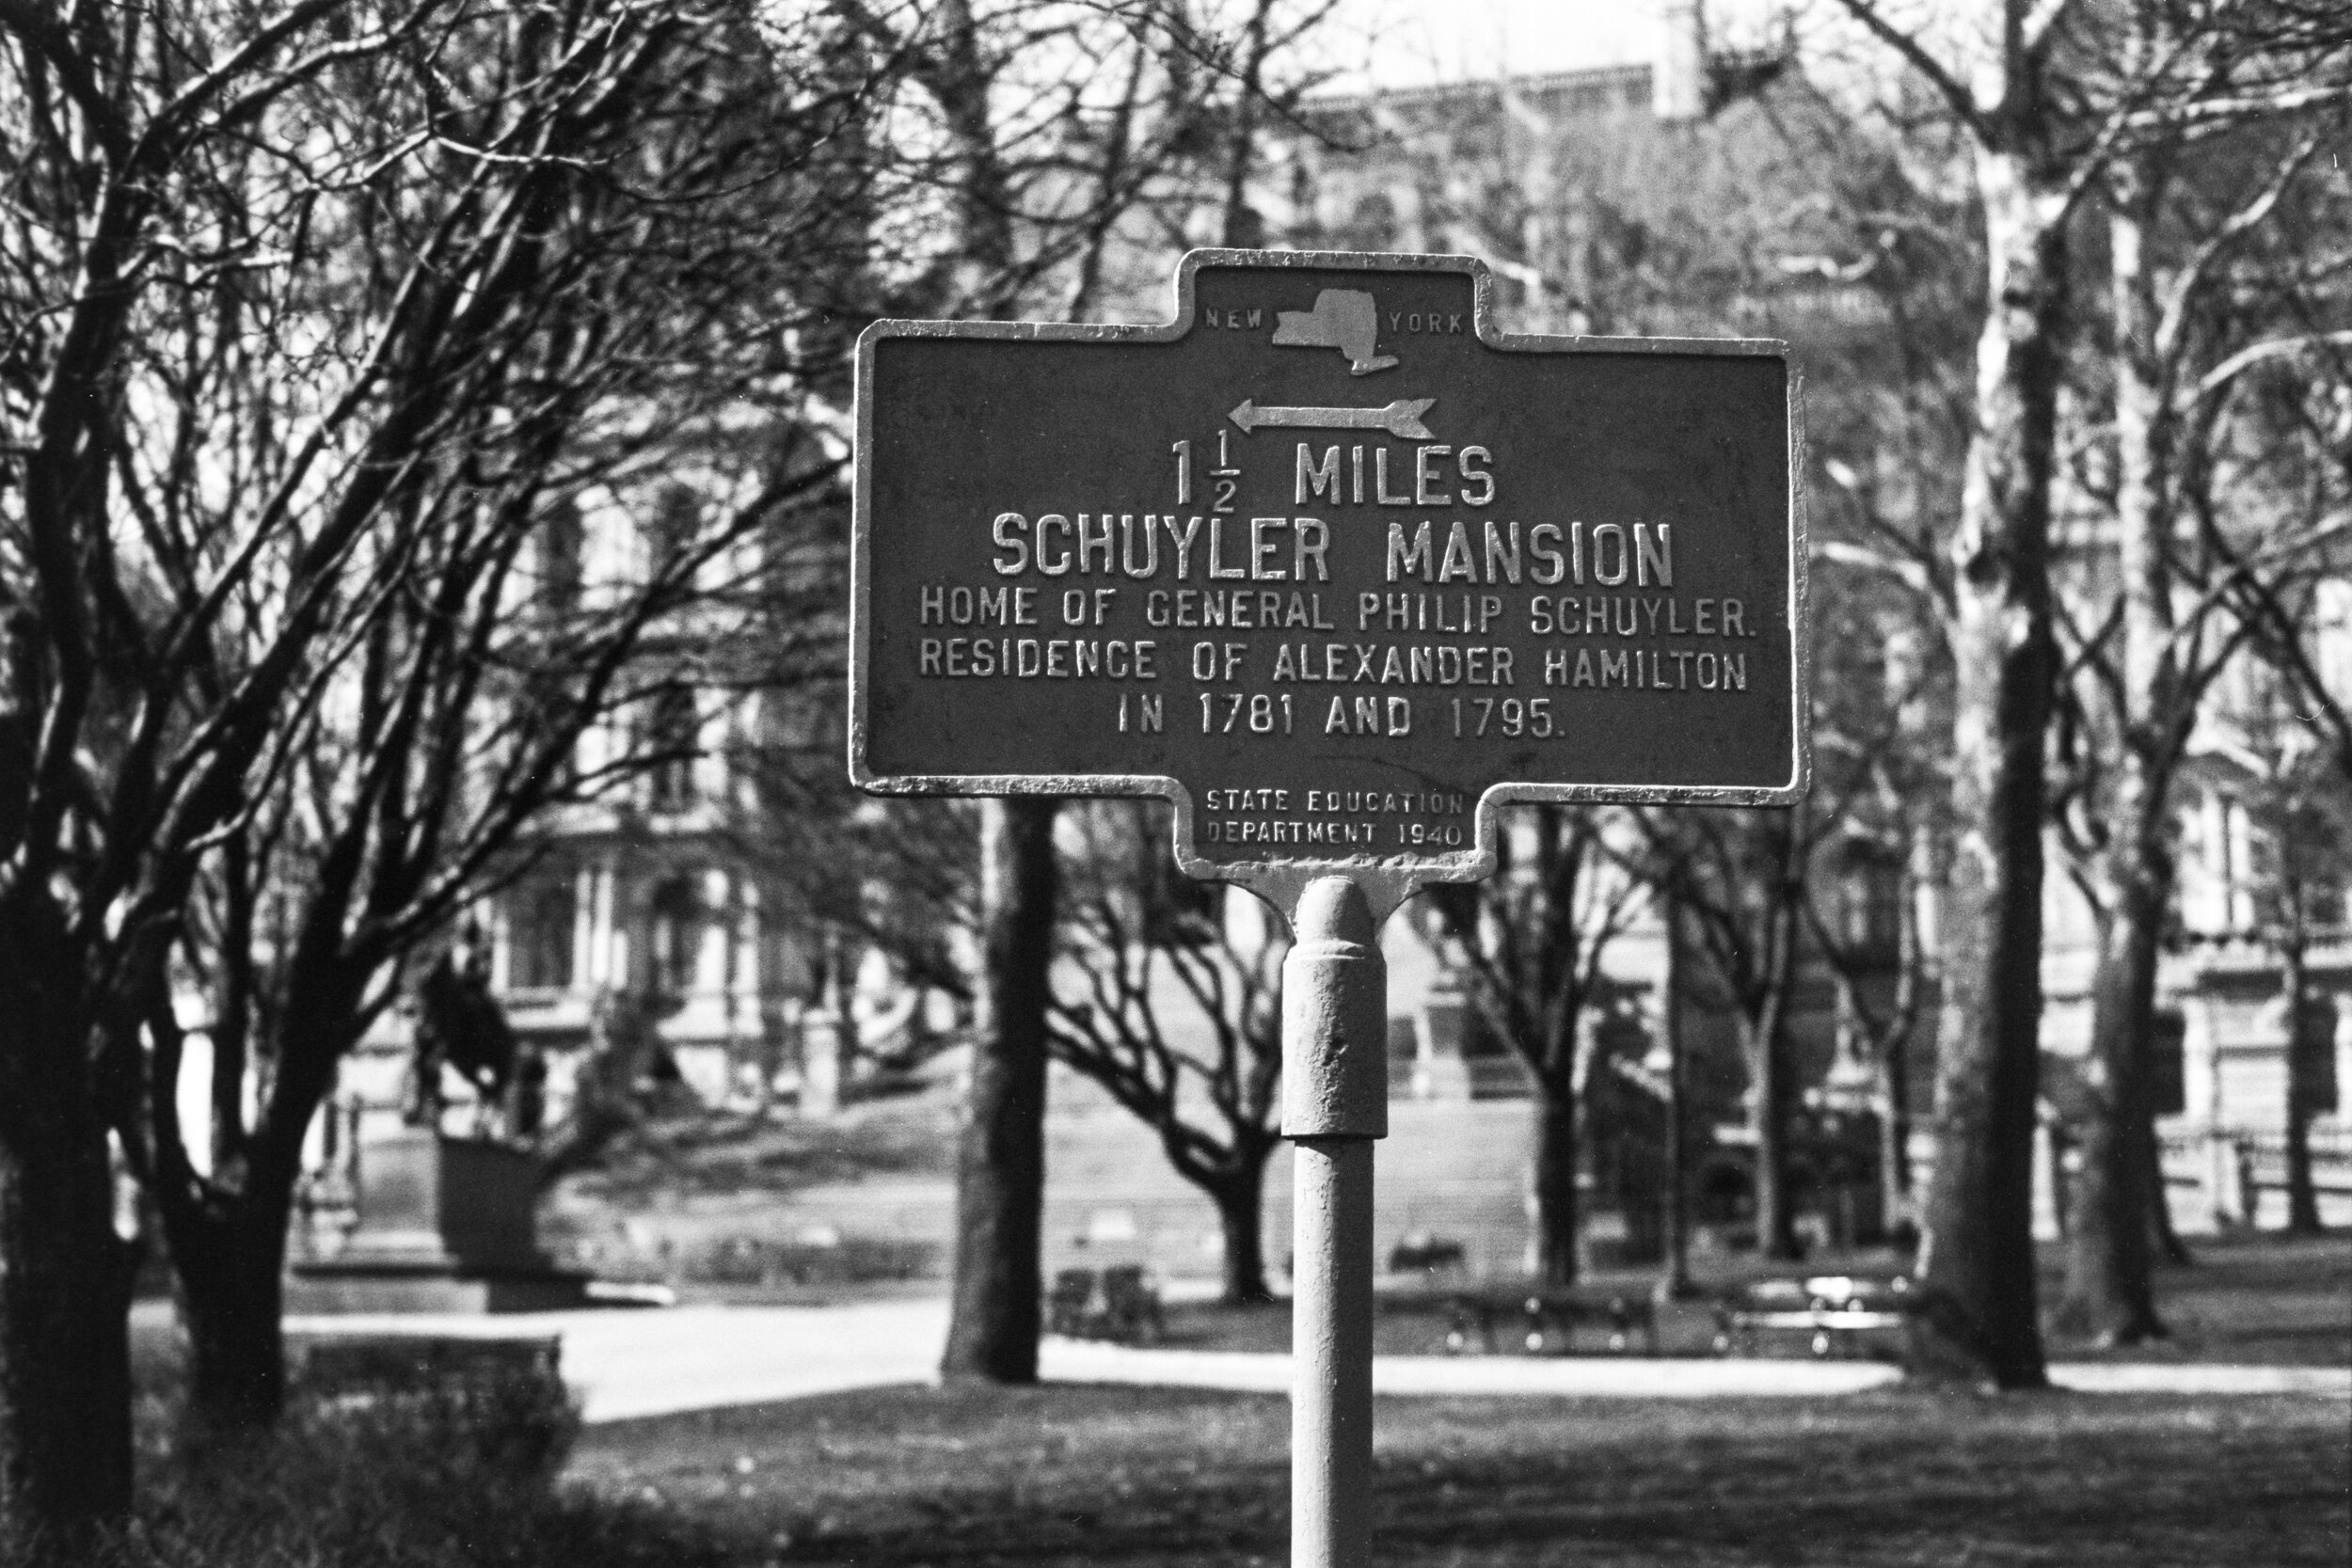
This film behaves unlike any other B&W film I regularly shoot. P30 stays true to its roots as a motion picture film stock. The high-contrast look might not be for everybody, but I’m a fan. The contrast renders industrial and architectural scenes, like Bethlehem Steel and the locations I recently shot in Albany, in a dramatic way that adds to the subject. Unfortunately, I can’t offer any advice on portraiture with P30 but I’d suggest spot metering over matrix metering. You need to be very careful to make sure the shadow detail of your subject isn’t lost.

Development

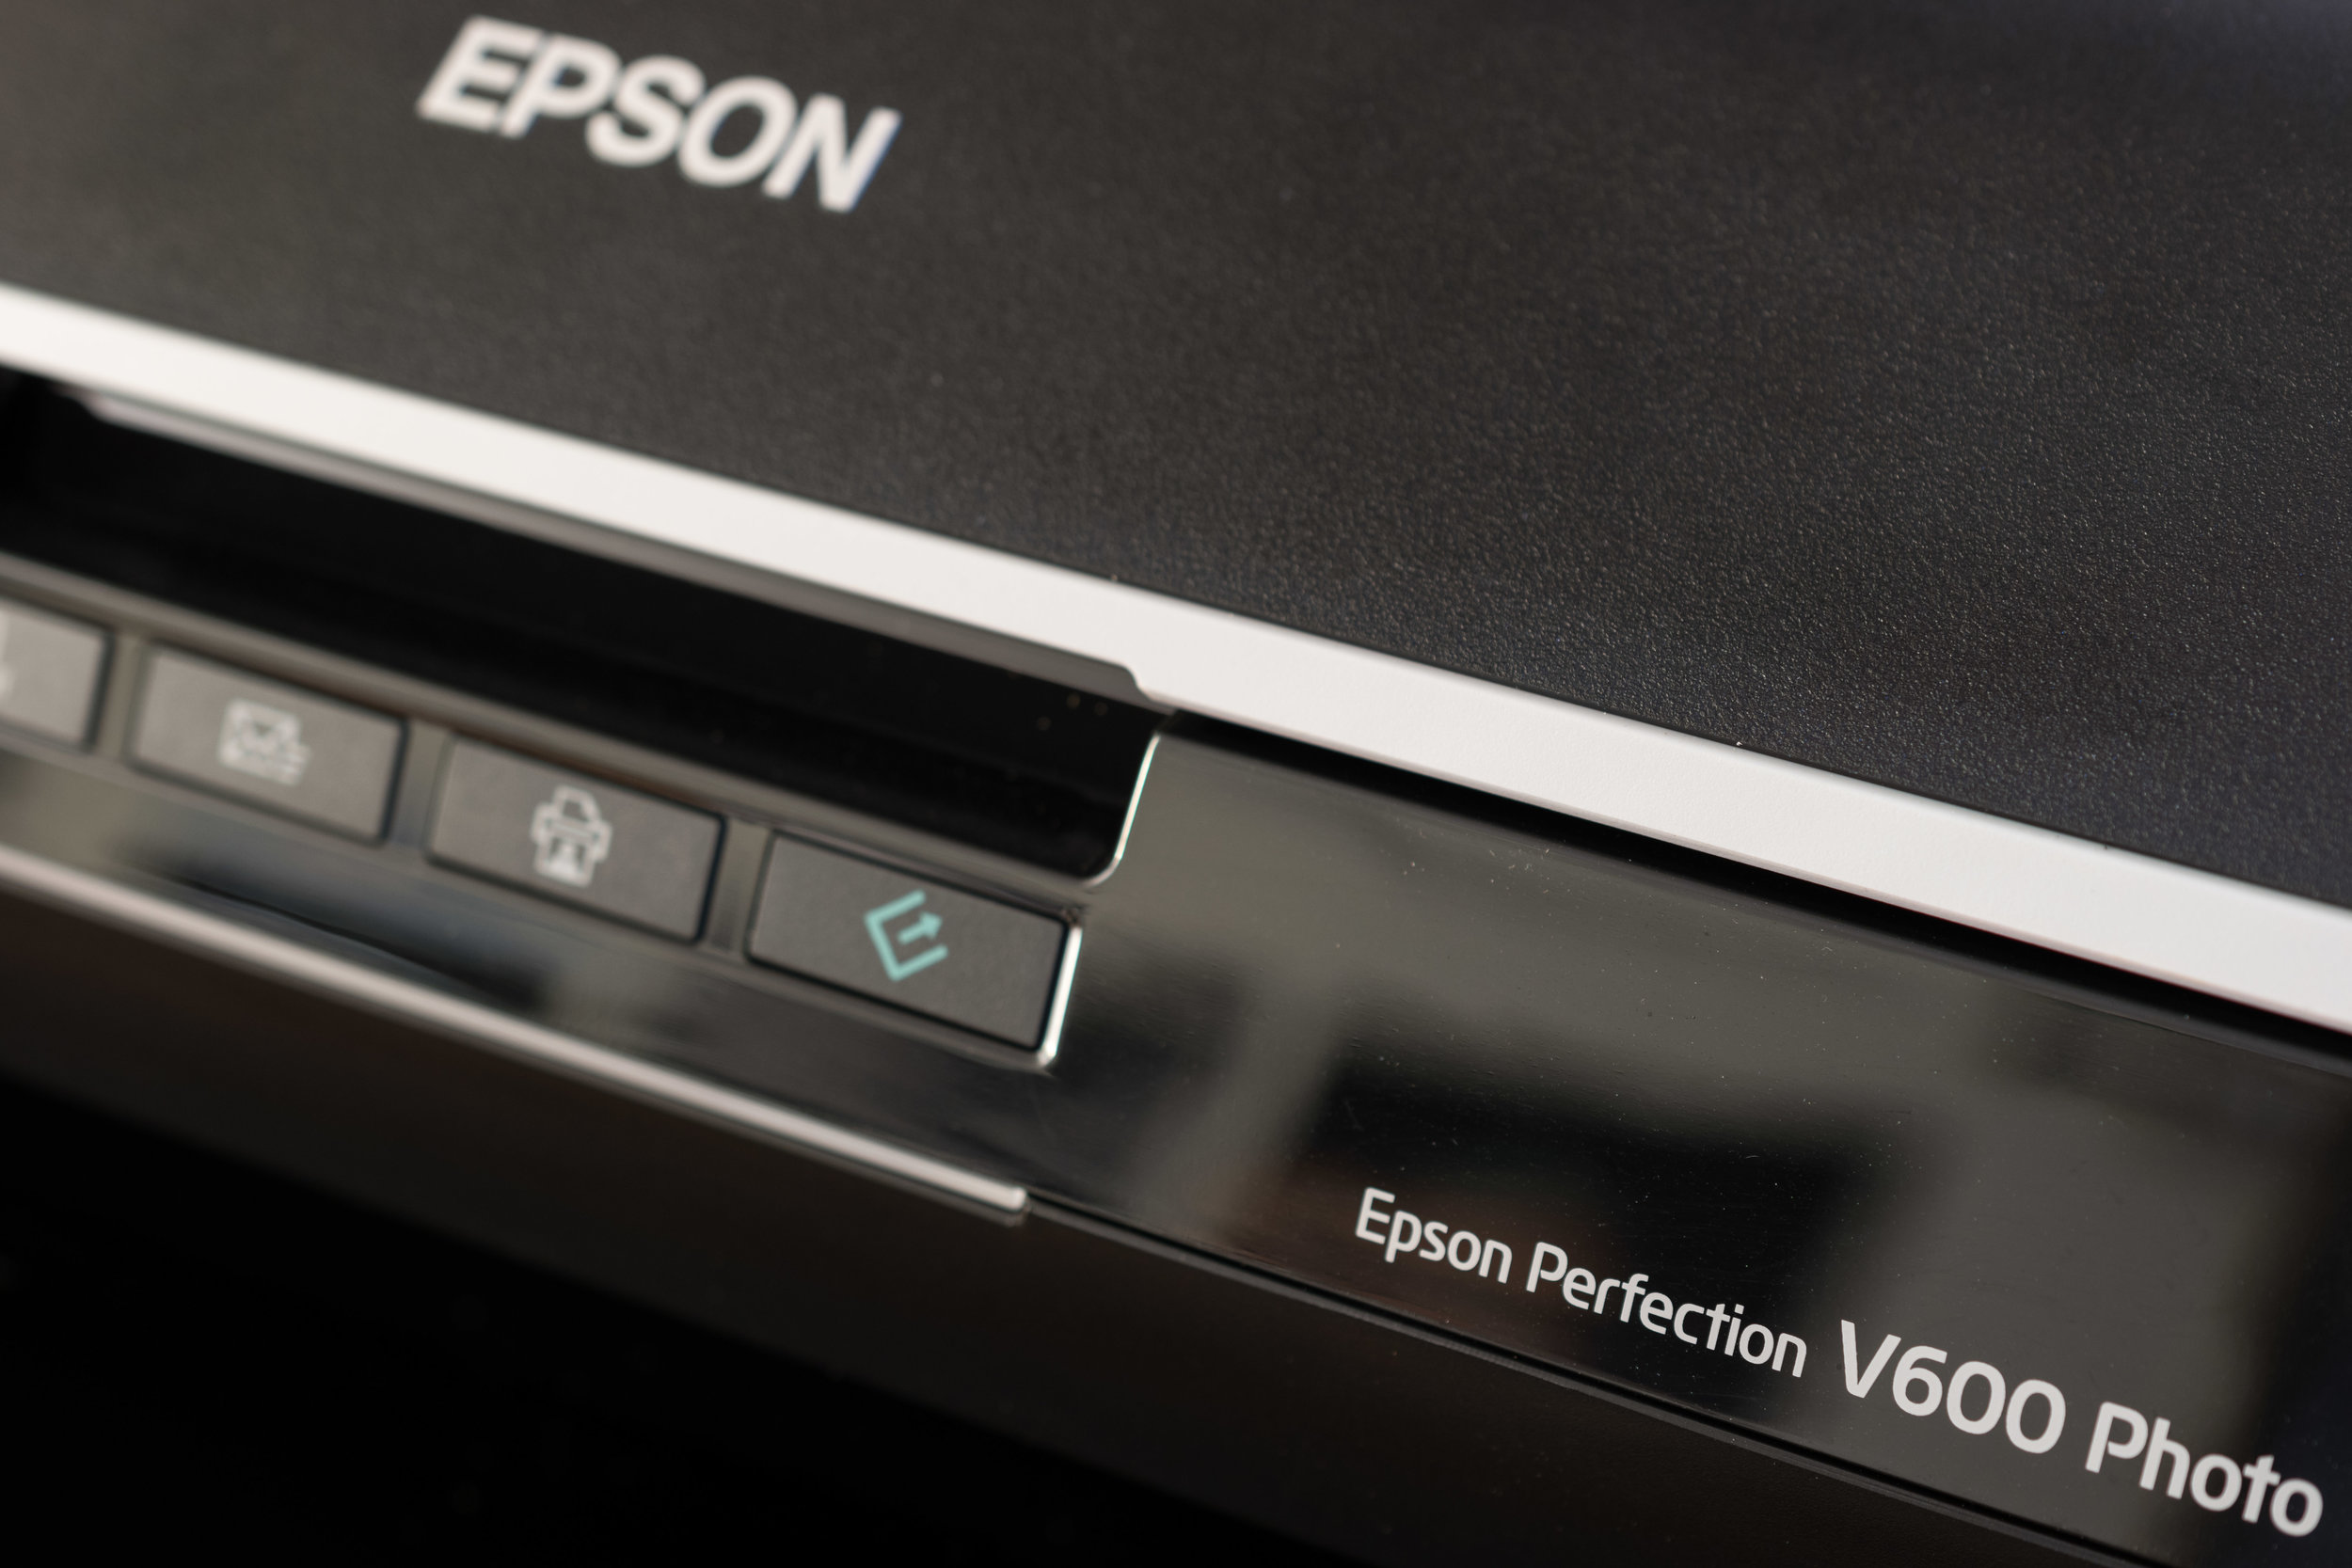
I’ve done quite a bit of experimentation with film/developer combos, and have had the best results with Rodinal 1:50 @ 14 minutes. Rodinal shines with slow speed films like P30. My tests with HC-110 and ILFOTEC DD-X, my go-to developer, didn’t produce the level of sharpness I was after. No matter what you do, P30 will leave you with a rather thin negative and little shadow detail. There were quite a few shots from Bethlehem Steel which I had to trash because the negatives were just too thin. I learned my lesson though, and the rolls I’ve shot since have had a much higher percentage of keepers. Although the negatives seem thin, they’re full of detail when you scan them. I can’t comment on how they perform when darkroom printing, but I get good results with my Epson V800 and even better results with my Nikon ES-2/D7200 combo.
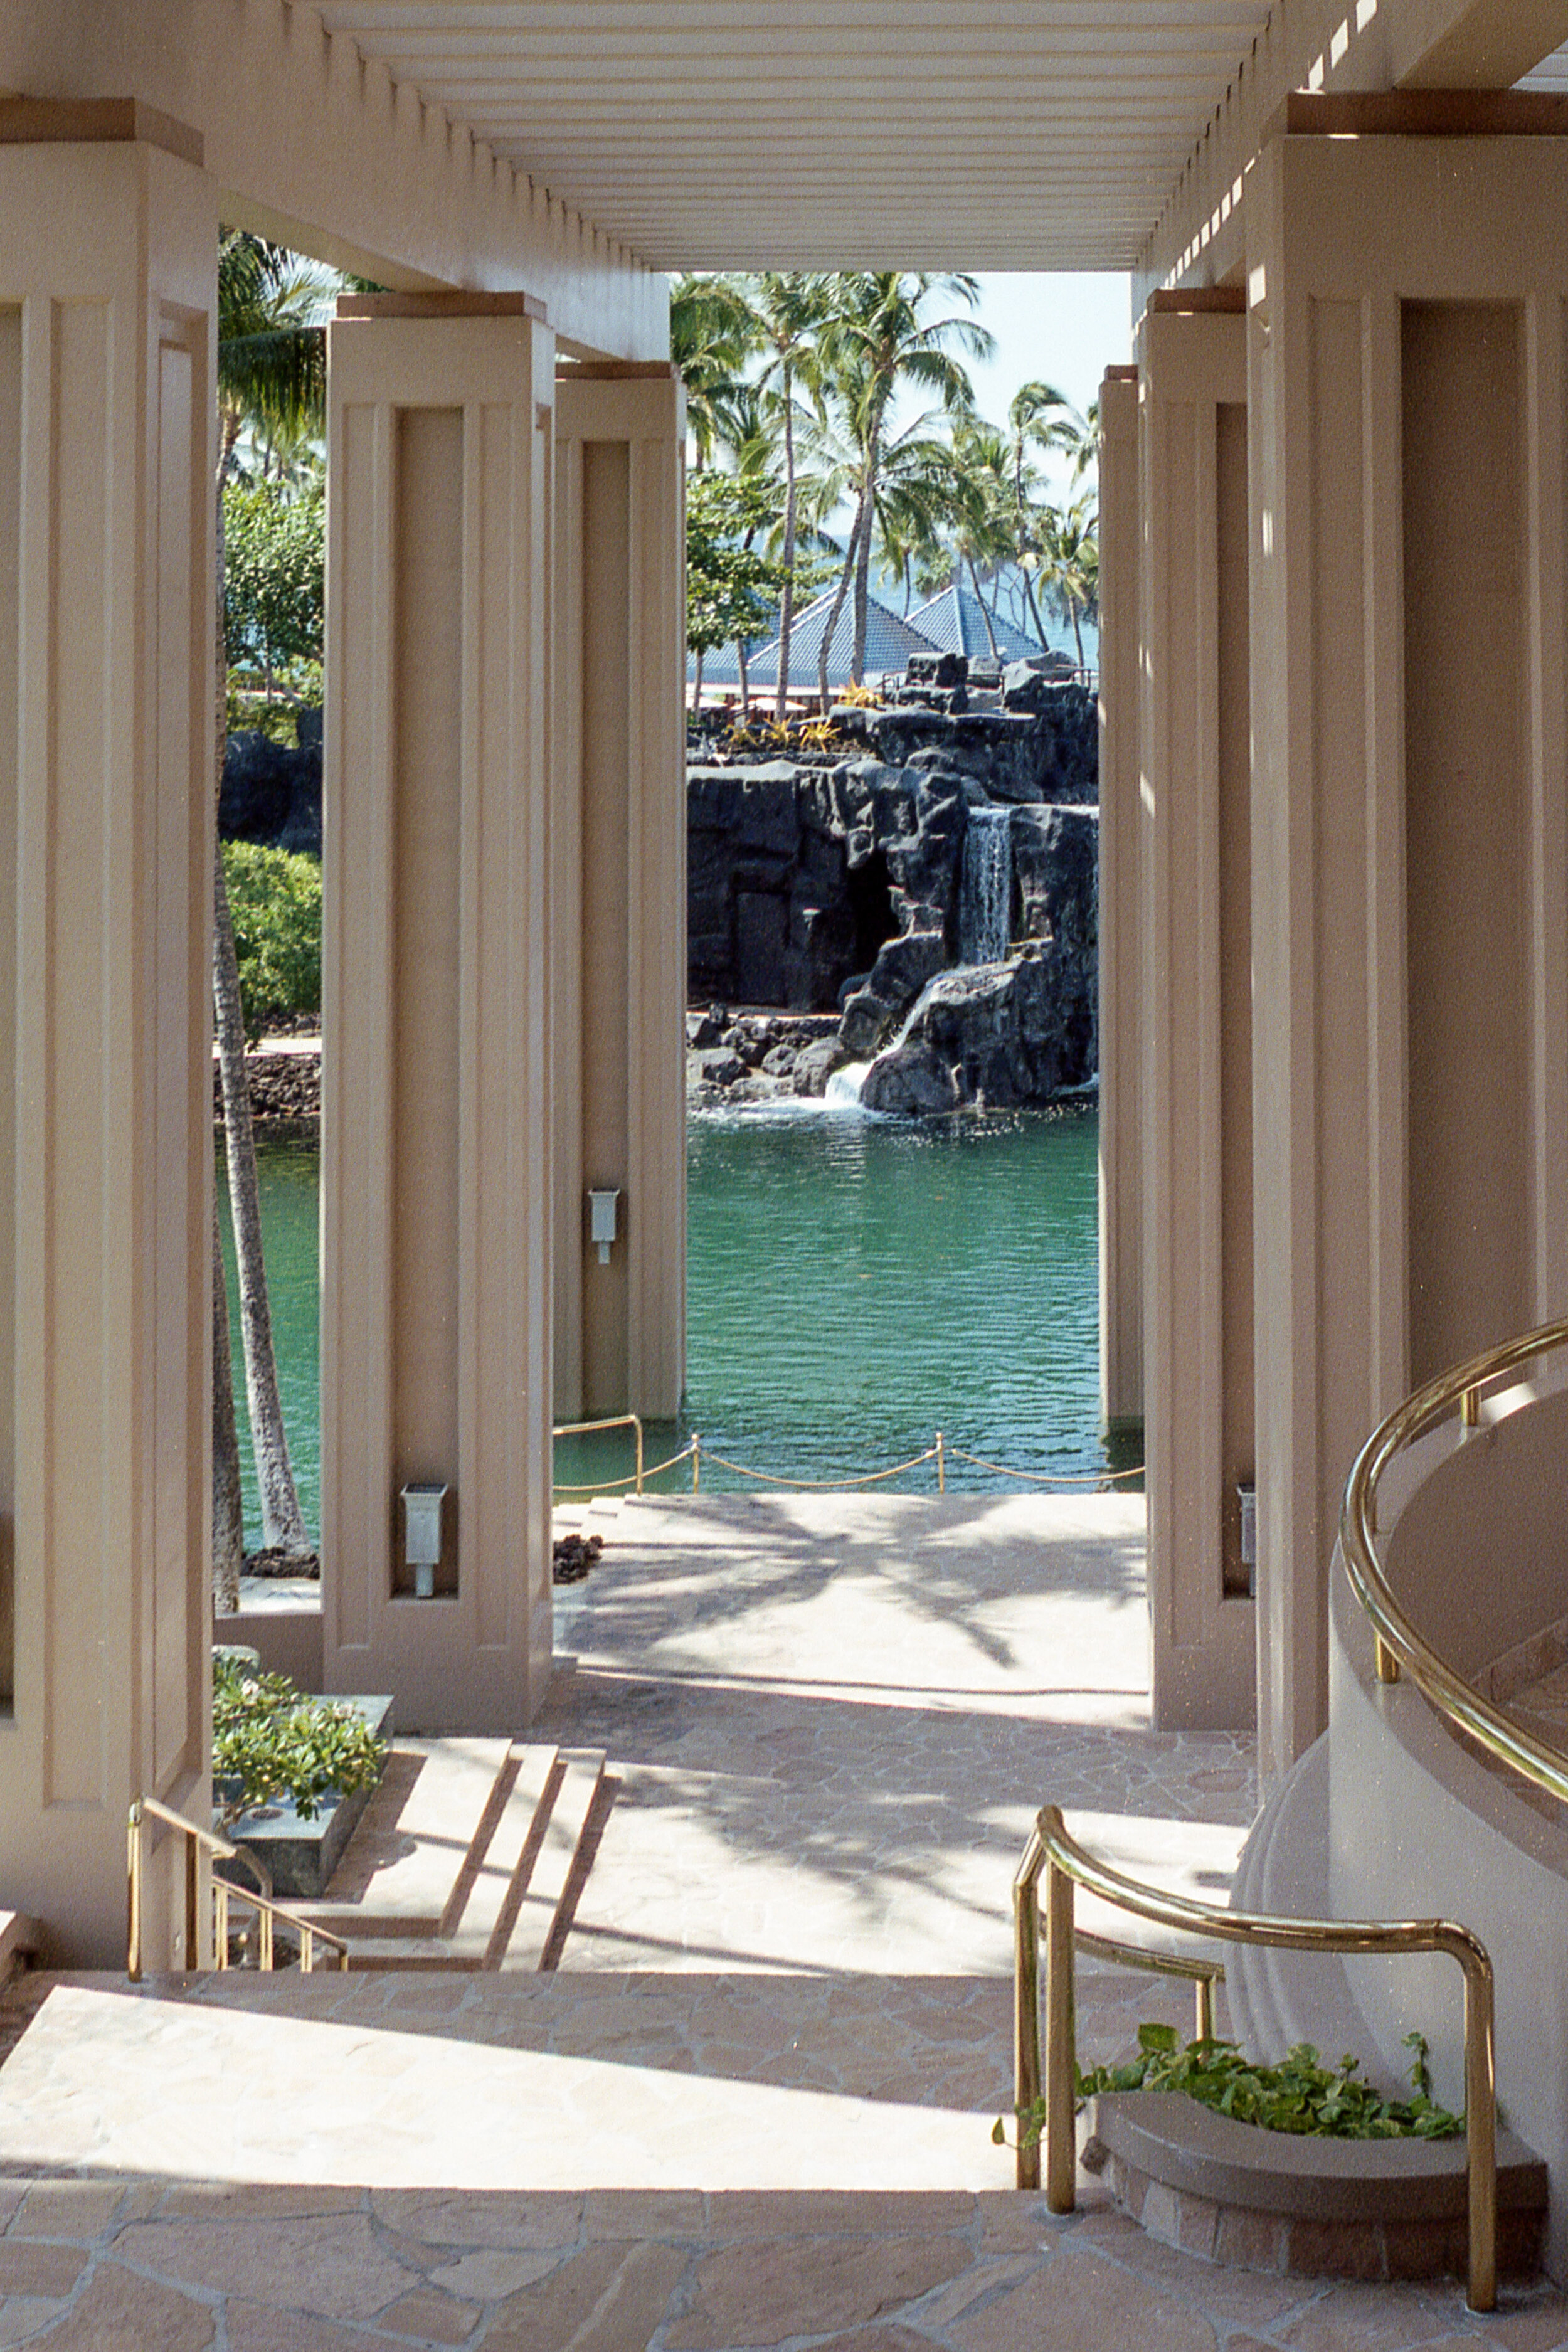
Image Gallery

GRC_19925-Edit.jpg
GRC_19931-Edit.jpg

Final Thoughts

Ferrania P30 is not a film that will work for everybody in every situation, but it’s a great choice if you’re looking for dramatic, contrasty negatives. The supply of P30 has been sporadic at best, and the COVID-19 pandemic certainly hasn’t helped remedy the issue. While there were initial complaints about Ferrania’s quality control in the early batches of P30, I haven’t seen any issues with the latest batch of five rolls I purchased. This is the type of film that you’ll know the right project for it when you see it, and I’d highly recommend you pick up a roll and give it a try!

Graflex Speed Graphic

GRC0329.jpg

Every time I pick up a new film format, I’ll tell myself I don’t need another one: 35mm was first; I don’t need medium format. Then came 6x4.5, 6x6, and now 4x5. I’ve been trying to build out a kit for my WWII Signal Corps Photographer impression which started with the PH-324 I picked up last year. While 35mm was used during the war, especially with Leica II cameras, 4x5 was still king. And an SPC photographer was almost guaranteed to have a 3 ¼ x 4 ¼ or 4x5 Speed Graphic on them for official portraits or more important work. Bigger negatives mean sharper prints and the Speed Graphic was the most portable large format camera of the time. You could either shoot cut film or use a film pack for quicker exposures (not sold anymore). Luckily companies like Kodak and Ilford still make 4x5 film and this camera can still be used today.

 I got relatively lucky when I picked up my Speed Graphic on eBay, winning it in an auction for about $350. I couldn’t tell much from the pictures posted but the lens looked clean which is the most important part on these old cameras. A lens that’s been etched by fungus and mold is useless, but a slow shutter can usually be fixed. I pulled an all-nighter to completely disassemble the camera and put it all back together again using a combination of PDFs including old service manuals and WWII training manuals for similar cameras. The unique feature of the Speed Graphic is the cloth focal plane shutter which allows exposures between 1/10 sec. and 1/1000 sec. This was probably the hardest feature for me to overhaul because it requires oiling small bearings and setting the curtain at the right position so all the shutter speeds work correctly. I also had to refocus the lens, fix the infinity stops, and calibrate the rangefinder.

GRC0330.jpg

I did my best to date the camera based on the lens serial number using Kodak’s CAMEROSITY dating system. Because the serial number started with EO, I could tell the lens was manufactured in 1946. I think the camera body might be a bit newer than that but I don’t have a definitive way to tell. I’ve been shooting Ilford FP4 Plus at ISO 200 because it lets me use a faster shutter speed of the focal plane shutter. The test shots in this post are from a long drive I took out to the Delaware National Water Gap, a favorite place of mine to shoot because of the abundant abandoned buildings. The last shot I took of the lumber mill was actually overexposed two stops (if you open the lens up to use the ground glass, don’t forget to stop it down!). I’ve found FP4 Plus has great latitude and produces excellent negatives when developed in DD-X. While the Speed Graphic and 127mm Ektar lens don’t allow you to do all the movements normally possible with a 4x5 camera, I still enjoy shooting handheld large format. I’ll probably look to get a 4x5 rail camera at some point in the future, but no other setup will beat the Speed Graphic for portability.

GRC0331.jpg

Kodak PH-324

_GRC2255.jpg

As a collector of historical objects, especially WWII era, I couldn’t pass up the opportunity to pick up this Kodak PH-324 on eBay. Despite the camera being billed as “operational” it took a ton of work to get it back in near-perfect order. I was hoping the camera would be accurate out of the box but instead I ended up with a shutter stuck at the fastest setting. I would've just returned the camera but the glass was in perfect condition - something that’s hard to find with an old camera such as this. I was able to completely disassemble the body, clean out the leaf shutter, and refocus the elements so the focus scale was (mostly) accurate by using a piece of ground glass off an old Canon F-1n focusing screen.

The PH-324 was issued throughout WWII to US Army Signal Photographic units as the standard 35mm camera. Included with this camera was an enlarger, photo paper, film, and chemicals needed to develop both in the field. Kodak produced the camera, a standard Kodak 35, in OD green exclusively for the federal government during the war. The camera used a leaf shutter and basic three element design to produce images on either Kodak Mircrofile or Kodak Super-XX film. A +2 Portra lens was included for copying documents with the accompanying stand in Photographic Set PH-261. The viewfinder and lens are decoupled so you can only get a general idea of what the final picture will look like. The images in this post are from the test roll after I completed the restoration.

_GRC2262-Edit.jpg
_GRC2269-Edit.jpg

Kentmere 400 | Budget B&W Film

Film isn't cheap. C-41 color film is more expensive than black & white, Portra is more than Superia, and Tri-X is more than HP5+. What if you're strapped for cash or just don't want to waste a roll of Tri-X testing out those light seals you just replaced? I recently sent my Pentax ME Super off to Eric Hendrickson for recalibration and replaced the light seals myself over the weekend with a kit from USCamera. Not wanting to waste a roll of Tri-X on photos that might not even turn out right, I reached for a roll of Kentmere 400. I discovered Kentmere 400 film in September when I decided to pick up two rolls of the cheapest black & white film I could find at B&H.

Note: I recently revisited Kentmere 400 in a recent blog post - check it out here!

As of November 2017, Kentmere 400 is the second least expensive 35mm black & white film you can buy at B&H (it's 10¢ more expensive than Arista 400). I paid $3.49 a roll at B&H in September when I made my yearly film order. The film is manufactured by Ilford, makers of the more popular HP5+. I've read that the beginning and end of HP5+ batches aren't up to Ilford's standards, so they're rebranded as Kentmere film. I had high hopes for the film when I loaded it into my AE-1 Program, ready to spend a day shooting around NYC to test the film.

I wasn't overwhelmed by this film, but it sure beat my expectations. The grain structure isn't well defined like more expensive films but it records lots of detail in the shadows which can be brought out later in Photoshop and Lightroom. The film feels "mushy", it's hard to describe. I did my best to shoot with a variety of lenses and lighting conditions, and you can see the results below. This roll was developed in Sprint 9+1 for 11 min 30 sec.

Overall, I would buy this film again. In fact I have two rolls of it right now in my film fridge. It's a good black & white film for testing out concepts for an upcoming project or to just have fun with your cameras. The grain isn't amazing and the images are a bit mushy, but what more can you expect from such a low price point? The bottom line is I don't feel bad about exposing a roll of Kentmere 400 just for fun. I need a good reason to shoot film because I feel like I'm otherwise throwing money away. The few rolls of Kentmere I've shot have been predictably similar in performance, which is good news for photographers that are used to the consistency of Kodak films. Look below for a side-by-side comparison of Kentmere, HP5+, Tri-X, and T-Max at ASA 400.

Review | Epson V600

Film isn't the most expensive part of analog photography and neither is the camera. Most film bodies go for around $100 and lower, and come coupled with a fast 50mm prime. Even development isn't expensive if you shoot black and white film. When you do the math using Kodak products like I do, you're spending about $1-2 per roll to develop the film. Scanning is by far the most expensive part of film development if you use a lab. For example, scanning your film with a professional service like the one near me in Columbus costs $18 per roll for 3200 dpi scans. You'd only have to shoot and scan about 11 rolls of film to break even, assuming you bought a V600 brand new at $200. With prices like that, the savings quickly add up when scanning at home. But which type of scanner is right for you?


Dedicate vs Flatbed Film Scanners

When I started shooting film I had two amazing scanners at my disposal - an Epson V750 and a Hasselblad X1. The Hasselblad scans a single frame at a time but can resolve an amazing amount of detail. The machine was complicated to use but produced results on par with lab scanning... which explains the $15,000 price tag. The Epson V750, on the other hand, could scan 24 frames per film holder at about the same speed as the X1. The biggest difference between the two was that I could set up a film holder on the Epson, make my adjustments, and walk away while it scanned the negatives. Both dedicated and flatbed scanners have their pros and cons, which I've outlined below.

Dedicated Film Scanners

There's a lot of options in this range, especially if you're only going to scan 35mm film. When I went looking for a film scanner, I ended up deciding between a Plustek dedicated scanner or an Epson flatbed. There's really no way around it: dedicated scanners will produce better results than flatbed scanners. They scan frame by frame, often requiring the user to manually advance the film holder. There are three main issues I had with these dedicated scanners: they only accept one format, require the user to manually advance the filmstrip, and can only hold one strip of negatives at a time. More advanced scanners have features that negate some of these issues, but they're far from the $200-300 price point I was looking for. If time isn't a concern and you want the best quality scans possible, a dedicated scanner is a good option.

Flatbed Scanners

Flatbed scanners are versatile. They'll scan documents and film of varying sizes, with the higher end scanners taking everything from 35mm to large format. They use specialized holders which flatten the film and automatically identify individual what type of film you have on the scanning bed. In Epson's case, this allows you to set up multiple strips of film, make adjustments, and let the scanner do its work - no manual advance needed. Flatbed scanners won't give you the same quality image as a comparable dedicated scanner, but will allow you to scan multiple formats and more exposures at one time.

A Note on Digital ICE - Digital ICE can be useful when scanning color negatives. It scans the film with an infrared laser to identify scratches on the negatives and makes the appropriate corrections to the final result. This technology is useful for color film but doesn't work for black and white. If you're looking to save some money on a dedicated film scanner, and shoot primarily black and white film, look for a scanner without this technology. Plustek specifically sells a model without Digital ICE, and it'll save you a bit of money.

Epson v600

The Epson Perfection V600 Photo is Epson's entry tier photo scanner, coming in around $200 on most sites like Amazon. This scanner can handle documents, 35mm, slide, and 120 film. Everything you need to scan is included in the box and setup is a breeze. The V600 uses the included film holders and EPSON Scan software to automatically identify the type of negative you're scanning and the individual frames. The scanner is a bit too small for large format so photographers with 4x6 or 8x10 negatives will need to look to the V600's older brothers, the V750 and V850.

The following negative holders are included with your purchase:

  • 35mm / film slides - Holds 4 slides or 12 35mm frames (2 strips of 6 frames)

  • 120 film - Up to 4 frames of 6x4.5 or 3 frames of 6x6

The process of scanning film with the V600 is easy and it's the primary reason I love this scanner. I use EPSON Scan which is the default scanning software provided by Epson. Other alternatives like Silverfast exist but I'm just not a fan of their interface, and I've been working with EPSON Scan since I first started scanning film with my college's V750.

This is the process I use to scan 35mm and 120 film:

  1. Load the film into the negative holder emulsion side up (the matte side of the film)

  2. Run anti-static cloth over negatives, dust off with compressed air to remove any visible dust

  3. Dust off scanner bed with compressed air and check for finger prints

  4. Remove the document backing from the scanner lid (if applicable), place negative holder onto V600 scanner bed

  5. Close the scanner lid and start up EPSON Scan

Once in EPSON Scan, I prefer to scan my negatives at 3200 dpi (16 bit grayscale for black & white and 48 bit color for C-41). In my testing, anything beyond 3200 dpi hasn't produced a noticeable improvement in image quality. The V600 only has a real dpi of around 1500 dpi, so anything beyond 3200 dpi is a waste.

My favorite thing about the V600 is that I can preview 12 images, make my adjustments, then leave the scanner alone while I work on something else. I don't have to manually advance the film or make adjustments as I go which frees up time for me to get other things done. Scanning film isn't a quick process by any means and the ability to make dinner while my film scans is valuable when I'm stretched for time. Note that I have printed my scans before, but I wouldn't recommend printing larger than 8x10. I'd recommend the V600 for anybody who's looking to do their own scans at home without spending too much on a scanner. Look below for some examples of the different film stocks I've scanned on the V600.

Sample Images

Manfrotto Pixi Mini

When you're out backpacking, the weight of everything you carry really adds up. I'm always on the lookout for ways to cut back on the weight of things I take with me when out shooting or hiking. One of my heaviest pieces of camera gear which I commonly pack is my MeFoto Backpacker tripod. It's a little shorter than a standard tripod, but its total weight of 2.5 lbs. is comparable to the full size Manfrotto BeFree at half the price. The versatility of the Mefoto is great to have when I know I'll be doing long exposures, but it's just too heavy to take backpacking without a good reason to do so. It also has a tall minimum height, making true low angle shooting a challenge. Naturally I've been looking for ways to remove it from my pack when I found my latest purchase: the Manfrotto Pixi Mini tripod.

Import 854-2.jpg

Build Quality

The body is a combination of plastic and metal, and overall it feels quite solid. The tripod is hefty enough to keep my D5500 and 18-140mm lens stable on a flat surface. It becomes a little unstable when the lens is extended all the way out to 140mm, but I rarely find myself shooting at that focal length and the Pixi. The 3/8 in. screw on the top of the tripod is designed to fit directly into the bottom socket of a camera as opposed to an Arca-Swiss plate like most other tripods. The ball head can be adjusted by pressing the red button on the front of the tripod and swiveling the camera to its desired position. It takes a lot of force to actuate the button, but the ball head moves quite freely once a camera is mounted on the tripod. Little rubber feet on the bottom of the tripod keep it from sliding around when on slick surfaces like a desk.

Backpacking

My main reason for buying this tripod was to replace my current full size tripod for multi-day trips. After a few months of testing, it seems like a very capable replacement. I used to pack a tripod only when I knew there were waterfalls or other features that I'd need ND filters for, but now I can always have a tripod on me whether on the trail or in the city. Its smaller size saves on weight but makes some shots challenging due to the low profile of the tripod. You have to plan your shot more when using the Pixi and work with the landscape by finding the best vantage point given the tripod's low height.

If there's a shot I want which I can't get at the time with the Manfrotto Pixi, I'll just come back at a later time with my other tripod. The Pixi works in a pinch and saves a ton of weight in my pack, so I'm willing to sacrifice some versatility for an item I use once or twice on a trip. Below is a shot that I took with the Pixi suspended over the stream on a fallen tree.

I've also used it extensively on day hikes where photography wasn't my primary goal for the trip. It fits conveniently in the top of my LowePro camera bag and leaves the side pocket free for a 1L Smart water bottle. I can throw it in my backpack or whatever bag I'm carrying. Since it's so light, I'm more likely to bring it along when I'm just walking around shooting. In my experience, it's better to have a small tripod than none at all.

Blogging

The other reason I chose this tripod as an alternative to my MeFoto Backpacker was because I knew I'd use it for blogging. The minimum height on my MeFoto is 17.3 in. vs. 5.31 in. with the Manfrotto Pixi, so the Pixi has the clear advantage for low angle shots. A lot of the products I review on this blog are best photographed on a table, which requires a tripod with a low minimum height to get up close with my 40mm macro lens. My lighting situation isn't always the best for the products I shoot, so the added stability lets me take longer exposures and achieve a greater depth of field than I could obtain shooting handheld.

Macro Photography

Finally, macro work with my 40mm f/2.8 lens has greatly. I've been working more with intimate landscapes this year and use the Pixi to create "macro landscapes". Bugs don't particularly interest me and my subjects (trees, brush, flowers, etc.) don't get scared off if I'm on top of them with my tripod and lens. The Pixi allows me to take long exposures at f/16 without having to increase my ISO. A lot of these macro landscapes require a low viewpoint, which is perfect with the Pixi. Both shots below were taken with my 40mm f/2.8 and the Manfrotto Pixi.

Summary

If you're looking for a light, low angle capable tripod then look no further. The Manfrotto Pixi isn't a total replacement for a full-sized tripod but it's found a place in my bag on almost every shoot. I use it for intimate landscapes, product photography for this blog, and as a lightweight alternative to my full sized MeFoto. It's handy both as a tabletop tripod and as a hiking companion. It's currently priced at $25 on Manfrotto's website but I bought mine on Amazon. Consider picking one up if you're in the market for a tabletop tripod that's capable of a whole lot more.