The Ridges

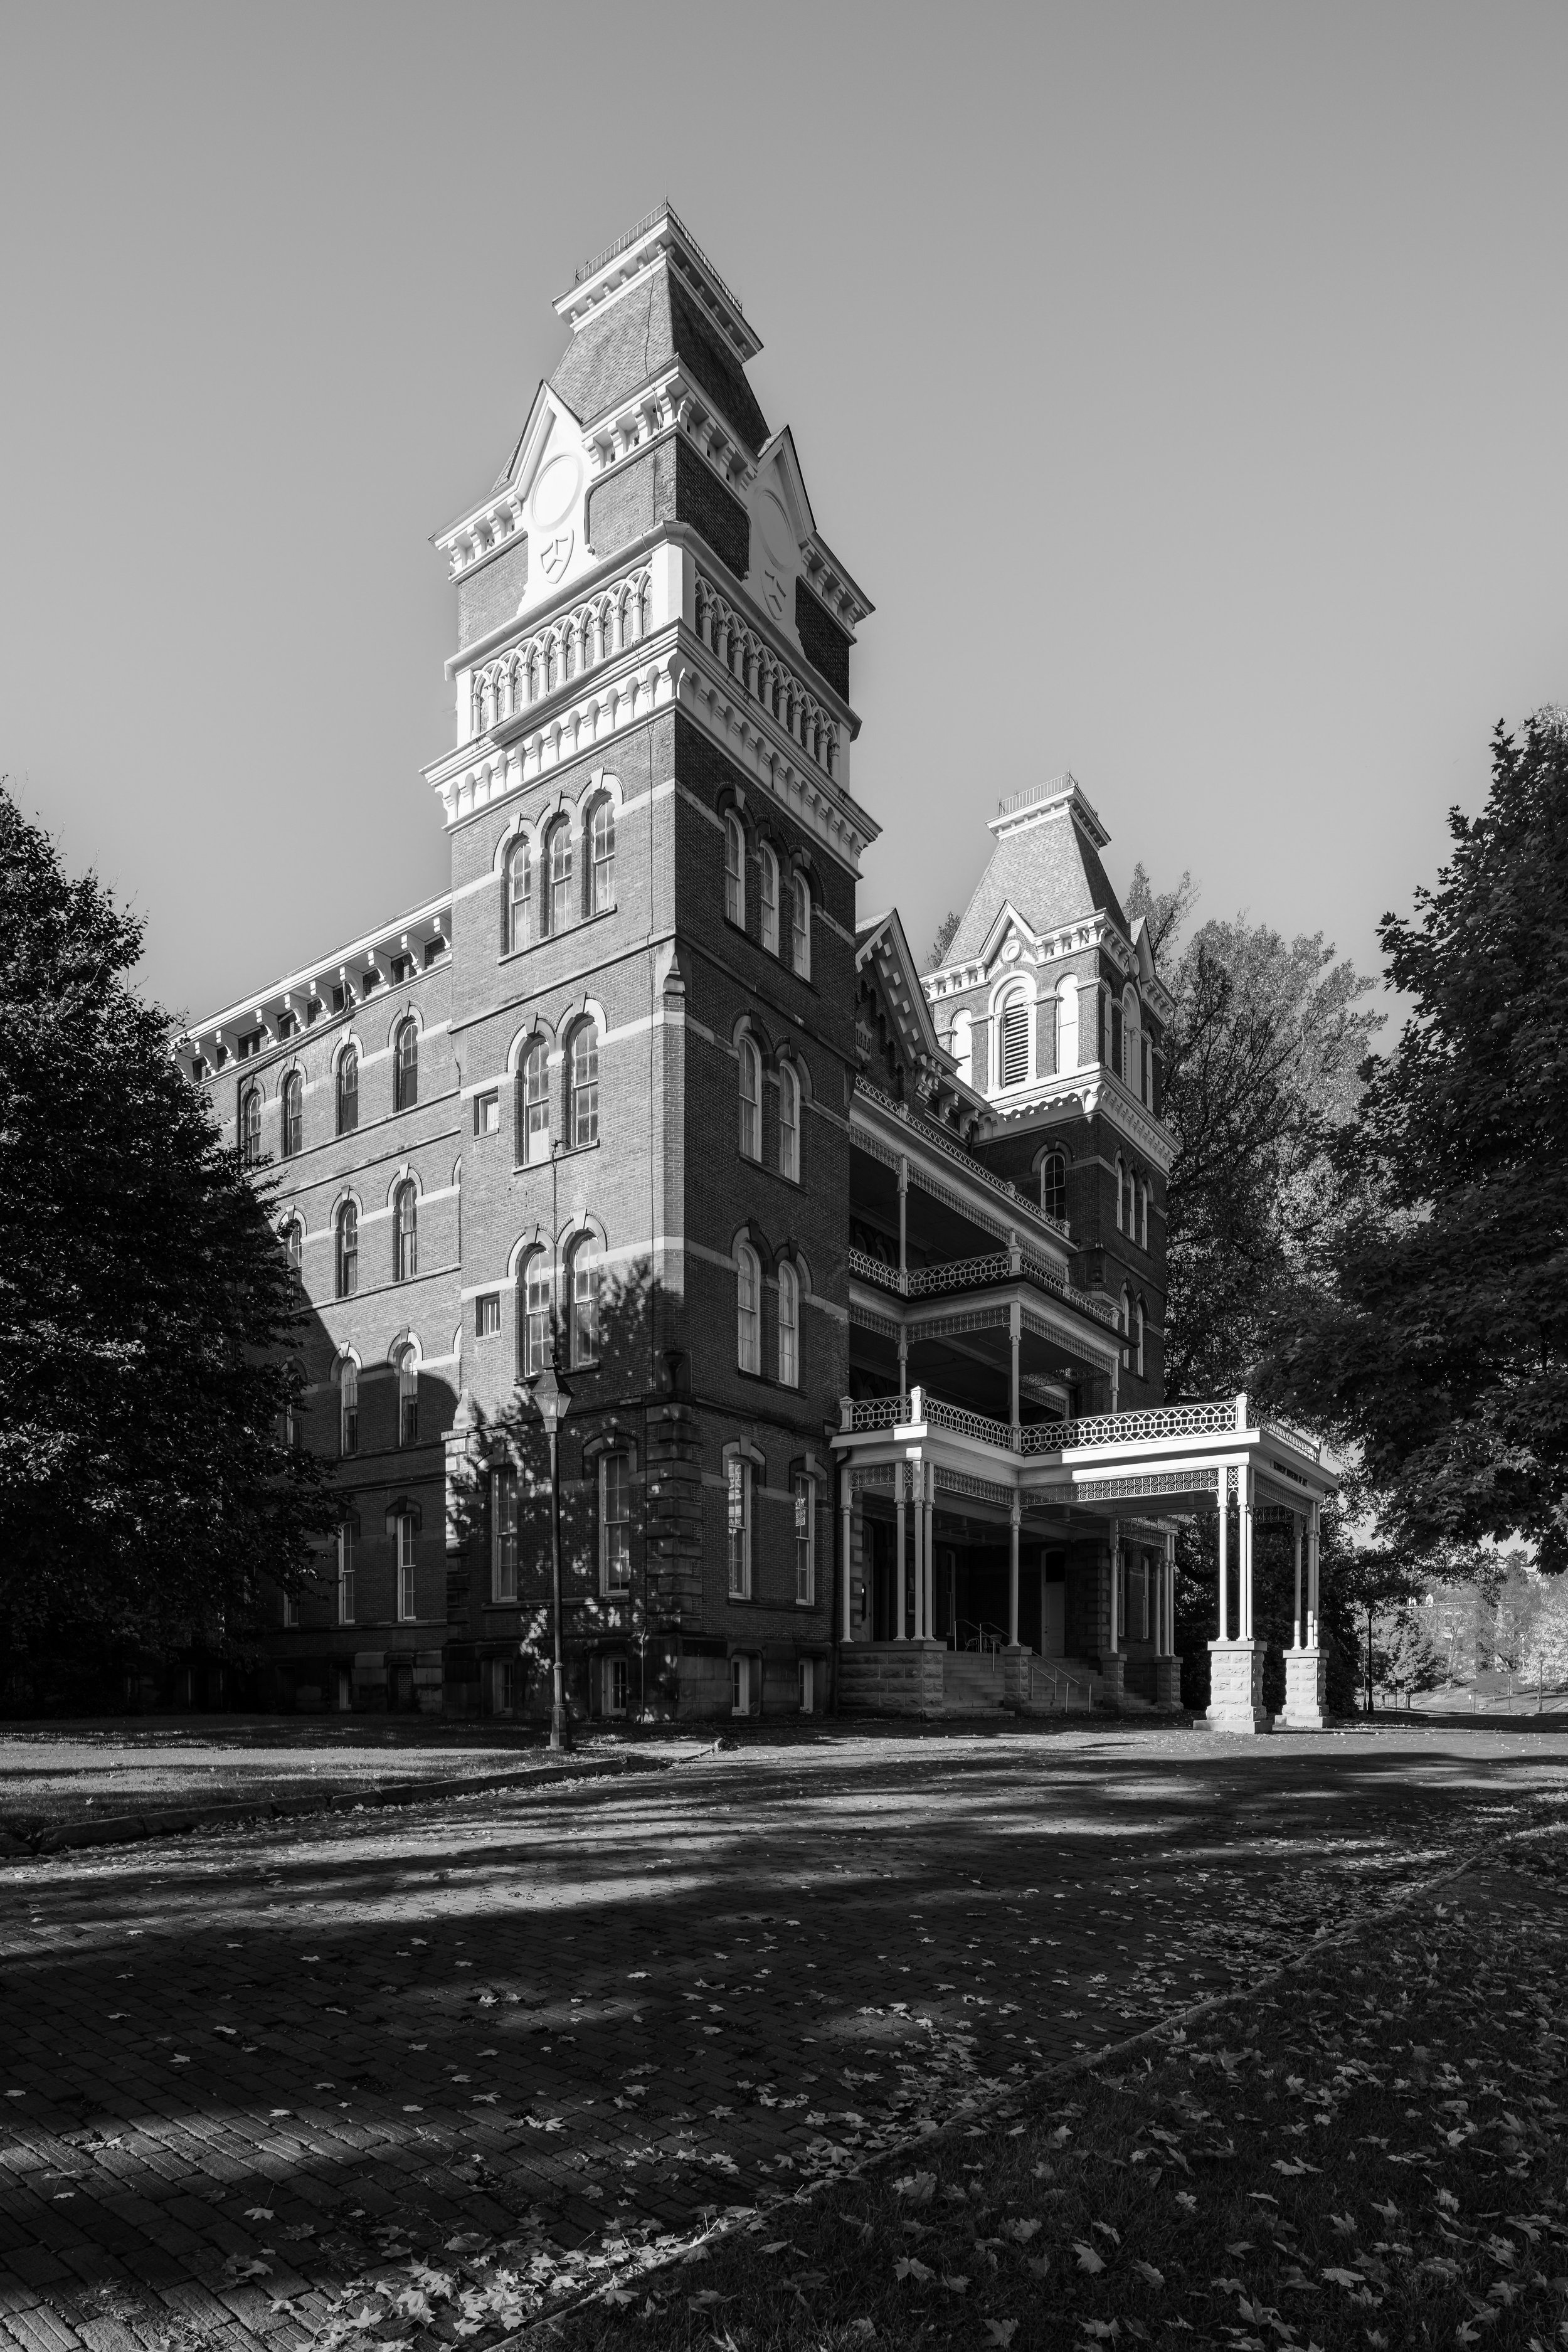
My relationship with The Ridges, formerly the Athens Lunatic Asylum, began back in 2014 when I was a freshman at Ohio University. It was the start of the 4 years I’d live in Athens while working towards by BBA in Management Information Systems & Analytics at Ohio University. It was a chilly fall night and I was sitting in the lobby of Reed Hall (the same dorm my where my dad lived in 1980) with my friends when I first heard about the place - an abandoned asylum that sat atop a hill overlooking the South Green section of campus. A group of about 15 of us decided to brave the cold October weather and venture out into the night.

A winding road paved with ubiquitous “Athens Block” bricks leads you up to the rear of the asylum, a short walk across the Hocking River from East Green where I lived. Rusted iron fire escapes, tattered curtains slung behind barred windows, and a graveyard with almost 2,000 nondescript burials draped in darkness piqued my interests in history and architecture. I hadn’t yet discovered my love for photography, but The Ridges had me hooked on asylums. I spent lots of time walking laps around the former Kirkbride Plan asylum, mostly at night when I had free time after classes. Looking back on the very first pictures I shot with my D5500, I’m almost glad I never did any serious shooting there. I feel like I’d be disappointed looking back on those photos today. When my dad asked if I’d like to come along for a quick trip to Athens I jumped on the opportunity, excited to finally document the place where you might say it all began - the Athens Lunatic Asylum.

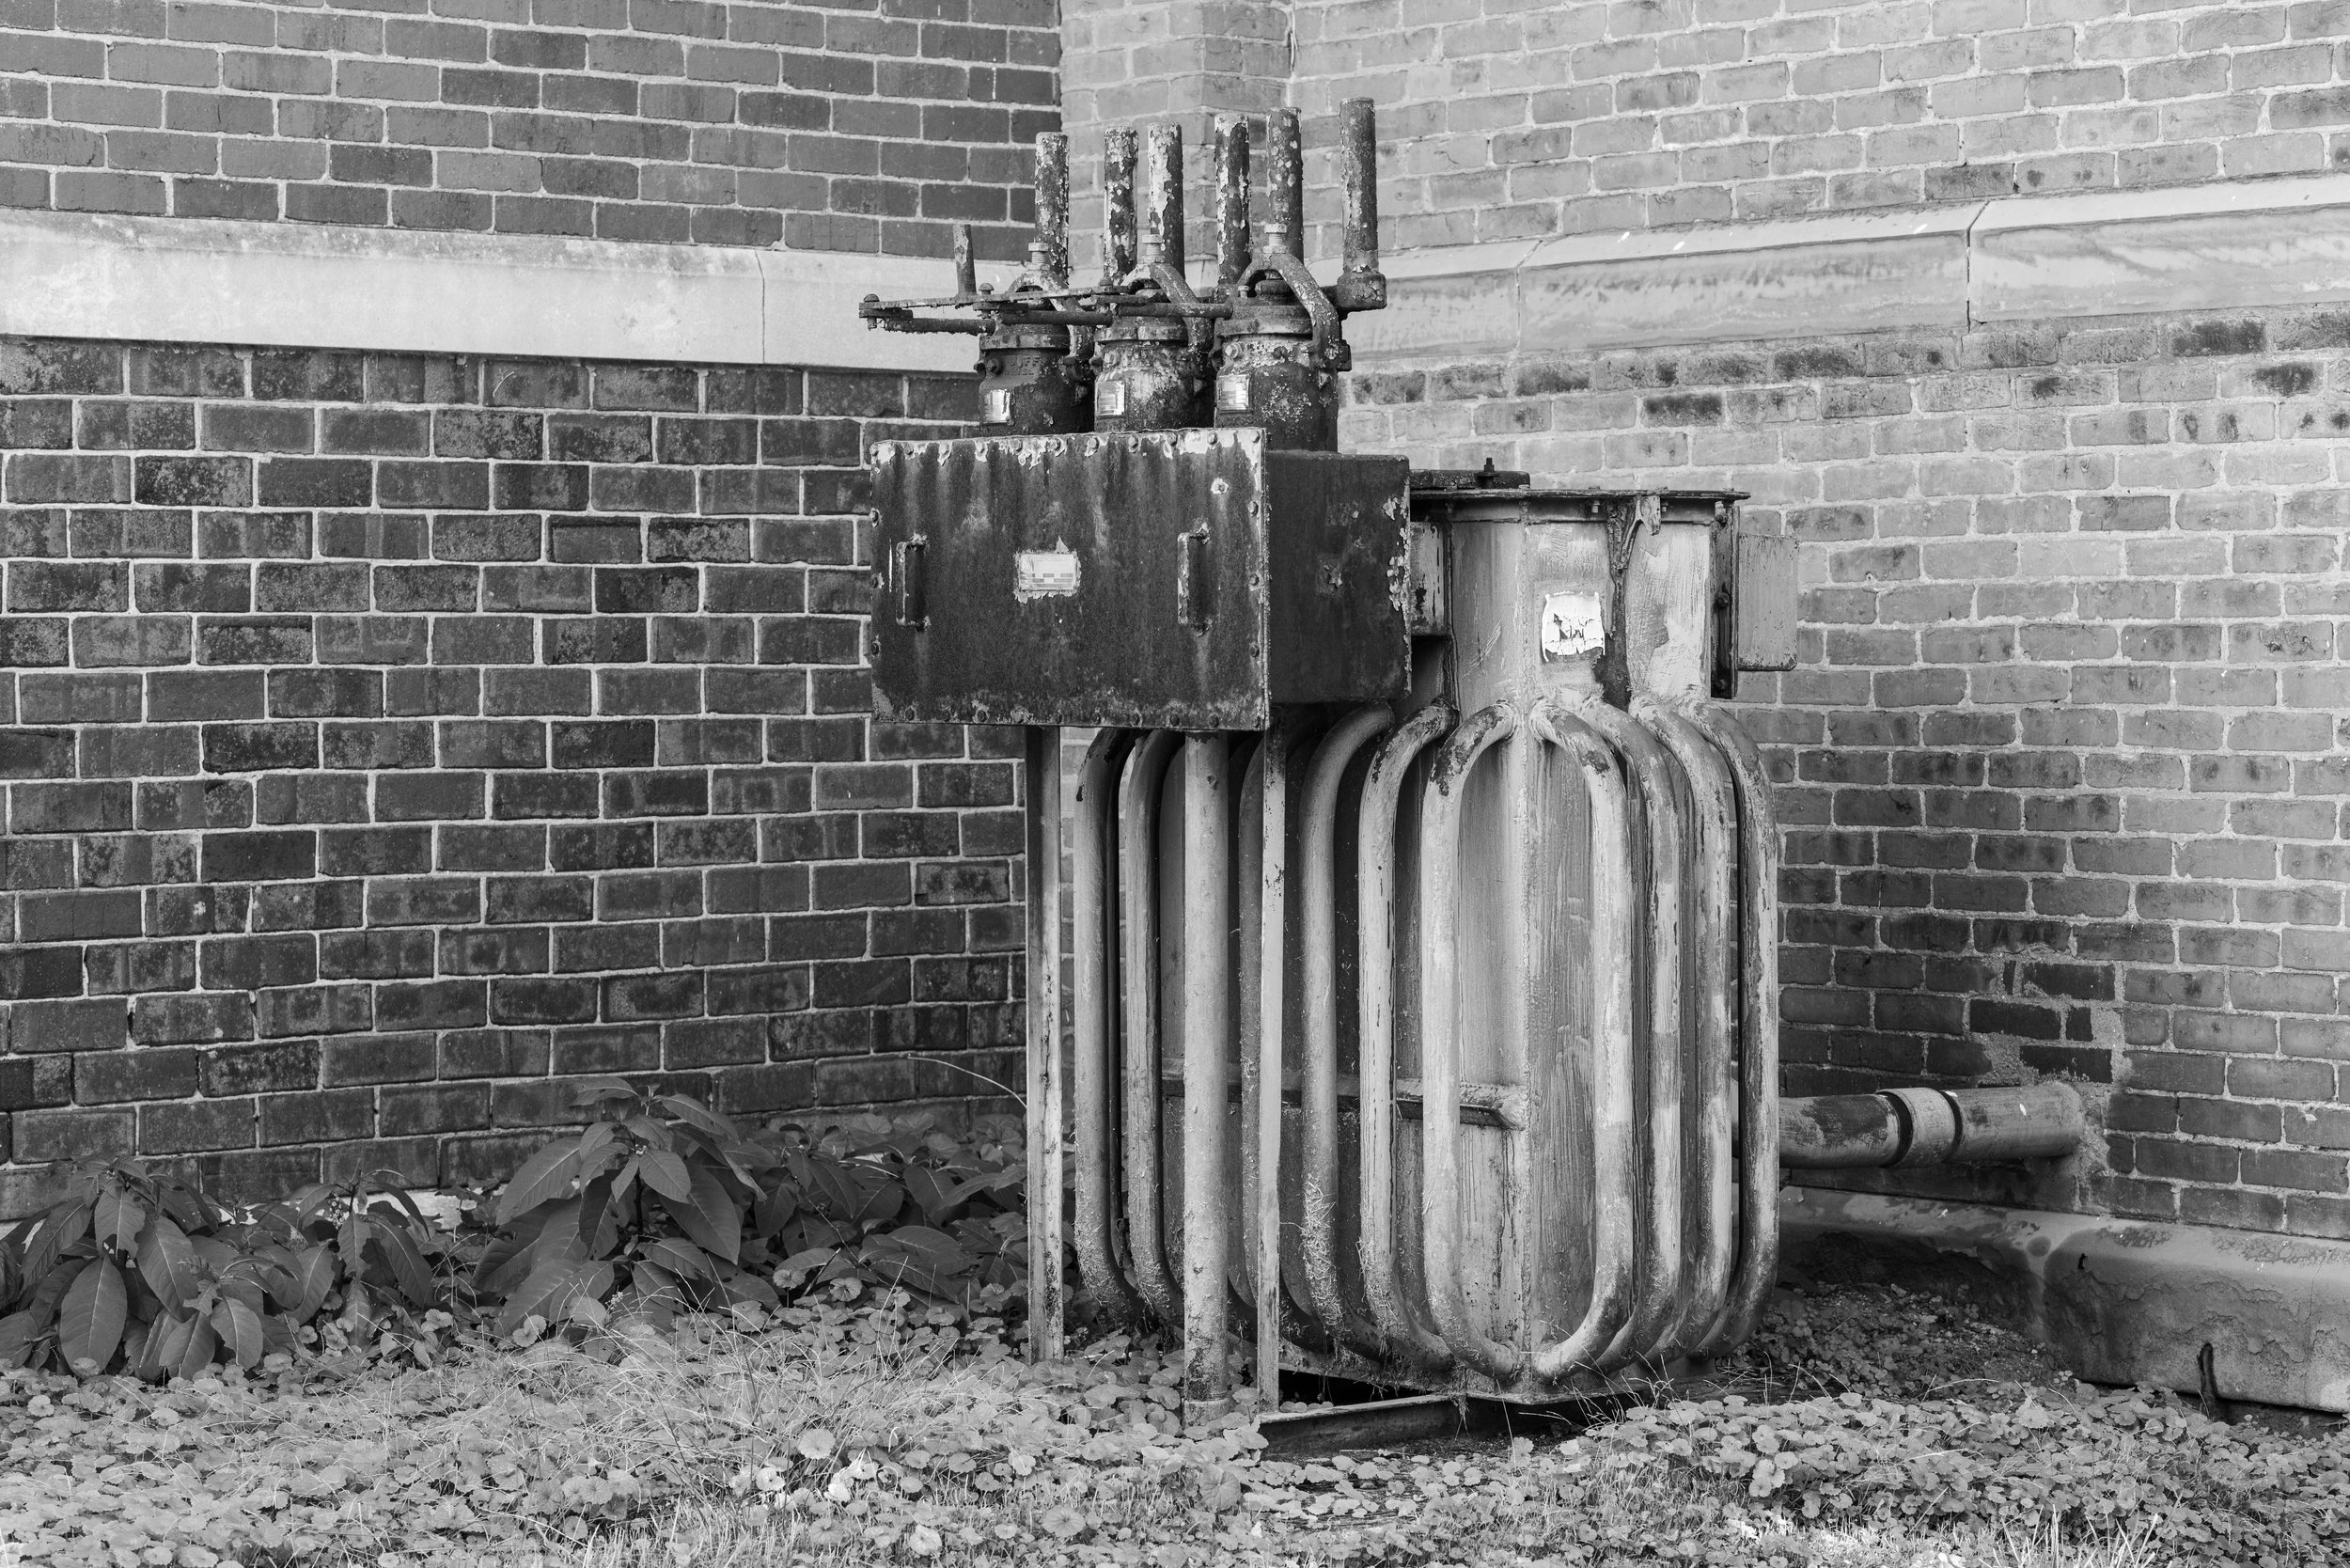
Opened in 1874, the Athens Lunatic Asylum was designed to house a combined total of 572 male and female patients. The campus was expanded over the years with new buildings and housed 1,800 patients at its peak in the 1950s. Ailments of those committed ranged form epilepsy to feebleness and hysteria. Physical labor was considered a form of occupational therapy, and patients helped staff the various agricultural ventures of the asylum. The entire campus was designed to be somewhat self-sustaining in nature, with a dairy barn, farmland, a power and steam plant, a piggery, and orchards. With the introduction of new psychiatric treatments and changes in the way mental illness was treated, the population of patients at the asylum steadily declined until the facility closed in 1993.

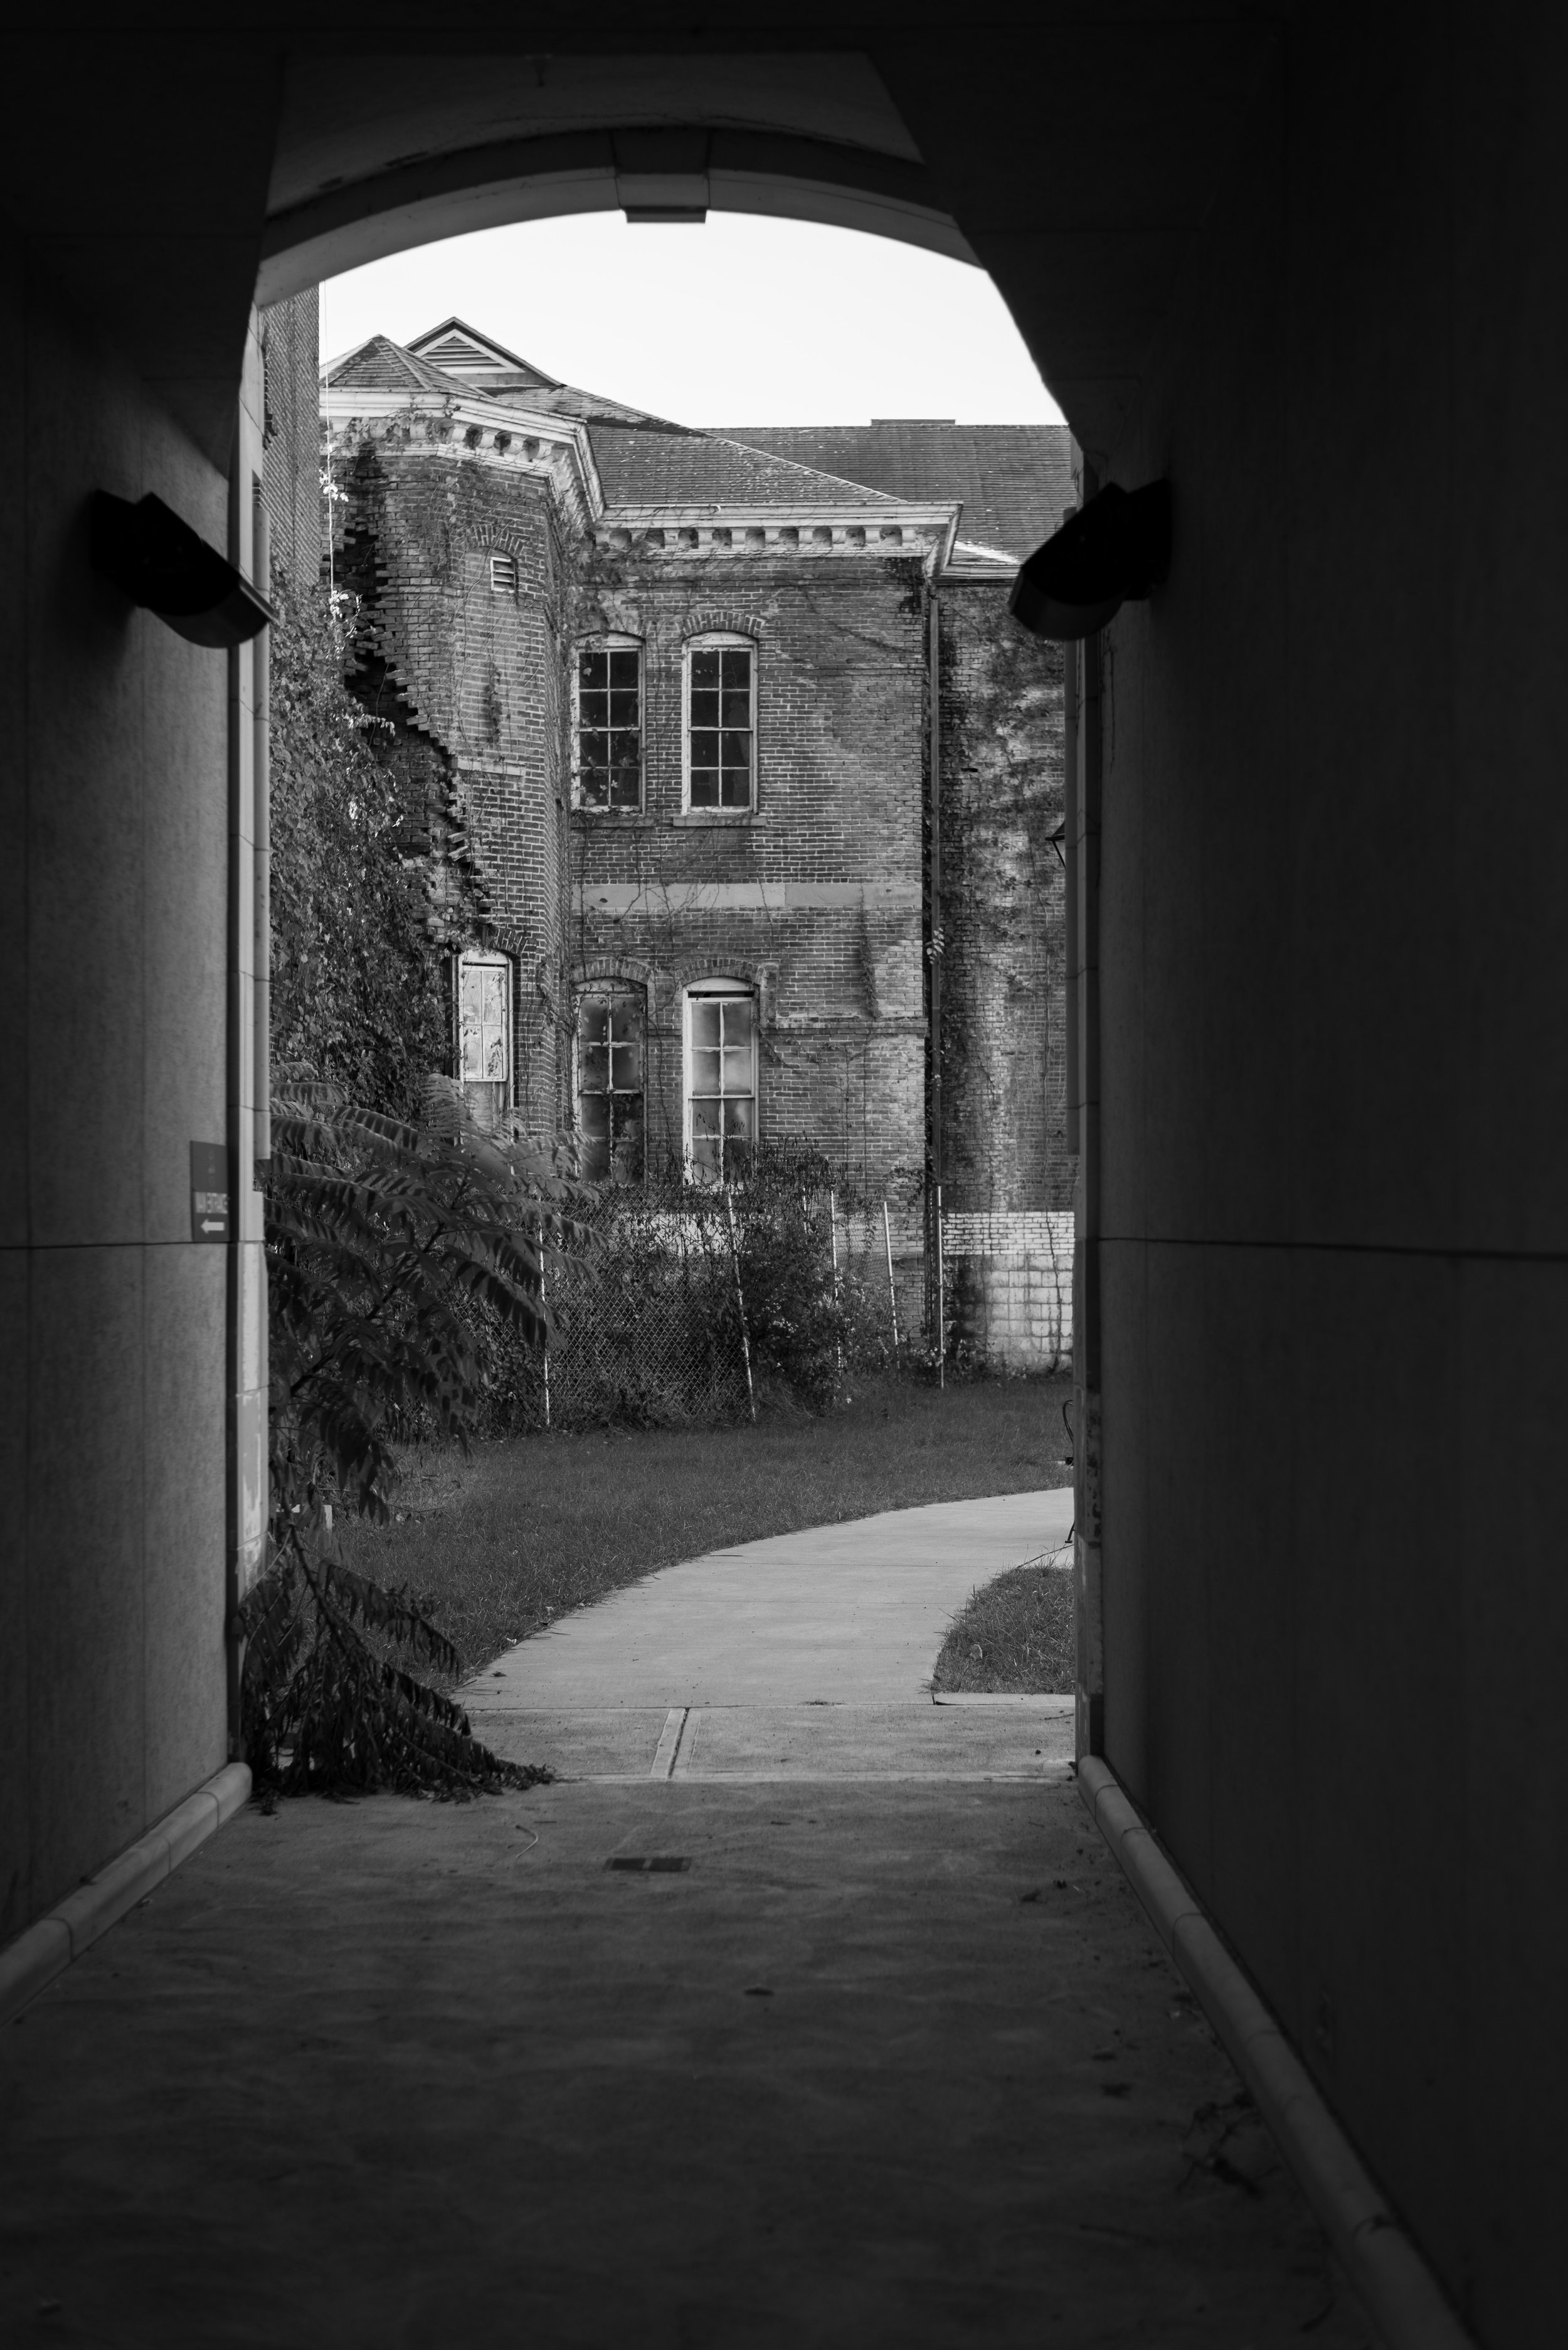
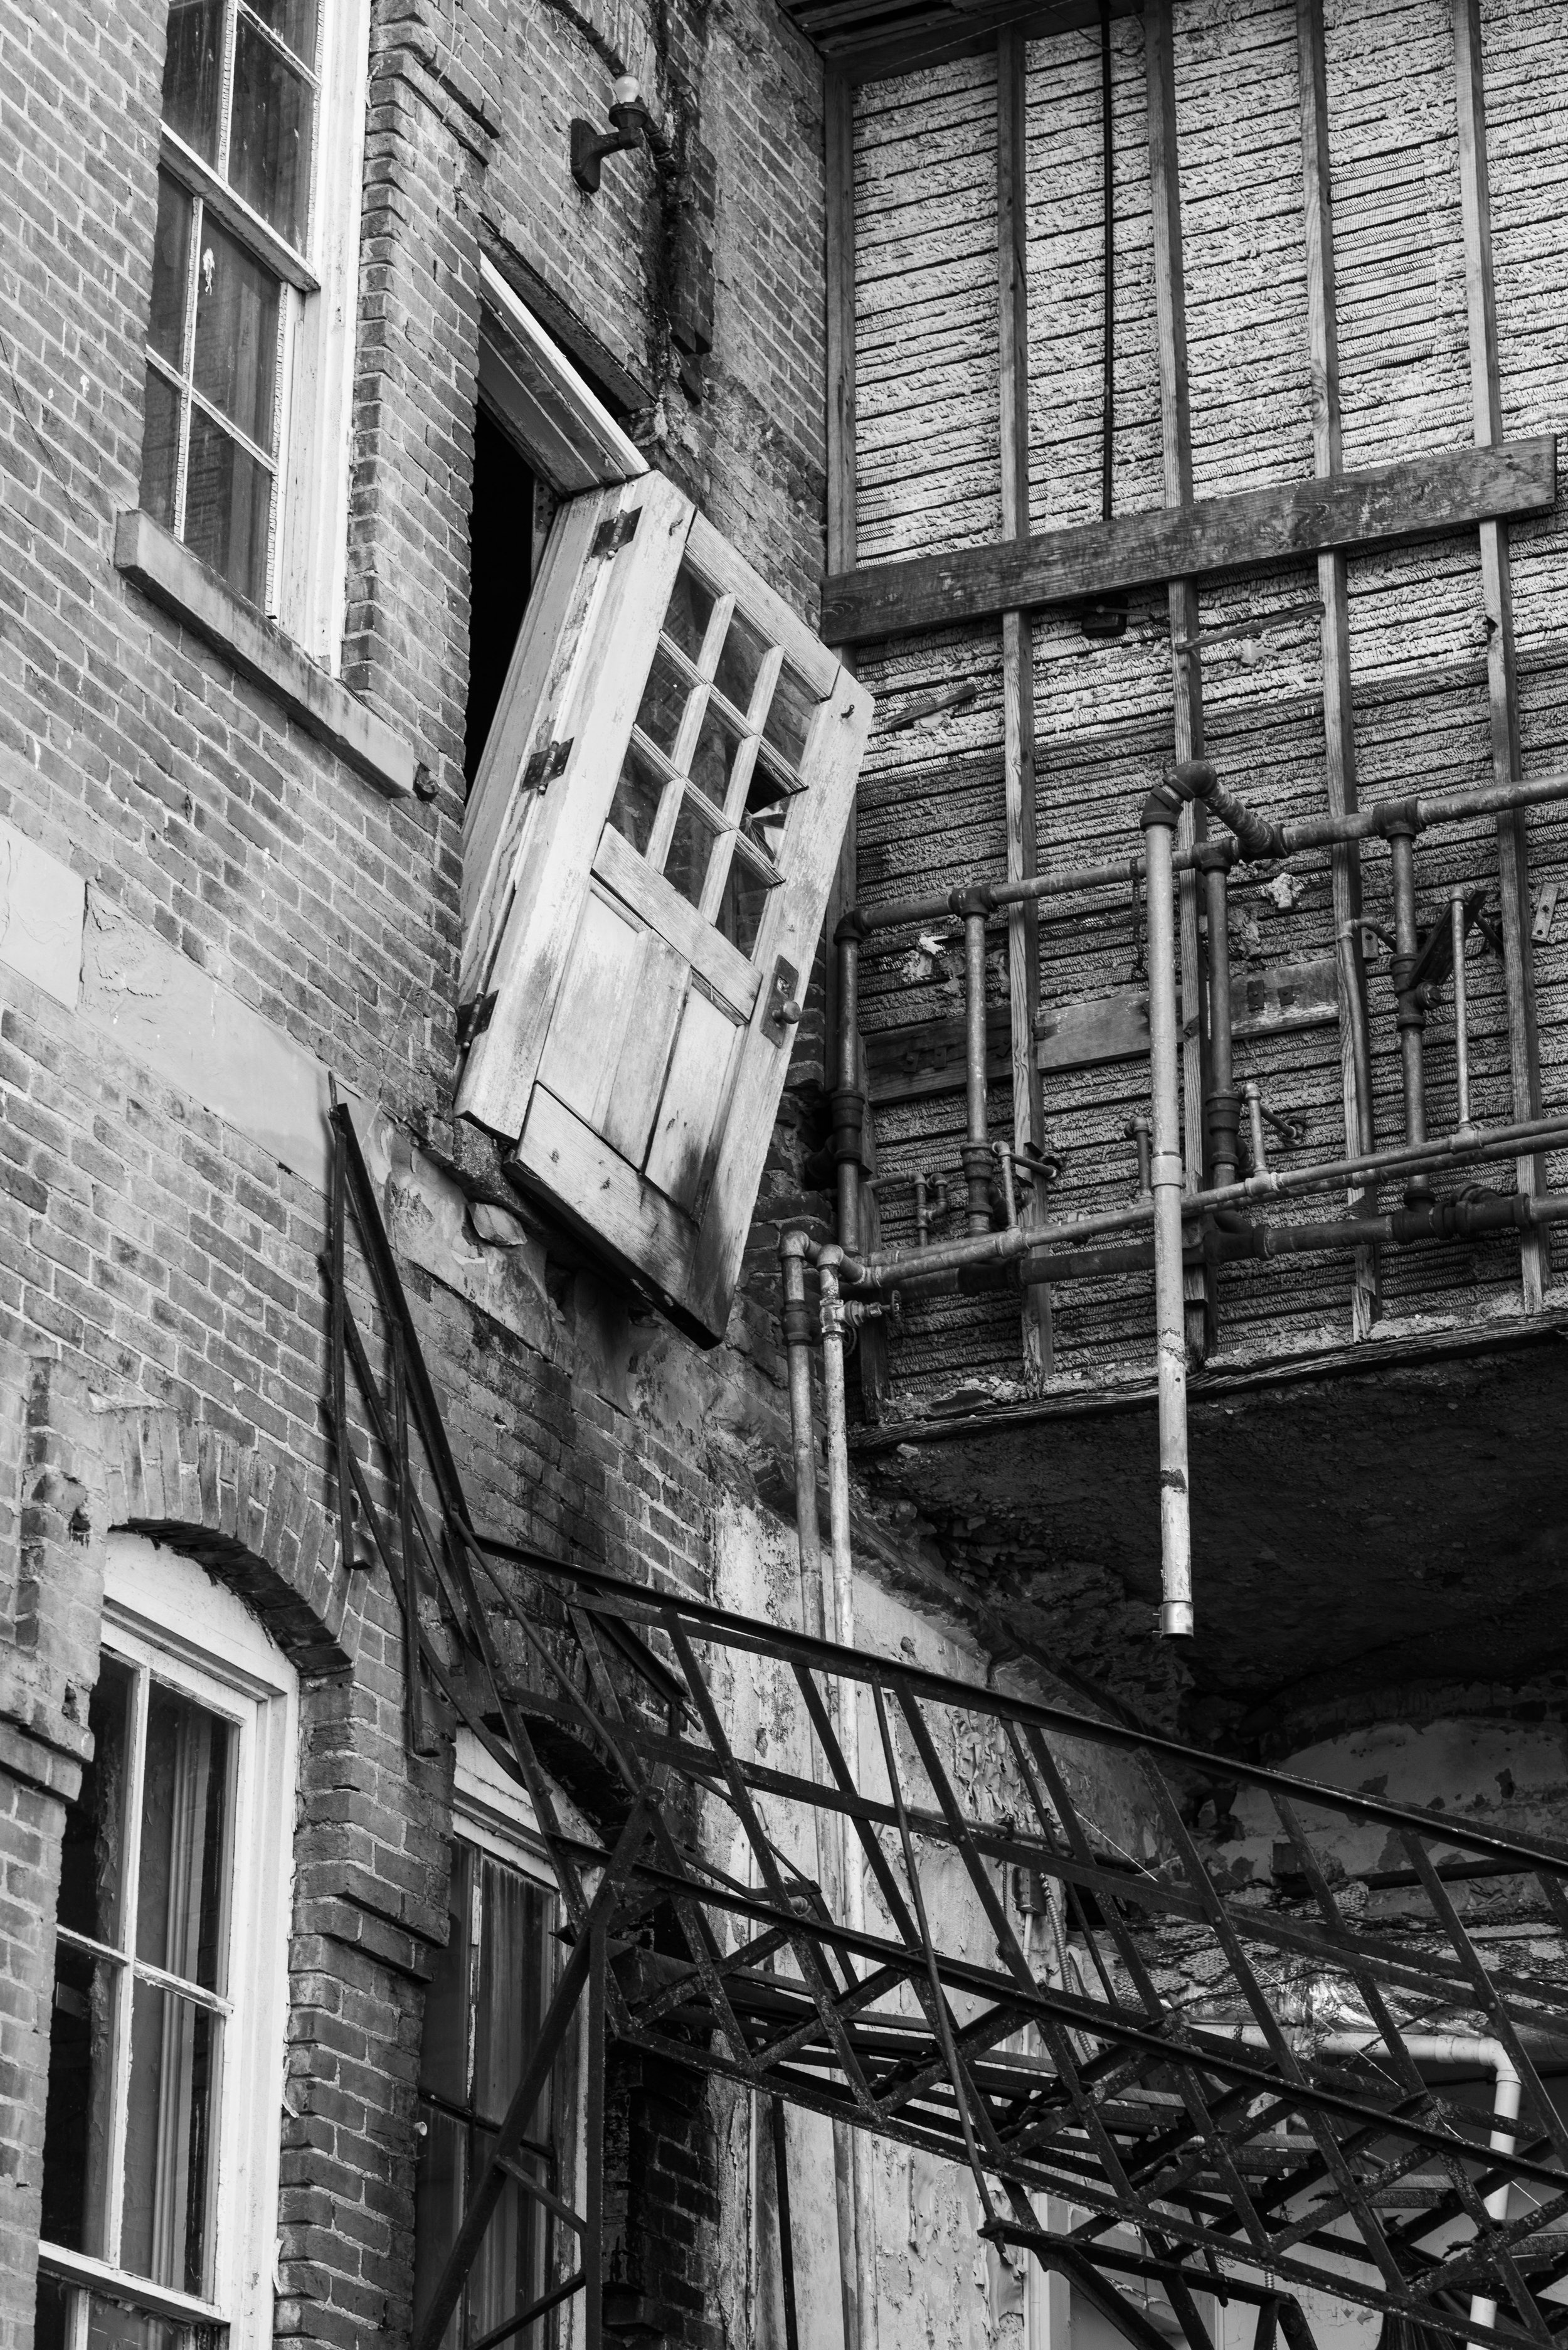
The Ridges are a rare case of an asylum finding new life after the deinstitutionalization movement and state governments sapped funding from residential mental health facilities across the country in the 1980s. Ohio University inherited the dilapidated complex of buildings in 1993, which had fallen into disuse as the patient census declined. The main Kirkbride building has been repurposed to host various functions of the university, including the police department and the Kennedy Museum of Art. The West wing, at least from the exterior, appears unused. The spires which dotted the roofline have been removed. A number of outlying buildings, including the receiving hospital, Cottage B, and the tuberculous ward have been demolished. Most later additions like the auditorium and cottages (excluding Cottage M which awaits asbestos remediation) have been remodeled and repurposed, presumably because the cost of renovation was more reasonable than the work needed to bring the Kirkbride building back online.

Over the years, around 2,000 patients were buried across the three cemeteries at The Ridges. Most were given numbered grave markers for which the ledger that contains personal details of those interred is long lost. Similar to Letchworth Village, numbered grave stones were used as a cost saving measure over creating custom marble monuments for the deceased. While The Ridges certainly gave off a creepy atmosphere when I first visited, I became more comfortable there during my many subsequent nighttime visits. I don’t particularly believe or disbelieve in ghosts, but I never saw much at The Ridges to make me think they exist. For me, The Ridges was a place to explore and unwind with a long walk at the end of a tough day. The familiarity of the towering asylum was comforting, almost like visiting an old friend. And I’m glad I made the trip.

Coney Island Cyclone

2400 DPI.jpg

The picture above, if you were unfamiliar with modern day Coney Island, doesn’t look that strange at first glance. There’s a few things that stick out when you take a closer look though: a ride on the Cyclone costs 25¢, there’s a Ford Model A waiting by the curb, and a bus ride costs 50¢. Why? Because this is actually a scan of an 8x10 cellulose negative from the 1930s. I was absentmindedly flipping through the Lelands 2020 Fall Classic auction catalog at my parent’s house in November when I saw this lot tucked away at the end of a larger selection of photographs up for auction. It came from a group of negatives obtained from the Brown Brother’s, the world’s first stock photography agency. There isn’t a specific date associated with the negative but it was probably taken sometime shortly after The Cyclone opened in 1927.

The tagline of my site is “History | Exploration | Photography”, and I don’t think I’d be living up to said tagline if I didn’t try to revisit this shot in the modern age. The Cyclone still towers over Surf Ave some 94 years later, though the area surrounding it has seen better days. The Big Dipper, built in 1921, was torn down in the late 40s and is now a vacant lot. I’m planning a trip to Rockaway Beach to visit the abandoned Fort Tilden this winter, and I’m hoping to stop by Coney Island and recreate this photograph with my own 4x5 camera.

I have to throw in a shoutout to my incredibly awesome dad who won this negative from Leland’s for me as a Christmas present, and I thought I’d share it here for those who appreciate history and photography like I do.

Review | Kentmere 400 vs. Tri-X vs. HP5 Plus

This post was inspired by another I made back in the early days of my website, a post from October 2017 titled Kentmere 400 | Budget B&W Film. Since that time I’ve come a long way with my film development techniques, the capability of my scanning equipment, the digital workflow I use to scan negatives, and my overall knowledge of photography. Looking back on that article I figured it was time for a redo. I loaded up my LowePro 400 AW II with my Nikon F100, 12-24mm f/2.8, 50mm f/1.8, and 85mm f/1.8 one foggy March morning before striking out through the streets of NYC to shoot some film.

GRC_20538.jpg

First, a quick bit about the technical specs behind this comparison. Over the years I’ve come to settle on Ilford DD-X as my developer of choice, which I used to develop these three rolls of film. I do keep a bottle of Rodinal on hand for slower films (Ferrania P30 or Across 100) but DD-X is my go-to for everything else. I started off with HC-110 but found the dilutions impractical for most film I shot. All negatives were scanned on a Nikon D810 with the 60mm f/2.8 AF-S macro lens and a Nikon ES-2 adapter, which is a massive leap forward in quality from the V600 I used when I first started shooting film. Hopefully this will be apparent when you look at the images below, which you can click on to get a closer look.

After digitizing the negatives I import the files into Lightroom, do some basic exposure adjustment, then finish the editing process in Photoshop. All photos were given the same amount of sharpening and then inverted after cleaning up any lingering dust with the spot healing tool. Lastly, I converted the file to 16-bit Grayscale and added a curves layer to set the white/black points in Photoshop. I then used Lightroom for final adjustments and export.

Tri-X 400

Kodak Tri-X 400 is a classic, and was the first film I started shooting with back in college. As of October 2021, Tri-X will run you $9.95 a roll for 36 exposures. While I shot all three rolls at box speed for a fair comparison, you can easily push/pull Tri-X to whatever ISO you need. The same can be said for HP5 Plus.

I personally have a love/hate relationship with Tri-X because no matter what I do, the grain is always hit or miss when scanning. It provides a grittier look than other Kodak films (specifically T-Max 400). Sometimes this grittiness fits your subject - I’ll often choose Tri-X when shooting at former military bases because of the grain alone. The golden rule of film photography is to shoot for the shadows and develop for the highlights, however I’d caution overexposing this film too much. I’ve found that when scanning, especially if you’re using something like an Epson V600, it can be very difficult to recover highlights from Tri-X without throwing off the whole image. Out of all the films I tested, I felt Tri-X had the best balance of contrast overall.

Kentmere 400

Working on a budget? Kentmere 400 is probably the film for you. Clocking in at $5.19 a roll for 36 exposures as of October 2021, this is the lest expensive film I shot for this comparison. I love Kentmete films for when I need to test a camera, lens, etc. because they’re reliable and inexpensive. Kentmere is a low contrast film which leaves you a lot of room to work in the shadows, and turns out great when developed in DD-X. I’ve shot numerous rolls of this film to test repairs I’ve made to my cameras, but not very many on what I’d consider serious work. I just don’t shoot enough film to make the price per roll very relevant, but I think you’d be hard pressed to find a B&W film in this price range that performs this well. I’d also highly recommend Kentmere 100, which I didn’t test here but still make use of quite often.

One word of caution when scanning Kentmere films with flatbed scanners like the Epson V600 or V800 - be very careful with the Unsharp Mask. I actually like to leave this option on when scanning 120, but I think it’s too aggressive for Kentmere and leaves the grain looking chunky. I’d leave the sharpening to Photoshop.

HP5 Plus

At $8.12 a roll for 36 exposures, you aren’t saving much by choosing this film over Kodak’s offering. But HP5 Plus offers something different than Tri-X - stronger contrast and what I think is less pronounced grain, especially in the skies. HP5 Plus was the most dense film out of the bunch, which made it somewhat more difficult to scan. I don’t think this had anything to do with overexposure since my F100 is usually pretty consistent in matrix metering mode. I’d probably let it sit in the developer a little longer next time.Regardless of the negative density, the results speak for themself - just look at the detail in the chrome of the motorcycle pictured below.

The Verdict

So what does this mean to you as a photographer? If you need a budget film, Kentmere is your best choice. Otherwise I’d say it’s a tossup between Kodak Tri-X and Ilford HP5 Plus. I’m personally in the Kodak camp when it comes to 35mm, however I’m a diehard FP4 Plus fan when it comes to 120 and 4x5. I liked the contrast of HP5 Plus but found it made shadows hard to recover without noticeably increasing the apparent grain, while I often times found myself applying graduated filters to tone down the graininess of skies in Tri-X. I think I spent less time editing my Tri-X shots in Lightroom after applying a basic curve in Photoshop, but I wouldn’t say that’s a good indication of film performance. Both films are a solid choice - try both and see which you like better! There’s never a bad time to go out and shoot some film.

Brooklyn Army Terminal

GRC_20623-Edit.jpg

The Brooklyn Army Terminal comprises a network of warehouses, administration buildings, piers, and railroad tracks which occupy the shores of Sunset Park, Brooklyn. What began life in 1918 as a supply base exists today as a shell of its former self, sparsely occupied by various industrial tenants. Construction of the terminal was authorized during WWI but was not completed until after the war had ended. Swinging into action for WWII, the Brooklyn Army Terminal was a crucial facility supporting the New York port of embarkation. Locations such as “AFRICA, ODD COUNTRIES” and “PORTUGAL” are stenciled on the concrete pillars of Building B, just some of the destinations where men or material might be dispatched.

Millions of soldiers passed through the terminal on their way to various theaters of war during WWII. After the terminal was vacated by the military in 1975, logistical operations were moved to the now-defunct Military Ocean Terminal in Bayonne, NJ. A unique feature of Building B is the gantry crane and small concrete balconies arranged in neat diagonals on the interior courtyard’s walls. Freight would enter the warehouse via rail and be offloaded directly by the gantry crane, which would deposit the delivery on the appropriate concrete balcony a number of floors up.

My visit to the terminal was eerily quiet. Building B is a gargantuan warehouse with overgrown railroad tracks, rusting equipment, and little activity. I had to keep my eye on my camera’s meter to make sure I didn’t loose shadow detail as the skylight overpowered the scene, flooding the interior of Building B with light. Looking at my negatives, there’s clear definition between the highlights of the skylight and the shadows of the courtyard. One thing that amazes me about film is the ability to recover highlights – when shooting digital, you meter for the highlights and recover the shadows in post. In this case film was not only the best choice in terms of technical medium for the subject, but also fit the overall narrative of the history surrounding the Brooklyn Army Terminal.

GRC_21469-Edit.jpg

Review | Canon F1n

My very long (and expensive) journey into film photography started out with the iconic Canon AE-1 Program and a 55mm f/1.2 SSC lens which my mom helped me buy from Midwest Photo Exchange in Columbus OH. It was a good camera to start out with, but I quickly outgrew the basic features of the AE-1 Program. I eventually upgraded to a Canon A1, which added some nice features like a multiple exposure override lever and a digital meter readout. But even that wasn’t enough, and I landed on the Canon F1n. Having invested in the 24mm f/2.8 SSC, 55mm f/1.2 SSC, and 100mm f/2.8 SSC, it made sense to upgrade bodies rather than jump lens platforms and mount. First available in 1981 as Canon’s top of the line film camera, the F1n was the last in a confusingly named line of FD mount profession 35mm SLRs. The F1 series was released in the following order: F1, F1n, New F1 (or the F1n latest version).

Import 11917.jpg

Tech Specs

One of the things which really stuck out to me about the F1n was just how satisfying it feels to hold. It’s a heavy SLR, and I personally find the weight reassuring. There’s barely and plastic on the F1n. It has some handy features common to top-of-the-line SLRs of the era like Nikon’s F series: interchangeable focusing screens and viewfinders, a fast maximum shutter speed of 1/2000 sec, and an optional AE winder/grip. The type of metering the camera performs is dependent on the focusing screen you use: A for average metering (matrix), P for partial (center weighted), and S for spot metering. I personally use a PL screen with center weighted metering and a cross split focusing aid. I find A screens to be unreliable and S screens to be too time consuming to use. The camera features match-needle metering where you change the aperture/shutter speed to determine the correct exposure. I prefer this over the meter of the AE-1 Program or A-1 because you know just how slightly over/under exposed your shot it compared to the meter readout. Note that you’ll need the AE Finder FN for aperture priority shooting and an AE Power Winder for shutter priority shooting. Many folks who choose film as a medium do so for a more manual experience, so these accessories are totally optional.

GRC_19866.jpg

The Verdict

If you are invested in Canon FD lenses and want the best (but not the most recent) FD mount camera you can get, the F1n is for you. However, I think 95% of people would be fine with an A-1 instead. It’s less money than the F1n and has all the features you’d need in an SLR, unless you want interchangeable viewfinders and focusing screens. An annoying quirk of the F1n is you can override the film advance to make a multiple exposure, but it still advances the film counter. You can only take so many so many multiple exposures before the film counter runs out – a problem the A-1 doesn’t have. The A1 is also a lighter camera. Otherwise, the F1n is a technically excellent camera.

While I did appreciate the vertical grip aspect of the AE winder, I often left it off the camera because it adds a lot of weight to the whole package with 4x AA batteries. Photographers today who shoot film are using the medium because of the unique look it provides, the complexity, and the greater perception of involvement the photographer has in the final product. I think you’d be hard pressed to find a photographer who’s shooting film in a sports or action setting, which negates the main benefit the AE winder provides: 4 FPS continuous shooting. That’s another reason I often left the AE winder at home: I missed throwing the film advance lever after every shot, which gives a satisfying thunk after every shot.

The real drawback to the F1n, which I can’t fault the camera for, is the FD mount itself. I ultimately sold my AE-1 Program, A-1, F1n, and all my FD lenses because I just couldn’t stand the breech-lock system anymore. The lock collar needs to be in a very specific position to take the lens on and off the cameras, and the rear lens caps are a pain to deal with compared to my Nikon F mount lenses. I recently combined my 35mm and digital platforms together with my recent purchase of a Nikon F100 and D810. I hope you found this helpful and feel free to send me any questions you might have here!

Review | Mamiya C22

_GRC3865.jpg

I’ve been through a few different camera systems over the years, refining the equipment I work with to fit my shooting style. I started off in the world of medium format film with a Bronica ETRS 6x4.5, mainly because it was a reasonably priced system to get into. Scanning on an Epson V600, I just wasn’t happy with the picture quality I was getting from my negatives. The 6x4.5 format exists in this weird space between 35mm and 6x6 and I felt like it really didn’t provide any benefits over just shooting 35mm with my F100. When many people think of the 6x6 format, they envision a TLR (twin lens reflex) from companies like Yashica or Roliflex which features a fixed (usually ~80mm) lens. I stayed away from these cameras because I wanted interchangeable lenses, though I wanted to stick with the TLR style of camera. The unique selling point of the Mamiya TLR system is the range of interchangeable lenses which allows you to switch focal lengths mid-roll.

The Mamiya C22 is solid camera that just feels right in your hands. Mamiya is known for making heavy cameras (think of how much an RB67 weighs!) and the C22 is no exception. It’s weighty, but also helps you keep the camera steady when using a neck strap. I use a padded OP/TECH Envy strap, but even then, I can only wear the camera around for so long before my neck starts to hurt. Prism finders are handy when using the camera on a tripod because it’s impossible to look down through the waist level finder (WLF) when the camera is up high. I prefer the C22 over the C220 and C330 because it’s a simpler (and slightly lighter) camera. I also just prefer the design ascetics over the later bodies, and don’t mind the “drawbacks” of the C22.

I shoot a combination of three lenses: the 80mm f/2.8, 65mm f/3.5, and 180mm f/4.5. The 80mm is the most versatile and can cover 80% of what I shoot. The 65mm is a good wide angle for those shots that are just a bit too tight for 80mm but it exhibits some vignetting on color film, which can be corrected in post. Mamiya did make an elusive 55mm lens, but I have yet to find one at a price point I’m comfortable with. I especially noticed the vignetting when shooting Ektachrome, where it showed up noticeably in the sky on a clear day. The 180mm is a beautiful and unique lens that looks almost comical when attached to the C22. It’s a beast of a telephoto lens that produces beautiful bokeh and is incredibly sharp. The 180mm is by far my favorite lens for the C22, but often requires a tripod because it’s very easy to get camera shake at shutter speeds less than 1/250th of a second when shooting handheld.

These lenses are built around Seiko shutters, which most repair shops won’t touch. Repair tutorials/manuals are also difficult to come by online. I had to rebuild the 80mm shutter myself because it became sticky and was difficult to cock. If you’re going to attempt a repair on these types of lenses, make sure you don’t over-tighten the interior lock ring when you put everything back together or the slow speed escapement won’t function correctly. After a few flushes of the shutter with contact cleaner and a touch of gun oil on the slow speed escapement, the shutter was back to working perfectly. Here’s a few tips I’ve picked up over the years if you’re planning on investing in the Mamiya TLR system:

  • Did you take a shot but can’t wind the film to the next frame? The Mamiya C22 has built in multiple exposure protection, and the film winding knob can lock up after you take a shot if you don’t completely follow thorough. This will require you to cock and fire the shutter again before the winding knob will release. Move yourself out of direct sunlight, put the lens cap back on, stop the shutter down to f/16, and set the shutter speed to 1/500 sec. This will reduce the chances of making an accidental double exposure while releasing the multiple exposure lock. Cock the shutter and take another shot, making sure to completely depress the shutter release lever. This should allow you to advance the film and keep shooting.

  • Is there dust between your lens elements? If so it’s an easy fix. Set the lens to maximum aperture and put the shutter on bulb (B). Cock the shutter, unscrew the front lens element, depress and hold the shutter release, and shoot a few bursts of canned air into the lens body. You can then reassemble the lens dust-free! Don’t overtighten the front lens element when you put it back together.

  • Is your viewfinder dirty? There’s a piece of protective glass over the focusing screen, so you can easily clean it by removing the WLF and wiping it down. If the dirt is between the focusing screen and protective glass cover, you can disassemble it and clean both. I’ve done this with my C22, and it’s not a difficult process though the task seems daunting. Be careful to retain the paper shims that will inevitably fall off when you remove the silver piece cover that holds the glass and focusing screen in place. These were added at the factory and are critical to maintain focus between the ground glass and film plane. Make sure to put them back when reassembling, otherwise your images will all be out of focus. After cleaning everything by hand with a bit of Dawn and some warm water (DO NOT use anything abrasive, just wash with your fingers), air dry the components and reassemble. Now your viewfinder should be as spot free as when it left the factory! Note that washing the focusing screen and protective glass cover won’t fix any etching damage that was caused by fungus.

  • Is there a chance you might bump your lens into something while walking around? Of course there is - don’t ask how I know. I’ve found the 80mm f/2.8 lens is pretty safe from bumps, but the 65mm f/3.5 and 180mm f/4.5 lenses are highly susceptible to dents and dings. It seems these lenses once came with protective retaining rings for the delicate threads, but they’re often missing on the second hand market. I was lucky enough to find some 49Ø Mamiya SL1-B skylight filters on eBay (the spacing between the looking and taking lenses is very tight and requires slim filters) to protect the threads. Even if you don’t normally put UV filters on your camera lenses, which I don’t, I’d recommend keeping one on just to protect the threads from damage.