KDKA 1020 AM's Saxonburg Transmitter

A special pre-recorded KDKA program from June 1956 at the Saxonburg Museum in Saxonburg, PA.

History was made on the evening of November 2, 1920 when KDKA, the USA’s first commercially licensed radio broadcaster, informed Pennsylvanians that Warren G. Harding had won the election over James M. Cox of Ohio to become the 29th President of the United States. Home to the Westinghouse Electric and Manufacturing Company, Pittsburgh was a prime location for the first commercial radio broadcast. Westinghouse was quick to capitalize on the “Special Amateur” grant the company was given during WWI, which it used to conduct experiments during wartime when other radio stations in the US were ordered off the air.

Seeing regular radio broadcasts as a way to incentivize the public into purchasing Westinghouse radios, executives at the company sensed an opportunity to bring entertainment to the masses. Westinghouse had already constructed a transmitter atop the K Building at their Pittsburgh factory to conduct radiotelephone operations with other Westinghouse offices. The array was part of a scheme to avoid those pesky Western Union telegraph charges, sending spoken word transmissions over the airwaves for free. It was also the perfect set of equipment to repurpose for that first broadcast on November 2, 1920.

That first 100 watt transmitter atop K Building was only the beginning for KDKA. Through the miracle of vacuum tubes and Westinghouse engineering, KDKA would eventually broadcast at a power level north of 300 kilowatts (kW) from nearby Saxonburg, PA. Normal operations hovered between 50 and 80 kW of broadcasting power, but from 1-6 AM each night KDKA joined the likes of Cincinnati’s WLW (who broadcast at a ludicrous 500 kW) in experimenting with high-power broadcasting. You could probably pick up the KDKA broadcast from your nearest chain-link fence when the Saxonburg transmitter was pumping out the full 400 kW it was capable of - similar phenomenon was often reported by those who lived near such high-power transmitters.

While I’ve been meaning to organize a deeper dive into the history of broadcast radio, this wasn’t a blog post I had planned for 2023. Sometimes a great bit of local history just falls into your lap, which is what happened when I made a stop at the Saxonburg Museum. I planned a pitstop in Saxonburg on my way to Pittsburgh, PA because the museum maintains John Roebling’s original workshop, an artifact relevant to a project I’m working on about the remnants of the Roebling Steel. The museum’s expansive collection spans far beyond John Roebling’s contributions to Saxonburg, and a 1.5 hour stop quickly turned into 3.5 hours. Tours are by appointment only, so call ahead!

Within the museum is a stunning collection of local artifacts, including a section dedicated to the radio station KDKA. The focal point of the KDKA display is the “Dog House”, a small shack whose namesake comes from its 3/4-size door. The original structure stood at the base of KDKA’s Saxonburg transmitter and housed the massive “Spider Coil” pictured above. The coil is built from 83 feet of thick copper tubing, which was used to tune the signal of the station and reject background noise from the broadcast.
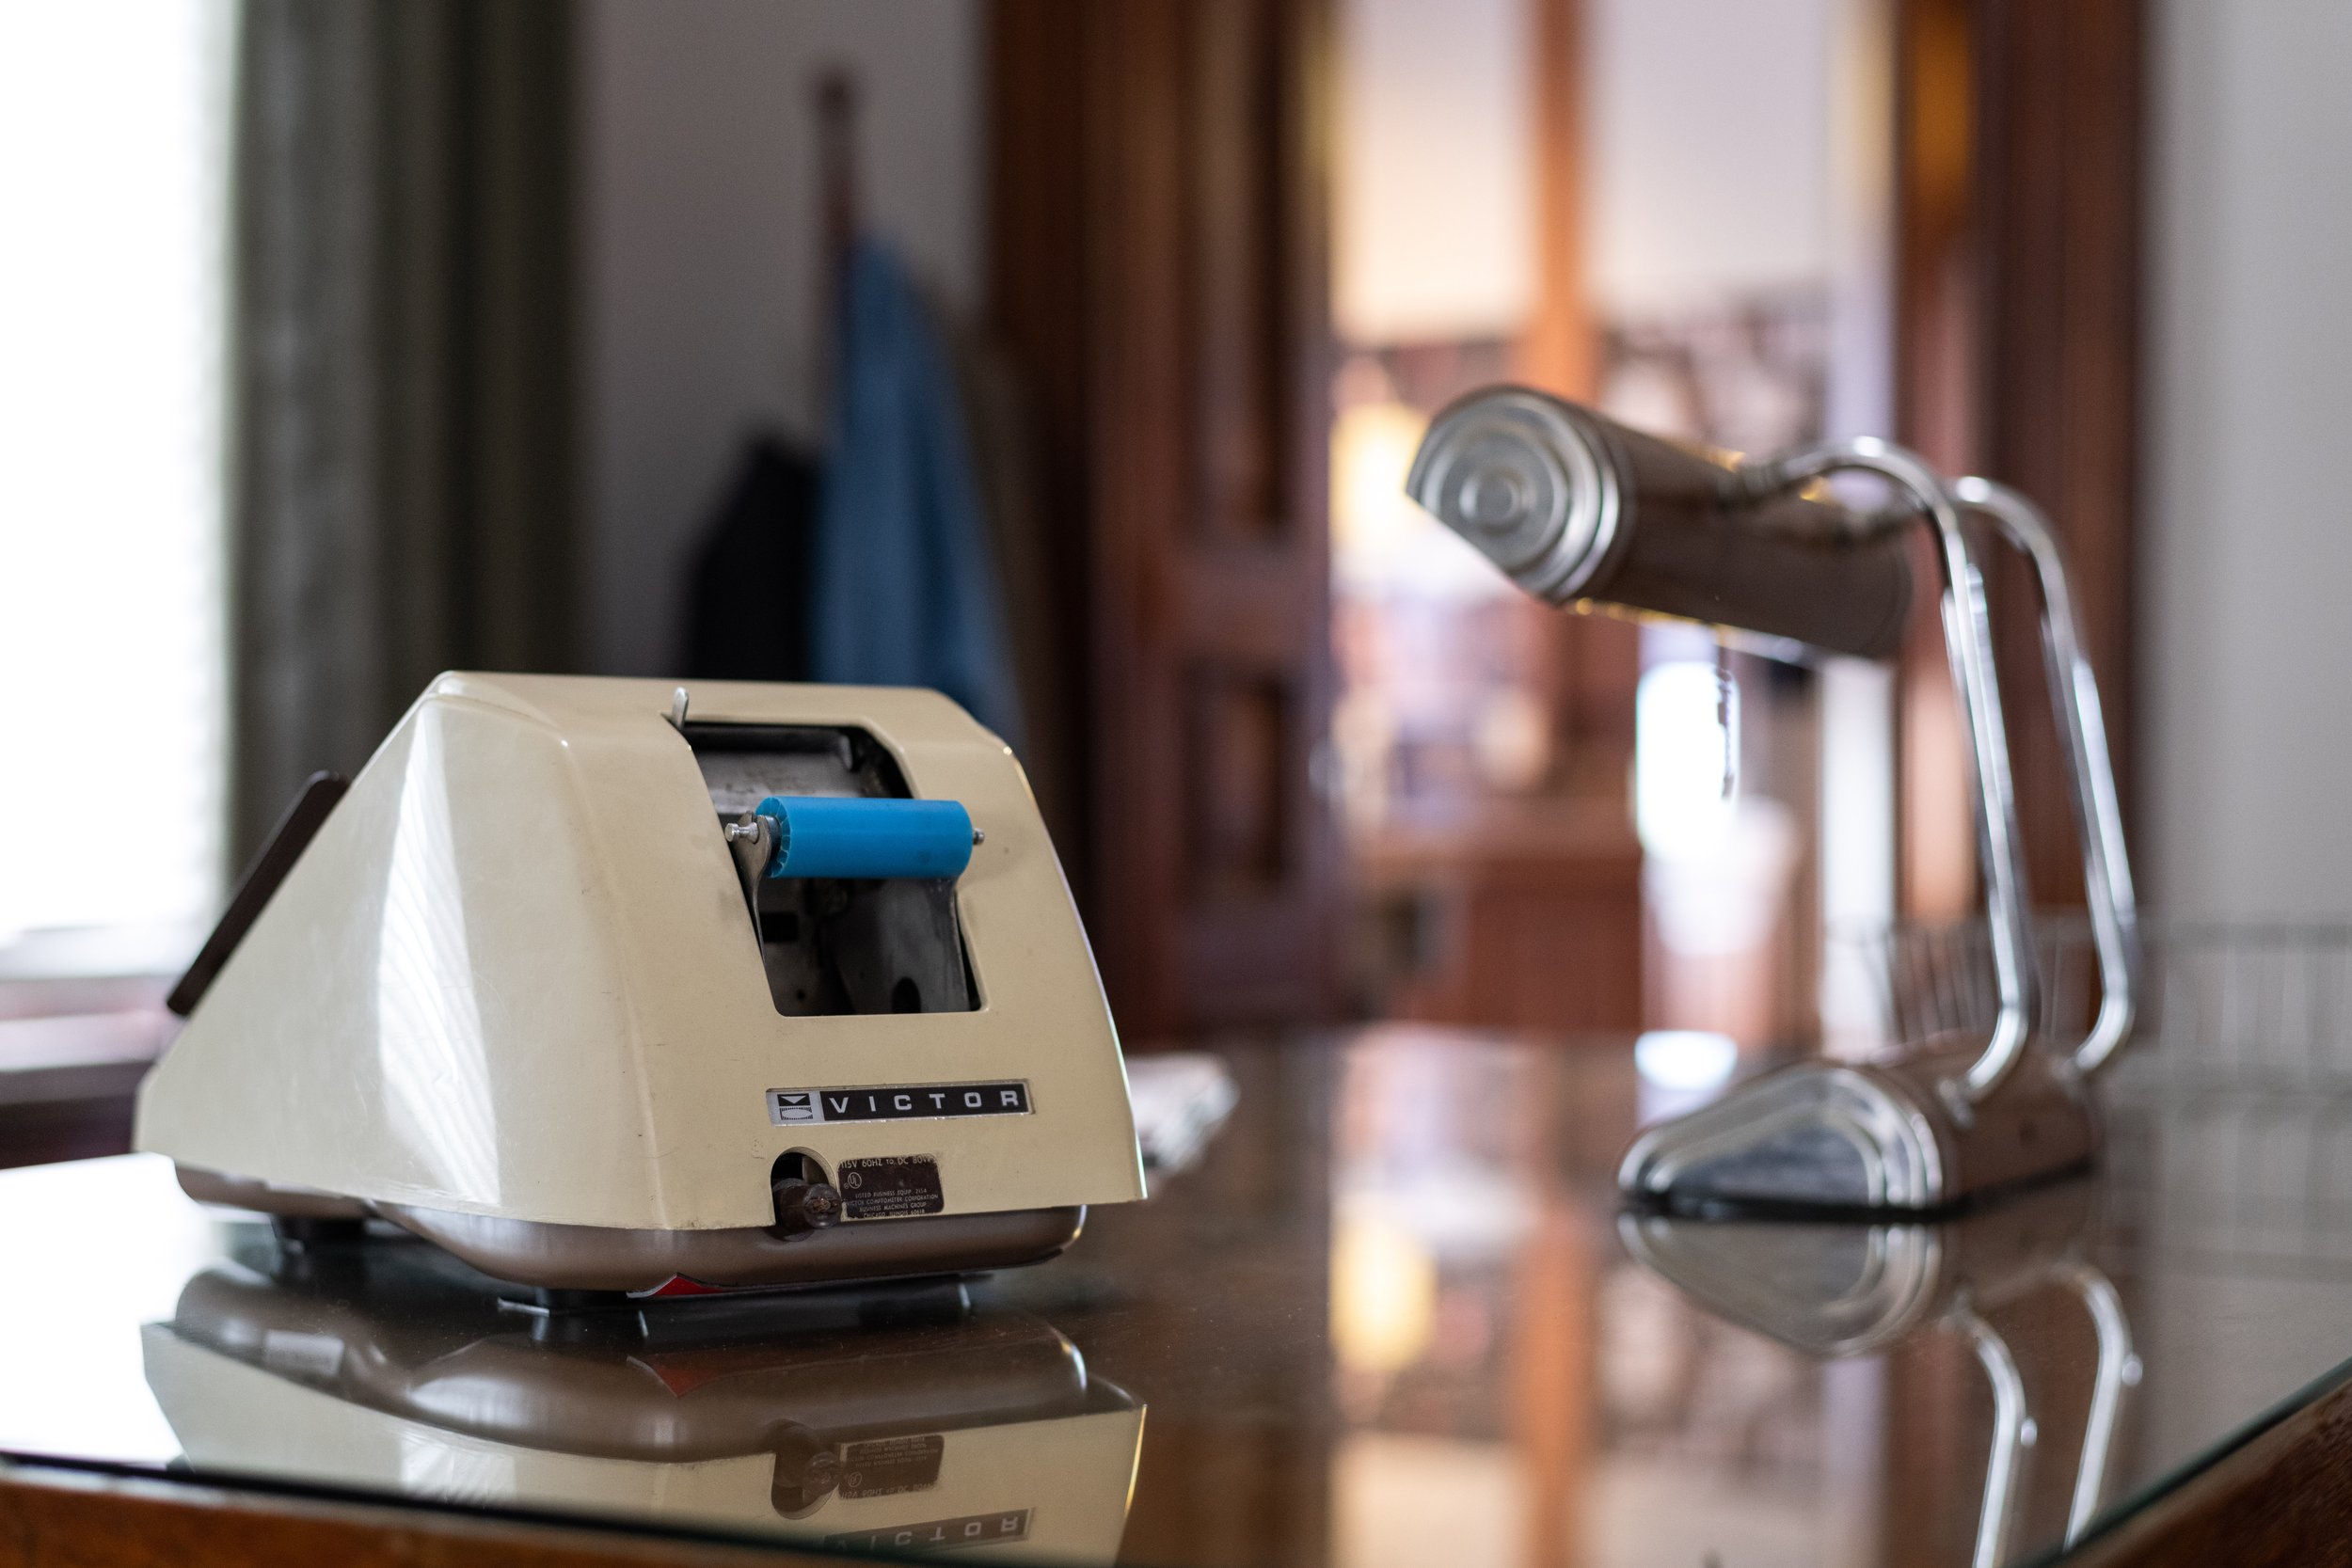
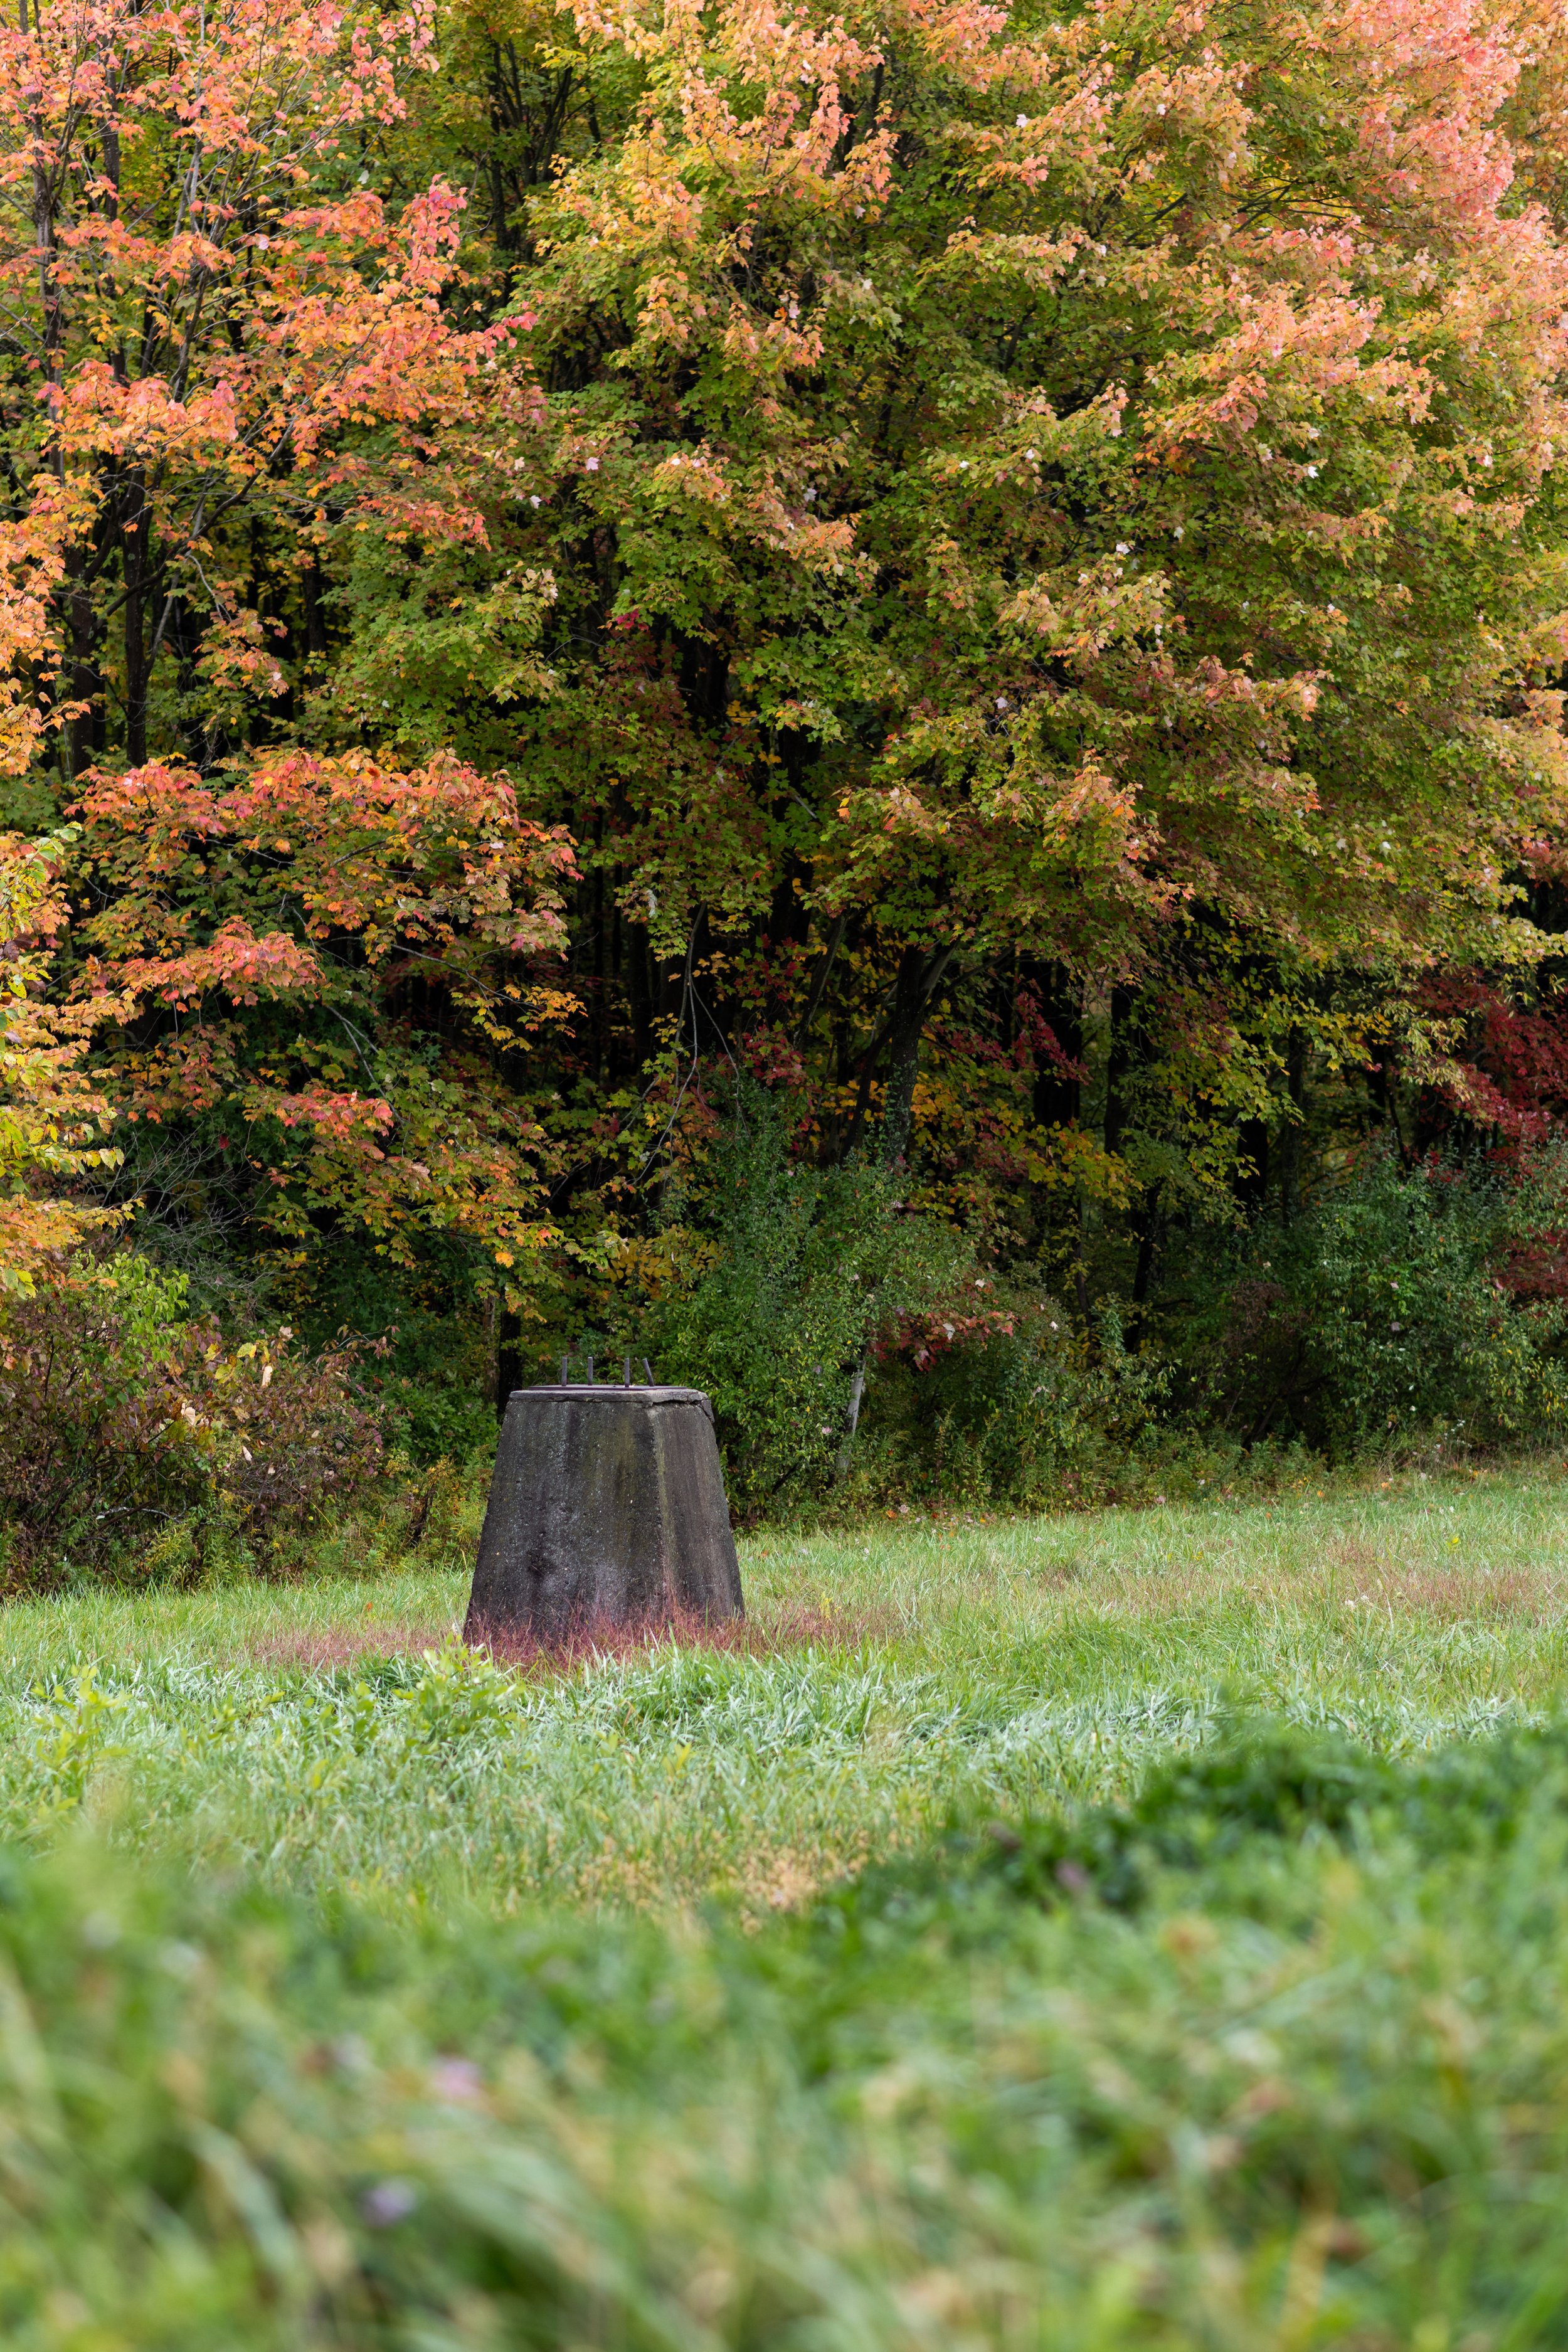
Some evidence of KDKA’s past in Saxonburg is still visible at the factory complex of Coherent Technologies, a modern-day manufacturer of electronics and communication equipment. A concrete pier from the days when a 718 foot tall broadcasting tower loomed over the site can still be seen on the property, left behind when the tower was relocated. Additionally, the brick transmission building constructed in the 1930s has been absorbed into Coherent’s factory and is still visible from the exterior.

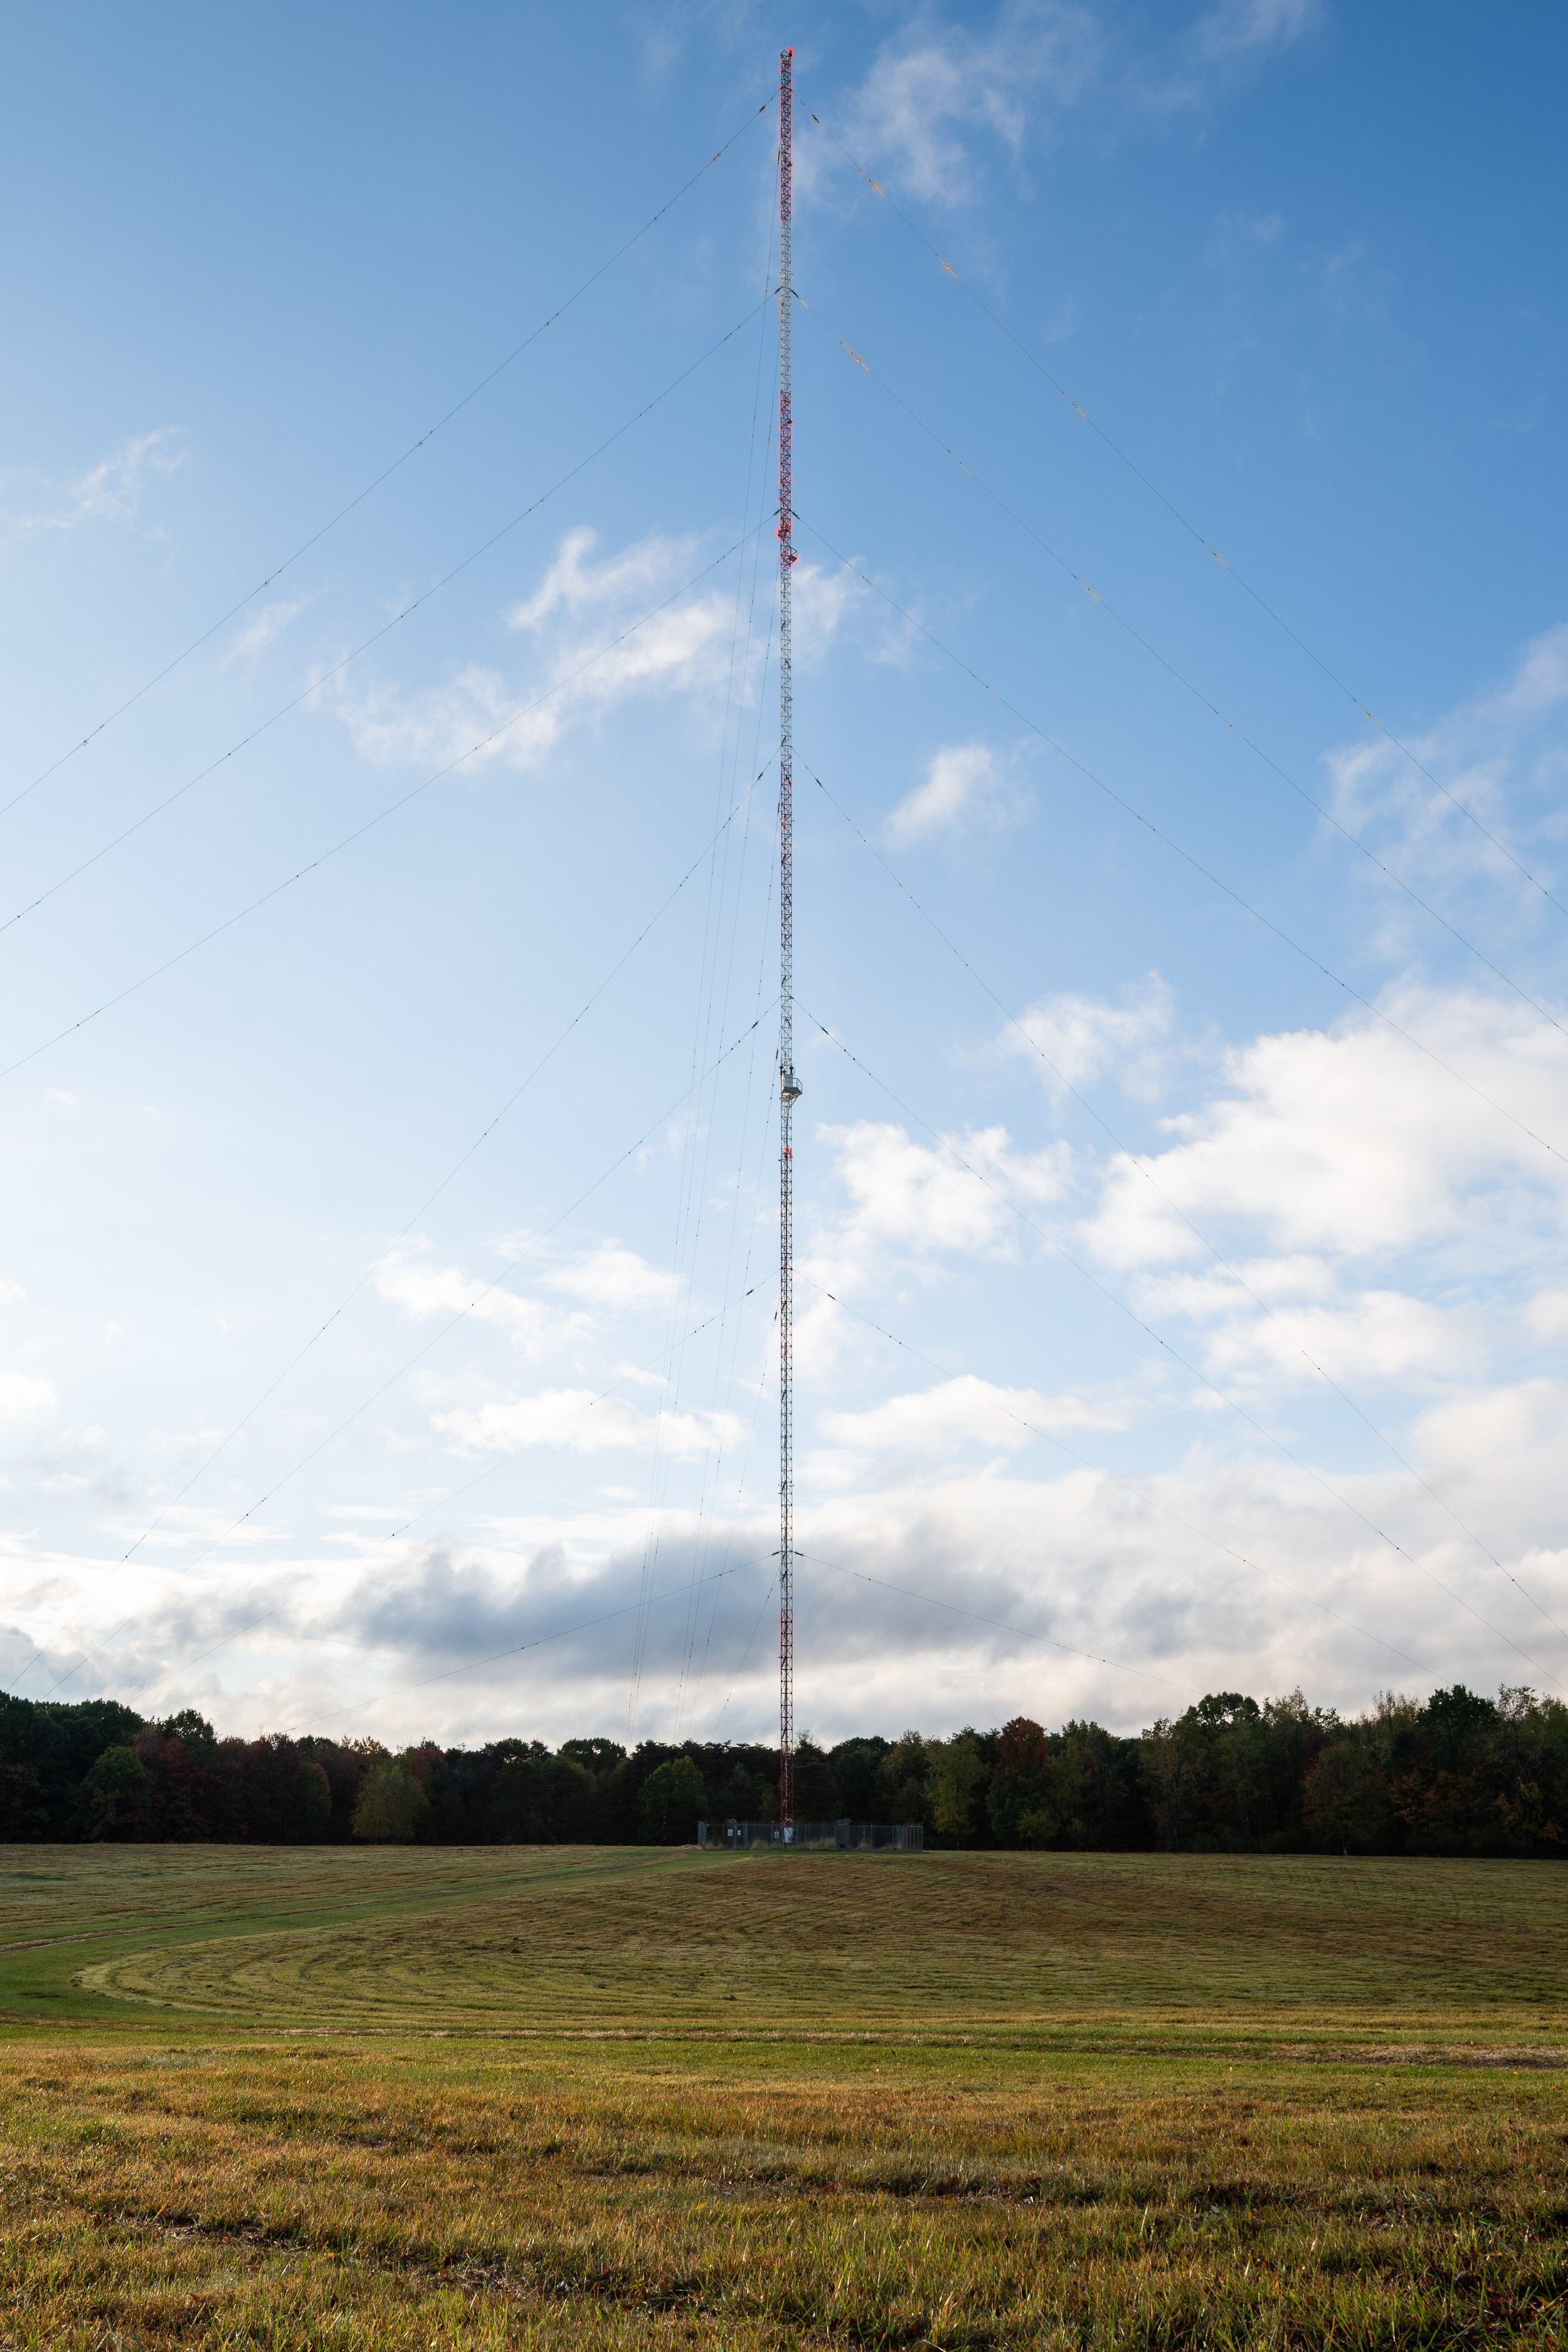
After taking in some of the history behind KDKA on Saturday at the museum, I started my Sunday off by hunting down the site where the Saxonburg transmitter was relocated to. A short drive landed me at KDKA’s present-day Allison Park transmission station. The 1939-vintage New England Colonial style transmission building straddles KDKA Drive and still houses the original 50 kW Westinghouse transmitter that was relocated from Saxonburg. KDKA relocated its broadcasting arrays to Allison Park, PA to improve their coverage of Downtown Pittsburgh around 1940.  KDKA’s shortwave transmitter was left behind in Saxonburg, and the land was eventually deeded to Carnegie Mellon University. An atom smasher was later brought to the site in Saxonburg and used by the university to conduct experiments through the 1970s.

Current KDKA transmission building built in 1939 to locate the KDKA transmitter closer to Downtown Pittsburgh.

Nikon Z 24mm f/1.7 DX Review

It was a chilly summer night in New Hampshire and I was sitting at the dining room table of the family cabin, typing up a blog post about the Abenaki Indian Shop & Camp in Conway, NH. I think it was around 2 AM when I heard the signature ding of new email hitting my inbox - Nikon had just released the Z 24mm f/1.7 DX lens I’d been dreaming about ever since it showed up on Nikon’s lens roadmap! Practically sight-unseen, I threw the lens in my cart for pre-ordered. I own a bunch of specialized Nikon lenses like the F-mount 19mm PC-E and 8-15mm fisheye, but I’d never been so excited for a new lens like I was for this Z-mount DX lens.

I started shooting in 2015 with a D5500, making the jump to a D810 in 2021. Nikon has always semi-neglected their DX lens lineup, but the fantastic Nikon F 35mm f/1.8 DX lens was my first foray into the world of sub-f/2.8 prime lenses. That lens opened me up to a whole new world of bokeh and depth-of-field in 2015, and I’ve been waiting for Nikon to drop a Z DX equivalent since I picked up a z50. I’ve spent a good amount of time shooting with this lens since it arrived in August 2023, and I’m finally ready to share my thoughts on this lens.

So why choose this lens over the Z 28mm or 40mm f/2.8 lenses Nikon offers? There are a few advantages inherent to this lens for those of us who sport a Z DX camera like the z50:

  • Advantages of a DX-Only Lens - Because a DX sensor is physically smaller than that of a FF sensor, Nikon engineers can reduce costs by designing a lens that throws a smaller image circle than its equivalent FF counterpart. For the same price as the Z 40mm f/2 lens, you get a faster aperture, 35mm equivalent field of view (FoV), and all in a lighter package. If I could only take one prime lens with me, I’d rather have a 35mm FoV than a more restrictive 60mm FoV.

  • Portability - Compared to the excellent Z 16-50mm f/3.5-6.3 DX, this lens is marginally larger with the (somewhat unique) hood attached. I use a MegaGear neoprene case when traveling without a camera bag, and I can still cram the z50 + lens + hood into it when I’m trying to minimize the gear I take with me.

  • Fast Aperture - While I almost never shoot wide-open, the f/1.7 aperture of this lens offers just a bit more light-gathering capability when you need it most. Who knows what’s in store for future Z DX cameras, but for now we need all the light we can get to compensate for lack of IBIS.

  • Filter Thread Size - This lens shares the same 46mm thread as the Z 16-50mm f/3.5-6.3 DX, so no need for adapter rings or new filters if you’ve already invested in them. This won’t be helpful if you own any of the other 3 Z DX lenses out there, which all use bigger filters. But this was a bonus for me, as I have no use for all-in-one zooms or telephoto lenses.

All images shot on a Nikon z50 + 24mm f/1.7 DX | ISO 100, f/8, 1/640

How does it handle in the field? To find out, I made the drive over to St. Gaudens National Historic Park on the border of Vermont and New Hampshire. The weather was awful - overcast, periodic showers, and excessively humid. I was hoping to get a mix of architectural shots, close-ups of flowers and the like, and some low-light shooting opportunities to find out what the lens could do. The Historical Park was established in 1965 to preserve the studio and home of Augustus Saint-Gaudens, who sculpted numerous important monuments during his career. Notable works include the statue of Abraham Lincoln that stands in Chicago and the Sherman Monument in NYC.

From an ergonomics perspective, this lens handles well when attached to the z50 and makes for a well-balanced package. The focusing ring is right where you’d expect it to be, which alleviates my chief complaint about the inconvenient placement of the focusing ring on the Z 16-50mm f/3.5-6.3 DX. The lens hood, while certainly odd, does its job well and protects the front element while reducing flaring. I’ll be leaving the hood attached at all times as I do with the Z 16-50mm f/3.5-6.3 DX.

ISO 100, f/8, 1/400

Chromatic aberration is well controlled, and any fringing I found was easily correctable in Lightroom. Focusing was fast and accurate, just like I expected. Part of my excitement about this lens was that it provided a reasonably-priced Nikon equivalent to the Fujifilm X100V, which seemed like the perfect portable camera for those trips where I don’t want to lug the D850 with me. I bought (and sold) an RX100V because I just couldn’t make the Sony RAW files I was getting from the camera work in Lightroom, so having a fast ~35mm FoV equivalent lens that works with a camera I already own is a huge plus. Shooting exclusively with a prime lens like this forces you to zoom with your feet and think about composition more than you would with a zoom lens, which makes this the perfect lens to carry around and practice your photography without a particular subject in mind.

When it comes to close-ups, this lens does a great job with close focus and blowing out the background at large apertures. I’d say the focal length is a little too wide for portraiture, but it worked just fine for the flowers that were blooming at St. Gaudens. The only real complaint I have so far about this lens is the vignetting. Chromatic aberrations are almost non-existent compared to the F-mount 35mm f/1.8 DX, but the vignetting on this lens bothers me more than its F-mount cousin did. To summarize, I’d recommend this lens for a number of reasons to all Z DX camera owners: it’s reasonably priced, a versatile focal length, and fun to shoot with. The F-mount 35mm f/1.8 DX really sold me on photography back when I started - seeing the bokeh, depth-of-field control, and light-gathering capabilities a wide prime lens could offer. So whether you’re looking for a reasonably priced lens to add fun to your shooting or for a faster aperture to help in low light situations, I don’t think you can go wrong with the Z 24mm f/1.7 DX.

ISO 100, f/2.8, 1/1250

Fuji Instax Meets 4x5 | The Lomograflok Instant Back

Fujifilm’s line of instant film, known as Instax, is all the rage these days. Introduced in 1998, Instax film stuck around while Polaroid died a slow death beginning in the early 2000s. And in an age of digital photography and camera sensors which can resolve an insane amount of detail, there’s still a certain thrill that comes along with watching a color print develop right before your eyes.

Some exciting things are happening in the world of film, from Pentax announcing the development of a new film camera to Fujifilm investing millions towards new film production at their factories outside Tokyo, Japan. Fuji even released my favorite 100 ISO black and white film, Across 100, in 120 format within recent years. Now if only they’d release it in 4x5…

Now instant film is fun and all, but the current line of Instax cameras just can’t satisfy my obsessiveness over controlling every aspect of the image-making process. Instax cameras are geared towards the casual photographer, and most models offer only the most basic exposure controls. But what if you want to push the film to the max with camera movements, varying depth of field, or off-camera flash? Clearly somebody else at Lomography had the same idea because they created this nifty attachment called the Lomograflok. If you happen to have a 4x5 camera laying around with Graflok tabs then you’re in luck!

Through the magic of the Graflok attachment system, you can easily shoot Instax images using your large format camera. Simply add a pack of Instax Wide film, throw in some AA batteries, and you’re on your way to instant color prints. Just don’t forget to bring a dark cloth with you like I did… you’ll still need it!


Sample Instax Images

NIkon 150mm @ f/32, 1/250 sec.

I’ll preface this review by saying that if you’re after absolute image quality, Instax will leave you disappointed. You won’t be blowing up an Instax shot to 200% in Lightroom to check for critical sharpness, and the prints are actually quite frustrating to scan/edit. Instax film resolves 10 lines/mm at best - for reference, Kodak T-Max 400 can resolve 10x the detail in B&W. Shooting Instax on 4x5 is just a fun, fast way to get a color image in the field. The images I took looked nothing like the advertising images you’ll see on Fuji’s website.

If you put technical details aside and focus on the fun then I’d say the Lomograflok back is a worthwhile purchase. Shooting Instax isn’t much more expensive than shooting 4x5 film at about $1 per exposure. As an added bonus, there’s no need to send any color film off for development if you’re like me and don’t shoot enough C41 or E6 to justify keeping color chemistry on-hand. You also avoid the tragedy of the USPS losing your exposed 4x5 Ektachrome in the mail… ask me how I know what that feels like.

The Lomograflok itself is a neat little device, and I feel the build quality matches the $175 price tag. To start making prints, you first compose your image using the ground glass and a special mask that’s provided with the Lomograflok back. The final image only takes up a portion of the 4x5 ground glass, and the mask also helps align your point of focus to the Lomograflok’s recessed film plane. Instax film comes in three sizes: Mini, Square, and Wide. The Lomograflok back uses Instax Wide film with an ISO of 800 that produces a picture of 4.3 in. × 3.4 in. in size.

Once you’ve squared away the composition and focus, you’re ready to install the Lomograflok back on the camera. Remove the ground glass and attach the Lomograflok with the locking tabs of the Graflok system, making sure the locking tabs are fully engaged. Next, open the back of the Lomograflok and pop an Instax cartridge in. Just like you would with a typical film holder, you’ll set the lens aperture/shutter speed, remove the dark slide, and make an exposure. Pressing the eject button spits out your image as small rollers in the back squeeze out development chemicals over the film. Within 90 seconds you’ll be able to see the results of your work!

Every pack of film gives you 10 exposures, which I found was just the right amount for a weekend of shooting. You’ll also need 4x AA batteries, and my Enloop rechargeables lasted me both packs of film I had on hand.

So what have I learned over my first 2 packs of Instax Wide film shot with the Lomograflok? Here’s some struggles I faced and tips I learned along the way:

  • Out of my first 10 shots, I had 6 successful images. I lost two by reason of over exposure, one to poor framing, and another to poor composition (completely my fault). Incident metering with my Sekonic L-508 seemed to produce more consistent results than reflective metering.

    • While Instax film is rated ISO 800, I recommend underexposing about 1/3 of a stop to protect highlight details. Crushed shadows look better than blown highlights with this film. It’s incredibly easy to end up with a completely white sky if you aren’t careful.

  • While Instax film develops in 90 seconds, I found it takes another few minutes for blacks to fully develop. Contrast vastly improves with time.

  • The high ISO of Instax film poses significant challenges with the comparatively slow shutter speeds that large format Copal shutters are capable of. Copal 0 shutters are capable of 1/500 sec. speeds while Copal 1s max out at 1/125 sec. The image of a sign post you see above was actually overexposed at 1/125 sec. and f/64, but that’s the best I could do without an ND filter. My Nikon 270mm f/5.6 just ran out of shutter speed and aperture to cut out the bright sunlight. Luckily the film is so low-resolution that diffraction really isn’t noticeable.

  • Be extremely careful with close subjects and leave a little room for unintentional cropping around your subject. The shot I lost to poor framing which looked right on the ground glass but was cropped tighter than intended.

Hopefully some of the information above and sample images here have helped you decide whether the Lomograflok is for you. The limitation of ISO 800 speed film, narrow dynamic range, and relatively slow shutter speeds inherent to large format is really the only thing that makes me second-guess the Lomograflok. Looking past the technical aspect, I think the fun of shooting Instax outweighs the technical difficulties of adapting it to a format for which it was never intended.

NIkon 270mm @ f/36, 1/125 sec.

Abenaki Indian Shop & Camp

Abenaki Indian Shop (circa 1900) as a Conway Scenic Railroad train heads toward Conway, NH.

Nestled in the woods next to the former Intervale, NH train station is the Abenaki Indian Shop and Camp. Preserved in 1989 and added to the National Register of Historic Places, the site is significant to both the history of the Abenaki people and the tourism that built the White Mountains region. Joseph Laurent, chief of the Abenaki and an entrepreneur, established the store and camp in 1884 to bring his people back to the region and generate income for the Abenaki tribe. Traditionally ranging from Maine to Vermont, the Abenaki were pushed northward to the current-day Odanak reservation in Quebec, Canada starting around 1660. Chief Laurent returned to the Intervale area and hashed out a mutually beneficial deal with a local hotelier, leasing land and drawing tourists to the area who would purchase ash-split baskets and other handicraft made by the Abenaki craftsmen who lived there seasonally.

The most visible element of the site, a yellow-trimmed shed which stands opposite the station platform, was the first of seven buildings which made up the camp. The shed changed hands multiple times, purchased from the Maine Central Railroad some time before 1900. The railroad used the shed to store a handcar and other tools for track maintenance. The Laurent family eventually added a sun porch to the shed between 1940 and the 1960s, expanding the overall retail space available. As of summer 2023, the shop and other buildings which remain stand in various states of decay, boarded up and nailed shut to keep out vandals. Based on my observations, the shop is in the best shape and would have the greatest chance of restoration into a miniature museum or some alternate use.

Cabin (circa 1884-1910) and residence of Stephen Laurent. The kitchen cabin and Cabin D, closely associated with Emanuel Laurent, stand opposite.

Set back in the forest, a total of three buildings remain of the six total (excluding the purchased shed) which Chief Joseph Laurent built at the camp between 1884 and 1910. These buildings are all residential in nature, as the basket storage shed and another cabin were destroyed some time before 1989 when the National Register of Historic Places paperwork was prepared. A contingent of 12-18 Abenaki men would travel to Intervale each summer from Odanak, living on-site for the season. Stephen Laurent’s cabin, son and successor of Chief Laurent, looks to be in the best shape with only minor vandalism visible from the exterior. The camp’s kitchen, centrally located and looking somewhat like a barn, is the largest building left. Meals were prepared there for the whole community, though cooking was done outdoors as well.

The Mount Washington Hotel, one of the tourist attractions which drew visitors to the White Mountains and spurred growth in Intervale.

A granite stone with a plaque presented to mark the township’s acquisition of the property in 1985. The site would be listed on the National Historic Register in 1991.

The last remaining cabin stands to the left of the camp’s kitchen. This cabin is 1 1/2 stories like the others, but looks to be in an advanced state of decay with plywood patching what must be a gaping hole in the rear left corner. Stephen Laurent, expanded the site to include a model Indian village which featured a wigwam and an authentic totem pole, dismantled in 1982.

At the peak of production, baskets and other handicraft would be made over the winter in Canada and toted to the US for sale. The booming tourist business, driven by opulent hotels like the Mount Washington Hotel, set up a steady stream of customers for authentic Abenaki goods. Beyond the shop, baskets were also sold on consignment at local hotels. Other Abenaki camps were established during the summers from the White Mountains to the Adirondacks, but none were as permanent as the Laurent family’s camp.

Chief Joseph Laurent operated the shop and camp for over 30 years until his death in 1917. Beyond his contributions to the Intervale area, Chief Laurent also published a crucial Abenaki to English dictionary which helped to preserve the Abenaki language in 1884, the same year he established the camp in Intervale. His widow continued to operate the business until 1960, when their son Stephen took things over. In 1985 the property on which the camp sat was gifted to Conway Township, who maintains the interpretive signs and historic structures. Clearly revered by the community even after his death, it was reported that 500 people showed up to the unveiling of an honorary plaque dedicated to Chief Laurent by his children in 1953.

Plaque donated in memory of Chief Joseph Laurent by his children, situated to the right of the old Abenaki shop. 500 people attended the dedication ceremony in 1959.

Looking North East down the railroad tracks towards Mount Washington from the former Intervale railroad station opposite the camp.

USS Recruit TDE-1

Just to the West of San Diego International Airport was once a large US Naval Training Center named Naval Training Station San Diego, known today post-redevelopment as Liberty Station. Scrolling over a satellite view of the formal naval base, one peculiar structure sticks out - what looks to be a Navy ship, somehow sailing on land? Affectionately nicknamed the USS Neversail for its lack of propeller or driveshaft, USS Recruit was built at the tail end of WWII to train recruits on naval customs and tradition before they set sail on a real ship. Commissioned, decommissioned, and recommissioned in 1982, TDE-1 USS Recruit had a hand in the training of naval recruits from WWII through the Gulf War, serving until Naval Training Station San Diego’s closure in 1997.

I was surprised by just how large the ship is when I walked alongside it. Originally designed as a 2/3 scale model of a WWII destroyer escort, she was reconfigured in 1982 as an Oliver Hazard Perry class frigate. This added the requisite CAS antenna and single OTO Melara 76 mm gun mounted forward which can still be viewed today. I can’t say I’ve ever walked alongside a real US Navy frigate before, but I can easily imagine just how large they are based on this model.

Believe it or not, the USS Recruit wasn’t the Navy’s first attempt at a land-bound ship. The first USS Recruit was constructed in 1917 in New York City’s Union Square as a recruiting tool to drum up enlistments for WWI. A fully rigged battleship, the original USS Recruit helped bring 25,000 sailors to the war effort. The 1917 USS Recruit featured a full compliment of six 14-inch guns and ten 5-inch casemate guns, all recreated from wood. Another landlocked ship, the USS Trayer, is still in use at Recruit Training Command on the Great Lakes in Illinois.

From afar, the starboard side of the ship looks pretty convincing if you can ignore the fact it isn’t afloat! The port side of the ship reveals USS Recruit’s dual purpose as a classroom and model, as six sets of doors are cut into the hull for ease of entry. Within the windowless hull were six classrooms to compliment the array of naval equipment used to train recruits topside. The little details like anchors, hatches, and radar equipment on the mast all match what you’d expect to see if you were sailing the high seas on a ship like the USS Samuel B. Roberts, another Oliver Hazard Perry class frigate. The ship remains in stasis today, maintained but not open to visitors. The USS Midway Museum is involved in the maintenance of the ship, and the landscaping which surrounds it is very well-kept. There isn’t an immediate plan to open the ship to tours that I know of, so for now we’ll just have to be satisfied with admiring this naval oddity from the outside.

The Ohio State Reformatory

The Ohio State Reformatory, an infamous prison and filming location of The Shawshank Redemption, is now a tourist destination which allows you to walk the cell blocks and get a glimpse of life behind bars for the thousands of inmates that once called Mansfield, Ohio home. The prison is imposing, designed by the architect Levi T. Scofield (who also designed the Athens Lunatic Asylum) and had an initial capacity for 1,500 inmates. While immortalized in The Shawshank Redemption as a maximum security prison, the Ohio State Reformatory was initially an intermediary facility intended to bridge the gap between the Boys Industrial School and the State Penitentiary in Columbus, Ohio. Only intended to house young, first-time offenders, the inhumane conditions that existed in the prison were enough to cause a federal judge to order its closure in 1983.

Starting in the administration block, the self guided tour route snakes through the various cell blocks and inner workings of the prison. In typical early 1900s institutional design fashion, a degree of ornamentation was included in the design of the trim, banisters, and other woodwork. One eye-catching architectural detail of the prison are the numerous fireproof staircases, which can be found throughout the administrative and cell blocks. These staircases imitate ornate wooden varieties, but are constructed of steel to maintain structural integrity during a fire. This also allowed the exclusion of unsightly fire escapes from the facade.

Despite these fireproof staircases, the prison still suffered a deadly fire on April 21, 1930. 322 inmates were killed when guards refused to open the cell doors of the burning sell block, trapping inmates in their 7x9 foot cells. Some prisoners who escaped were able to wrestle keys from the guards and run back into the prison, saving a number of those inmates who were otherwise left for dead. Built for 1,500 inmates and completed in 1910 (construction was delayed from the start in 1896 by the Bearing financial crisis), the prison held 4,300 at the time of the fire.

Sections of the administration block remain unrestored, but some rooms filmed in The Shawshank Redemption were left as-is by the production crew. There’s still plenty of peeling paint and crumbling plaster to see, but the Mansfield Reformatory Preservation Society has done a good job of stabilizing the buildings and preventing further degradation. Moving onto the cell blocks, it’s almost impossible to understand just how tiny each cell is without seeing for yourself. Stacked six stories high, sleeping one on top of the other, two adult inmates would share a cell designed for adolescents which included a toilet, small sink, and mirror. Gang-type showers were located just off each cell block.

Like many institutions of the day, the prison functioned like a walled city - food was prepared on-site, a small hospital provided a minimum standard of care, and a library gave inmates the opportunity to learn. Job training programs played an important role in the prison, and the land was farmed to provide fresh food for the kitchens. Most of the outbuildings that supported the prison were leveled when the modern Mansfield Correctional Institution opened as a minimum/medium security prison in 1990. Delays in construction of Richland Correctional pushed the court-ordered closure of the reformatory back from 1983 to 1990.